Note
Access to this page requires authorization. You can try signing in or changing directories.
Access to this page requires authorization. You can try changing directories.
This article explains how to enable an autostop schedule on a dev box pool to save on costs. Microsoft Dev Box then attempts to stop or hibernate all dev boxes in the pool daily at the time specified in the schedule.
Project administrators can manage autostop schedules by using the Azure portal or the Azure CLI. You can configure one stop time in one timezone for each pool.
Note
Autostop behavior depends on whether the applied dev box definition supports hibernation. Hibernation-enabled dev boxes hibernate at the scheduled autostop time. Dev boxes that don't support hibernation shut down at the scheduled time. For more information, see How to configure dev box hibernation.
Prerequisites
| Category | Requirement |
|---|---|
| Permissions | Owner, Contributor, or DevCenter Project Admin role or permissions on a dev box project. |
Create an autostop schedule
You can create an autostop schedule while configuring a new dev box pool, or by modifying an already existing dev box pool.
The following procedures describe how to use the Azure portal to create and configure autostop schedules for existing or new dev box pools.
Add an autostop schedule to an existing pool
Follow these steps to add an autostop schedule to an existing dev box pool:
In the Azure portal, open the project associated with the pool that you want to edit and select Dev box pools in the left navigation menu.
On the Dev box pools page, select the checkbox for the pool you want to modify, select the More actions icon at right, and then select Edit.
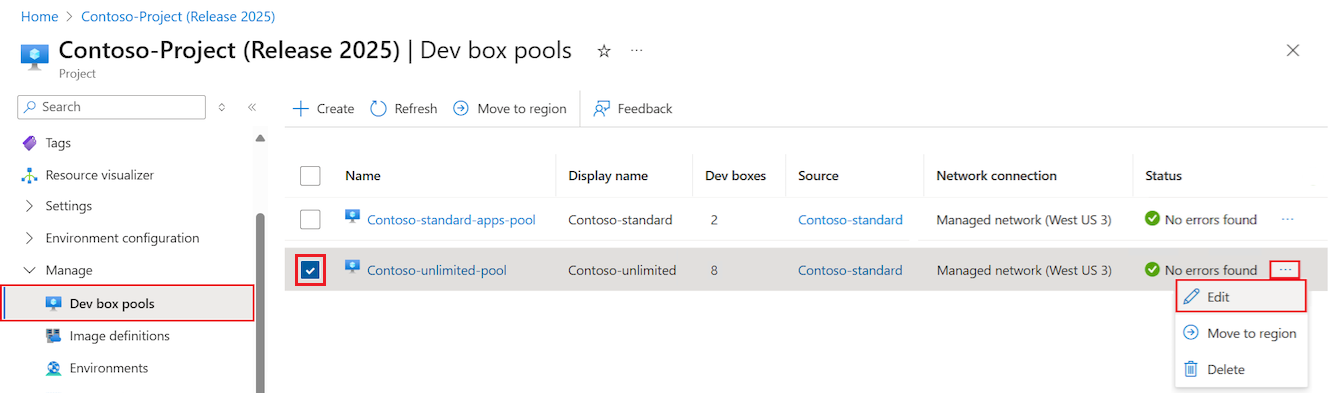
In the Edit pane, select the Management tab.
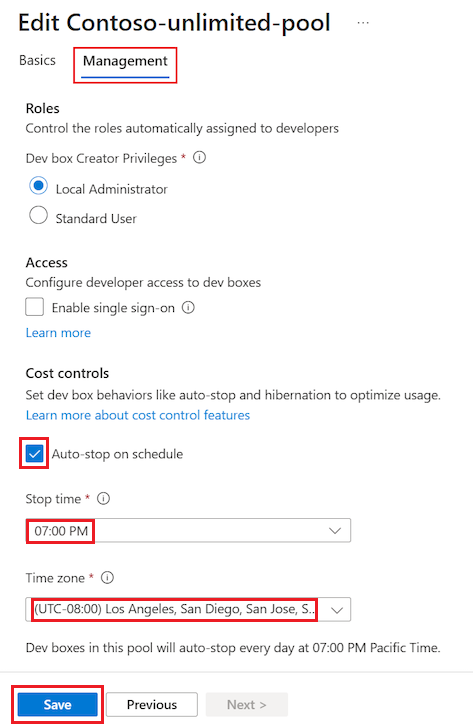
Under Cost controls on the Management screen, select the checkbox for Auto-stop on schedule.
For Stop time, select a time to shut down or hibernate all the dev boxes in the pool daily.
For Time zone, select the time zone that the stop time is in.
Select Save.

Add an autostop schedule when you create a pool
Follow these steps to add an autostop schedule when you create a dev box pool.
In the Azure portal, open the project you want to add the pool to and select Dev box pools in the left navigation menu.
On the Dev box pools page, select Create, and start to create a dev box pool by following the instructions at Create a dev box pool.

Under Cost controls on the Management tab of the Create a dev box pool form, select the checkbox for Auto-stop on schedule.
For Stop time, select a time to shut down or hibernate all the dev boxes in the pool daily.
For Time zone, select the time zone that the stop time is in.
Finish configuring the other pool settings, and then select Create.


Verify that the new dev box pool appears in the dev pool list. You might need to refresh the screen.
Delete an autostop schedule
The following steps delete the autostop schedule associated with a dev box pool.
In the Azure portal, open the project associated with the pool that you want to edit and select Dev box pools in the left navigation menu.
On the Dev box pools page, select the checkbox for the pool you want to modify, select the More actions icon next to the entry, and then select Edit.
In the Edit pane, select the Management tab.
Under Cost controls on the Management tab, deselect the checkbox for Auto-stop on schedule.
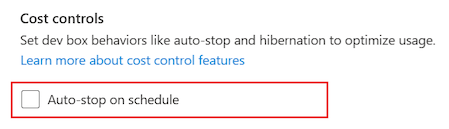
Select Save.
After you deselect the setting, dev boxes in this pool no longer stop automatically.