Note
Access to this page requires authorization. You can try signing in or changing directories.
Access to this page requires authorization. You can try changing directories.
Azure DevOps Services | Azure DevOps Server | Azure DevOps Server 2022
Visual Studio 2019 | Visual Studio 2022
Work items are the foundation of project management in Azure Boards, enabling teams to track and organize all types of work including user stories, product backlog items, tasks, test cases, and bugs. Effective work item management helps teams:
- Plan and prioritize work with clear descriptions and assignments
- Track progress through states and status updates
- Coordinate team efforts with links, dependencies, and notifications
- Maintain visibility across project stakeholders and management
This comprehensive guide covers essential work item management capabilities in Azure DevOps.
| Category | Requirements |
|---|---|
| Permissions | - To view, follow, and edit work items: View work items in this node and Edit work items in this node permissions set to Allow. By default, the Contributors group has these permissions. For more information, see Set work tracking permissions. - To add tags to work items: Project-level Create new tag definition permission set to Allow. By default, the Contributors group has this permission. |
| Access levels | - Project member. - To add new tags to work items or to view or follow pull requests: At least Basic access. - To view or follow work items: At least Stakeholder access. For more information, see About access levels. - All project members, including members in the Readers group, can send emails containing work items. |
Note
- Provide Stakeholder access to members who want to contribute to the discussion and review progress. These members typically don't contribute to code, but want to view work items, backlogs, boards, and dashboards.
- By default, all Contributors and Stakeholders in public projects can add new and existing tags. In private projects, Stakeholders can only add existing tags. To control the ability to create new tags, set the Create tag definition permission at the project level. For more information, see Change project-level permissions.
Note
- Provide Stakeholder access to members who want to contribute to the discussion and review progress. These are typically members who don't contribute to code, but want to view work items, backlogs, boards, and dashboards.
Update and modify work items
Regularly update work items to reflect current status, assignments, and progress. Key elements you can modify include:
- Basic information: Title, description, and acceptance criteria
- Assignment and tracking: Assigned team member, state, and iteration
- Classification: Area path, tags, and priority
- Progress tracking: Remaining work, completed work, and effort estimates
Access work items through the web interface for full editing capabilities. Select any work item to open the detailed form where you can make comprehensive updates.
View and track work items
Effectively viewing and tracking work items ensures team visibility and progress monitoring. The Work items page provides multiple viewing options:
- My work items: Items assigned to you or that you're following
- Recent activity: Recently created or updated items
- Mentioned: Items where you're @mentioned in discussions
- Custom filters: Filter by state, iteration, area path, or custom criteria
Use interactive filters and sorting to quickly find relevant work items and maintain awareness of project progress.
You can also view work items from Visual Studio, Azure DevOps CLI, or the REST API.
For more information, see View and add work items.
Link work items for traceability
Link work items to establish relationships, dependencies, and hierarchies that improve project visibility and traceability.
Common linking patterns:
- Hierarchical links: Connect epics → features → user stories → tasks
- Dependency links: Related work items that block or depend on others
- Reference links: Connect work items to commits, pull requests, or external resources
Benefits of linking:
- Maintain traceability from requirements to implementation
- Visualize work dependencies and relationships
- Enable portfolio rollup and progress reporting
- Support effect analysis for changes
For comprehensive linking guidance, see Link work items to objects and Link types reference.
Follow a work item
To track the progress of a single work item, select the Follow icon
![]() . This action sends you email alerts when changes are made to the work item.
. This action sends you email alerts when changes are made to the work item.

You receive notifications when other project members modify the work item, such as adding to the discussion, change a field value, or add an attachment.
You can specify the types of changes you want to be notified about. When you select the settings icon, ![]() you can select:
you can select:
- Not Subscribed: Only receive notifications from this work item when you're @mentioned.
- Subscribed: Receive notifications for all changes to this work item.
- Custom: Specify notifications for:
- State Changed: When the work item changes state
- Assigned To Changed: When the work item is assigned to someone else
- Iteration Changed: When the iteration path changes
Notifications are sent to your preferred email address, which you can change from your user profile.
To stop following changes, select the Following icon ![]() .
.
Manage attachments and documentation
Attach relevant files and documentation to work items for context and reference.
Attachment capabilities:
- File limits: Up to 100 files per work item, 60 MB maximum per file
- Supported formats: Images, documents, code files, logs, and more
- Access control: Attachments inherit work item permissions
Best practices:
- Use descriptive filenames for easy identification
- Attach relevant screenshots for UI-related work items
- Include test data or logs for bug reports
- Consider linking to shared storage for large files
Manage attachments through the web portal's attachment tab. For detailed guidance, see Manage attachments to work items.
Organize with tags and categories
Tags provide flexible categorization for work items beyond formal area and iteration paths.
Effective tagging strategies:
- Feature grouping: Tag related work items for feature tracking
- Skill requirements: Identify work requiring specific expertise (frontend, backend, design)
- Priority indicators: Mark urgent or high-visibility items
- Process stages: Track work through custom workflow stages
- Cross-team coordination: Identify work affecting multiple teams
Tag management tips:
- Establish team conventions for consistent tagging
- Use specific, descriptive tags rather than generic terms
- Regularly review and clean up unused tags
- Use tags in queries and dashboard filters
For comprehensive tag management, see Add tags to work items.
Capture comments in the Discussion section
Use the Discussion section to add and review comments made about the work being performed.

The rich text editor toolbar appears under the text entry area when you place your cursor in any text box that supports text formatting.

Note
A Discussion work item field doesn't exist. To query work items with comments from the Discussion area, filter on the History field. The full content of the text entered in the Discussion text box is added to the History field.
Mention someone, a group, work item, or pull request
Select one of the following icons to open a menu of recent entries where you mentioned someone, linked to a work item, or linked to a pull request:
You can open the same menu by using keyboard shortcuts: at-mention @, hash tag #, and exclamation point !.

Enter a name or number to filter the menu list to match your entry. Select the entry you want to add. To bring a group into the discussion, enter the at symbol @ followed by the group name, such as a team or security group.
Edit or delete a comment
To edit or delete any of your discussion comments, select Edit ![]() or More actions (
or More actions (![]() ) and then select Delete:
) and then select Delete:

After you update the comment, select Update. To delete the comment, confirm the deletion. The History tab on the work item form maintains a full audit trail of all edited and deleted comments.
Important
For on-premises Azure DevOps Server, configure an SMTP server for team members to receive notifications.
Add a reaction to a comment
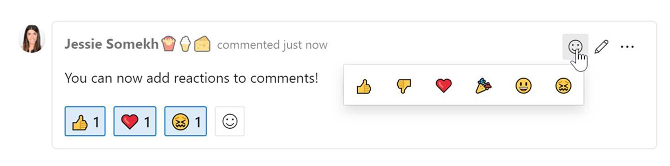
Add one or more reactions to a comment by choosing an emoji icon at the top right of any comment. Choose from the icons at the bottom of a comment next to any existing reactions. To remove your reaction, choose the reaction on the bottom of your comment. The following image shows an example of the experience of adding a reaction, and the display of reactions on a comment.
Save a comment without saving the work item
Note
This feature is available starting in Azure DevOps Server 2022.1.
If you only have permissions to add to the Discussion of a work item, then you can do so by saving comments. This permission is controlled by Area Path nodes and the Edit work item comments in this node permission. For more information, see Set work tracking permissions - Create child nodes, modify work items under an area or iteration path.
When you save the comments, you don't need to save the work item.

Note
When you save changes made to the Discussion control, only the comment is saved. No work item rules defined for the work item type are executed.
Copy and clone work items efficiently
Cloning work items accelerates work creation while maintaining consistency and quality.
Key benefits:
- Time efficiency: Rapidly create similar work items without manual duplication
- Consistency: Preserve structure, fields, and formatting across related items
- Template creation: Establish reusable patterns for common work types
- Bulk operations: Generate multiple items for different team members or iterations
- Historical preservation: Maintain original context while tracking separate progress
Common use cases:
- Creating similar user stories across different features
- Generating tasks for recurring processes or ceremonies
- Establishing work item templates for new team members
- Duplicating bug reports for different environments or configurations
For step-by-step instructions, see Copy or clone work items.
Move work items between teams
Transfer work items between teams to accommodate changing priorities, skill requirements, or organizational restructuring.
Prerequisites:
- Edit work items in this node permission for the target team
- Understanding of target team's area path and iteration settings
Common scenarios:
- Reassigning work based on team expertise or capacity
- Reorganizing work due to project restructuring
- Balancing workload across teams
- Moving work to specialized teams (security, performance, accessibility)
Important considerations:
- Moving items might affect team velocity calculations
- Update area path and iteration to match target team
- Communicate changes to affected stakeholders
- Review dependencies that might span teams
For detailed procedures, see Move work items from one team to another.
Customize work item templates and types
Tailor work items to your team's specific processes and information requirements through customization options.
Work item template customization approaches
Work item templates (Team-level)
- Purpose: Create reusable templates with predefined field values
- Scope: Team-specific customizations
- Benefits: Standardize common work patterns, reduce manual entry
- Use cases: Sprint planning templates, bug report templates, user story formats
Work item type customization (Project-level)
- Purpose: Modify work item types with custom fields, rules, and layouts
- Scope: Project-wide customizations
- Benefits: Capture domain-specific information, enforce process compliance
- Use cases: Custom fields for compliance tracking, specialized workflows
Process template inheritance (Organization-level)
- Purpose: Create organization-wide process standards
- Scope: All projects using the custom process
- Benefits: Consistent practices across teams, centralized governance
- Requirements: Organization-level permissions
Customization resources
- Use work item templates
- Add and manage work item types
- About process customization and inherited processes
Delete work items
You can delete work items that are no longer needed. Deleted work items are moved to the Recycle Bin where they can be restored or permanently deleted.
For more information, see, Remove, delete, or restore work items.
Reporting and Analytics
Analytics views provide a powerful way to visualize and analyze your work items. You can use create custom reports and dashboards to track progress, identify trends, and make data-driven decisions.
For more information, see What is Analytics?.
Work item management best practices
Implement proven practices to maximize the effectiveness of work item management across different process frameworks.
Universal best practices
- Clear descriptions: Write specific, actionable descriptions with clear acceptance criteria
- Consistent estimation: Use relative sizing or time-based estimates consistently
- Regular updates: Keep work item states current to reflect actual progress
- Effective linking: Maintain traceability through hierarchical and dependency links
- Meaningful tags: Use standardized tagging conventions for filtering and organization
Process-specific guidance
Agile methodology:
- Focus on user value and iterative delivery
- Maintain a prioritized product backlog
- Use user stories with clear acceptance criteria
- Agile process workflow guidance
Scrum framework:
- Organize work into time-boxed sprints
- Maintain a definition of done
- Use product backlog items and tasks
- Scrum process workflow guidance
CMMI approach:
- Emphasize process improvement and measurement
- Track requirements through implementation
- Use formal change control processes
- CMMI process workflow guidance