Note
Access to this page requires authorization. You can try signing in or changing directories.
Access to this page requires authorization. You can try changing directories.
This article shows how to use Azure Pipelines to create a pipeline that builds and deploys a Node.js application to Azure App Service with continuous integration (CI) and continuous deployment (CD). CI/CD reduces downtime and error risk by automatically building and deploying your app whenever there's a commit to your app code repository.
Prerequisites
| Product | Requirements |
|---|---|
| Azure DevOps | - An Azure DevOps project. - An ability to run pipelines on Microsoft-hosted agents. You can either purchase a parallel job or you can request a free tier. - Basic knowledge of YAML and Azure Pipelines. For more information, see Create your first pipeline. - Permissions: - To create a pipeline: you must be in the Contributors group and the group needs to have Create build pipeline permission set to Allow. Members of the Project Administrators group can manage pipelines. - To create service connections: You must have the Administrator or Creator role for service connections. |
| GitHub | - A GitHub account. - A GitHub service connection to authorize Azure Pipelines. |
| Azure | An Azure subscription. |
| Product | Requirements |
|---|---|
| Azure DevOps | - An Azure DevOps project. - A self-hosted agent. To create one, see Self-hosted agents. - Basic knowledge of YAML and Azure Pipelines. For more information, see Create your first pipeline. - Permissions: - To create a pipeline: you must be in the Contributors group and the group needs to have Create build pipeline permission set to Allow. Members of the Project Administrators group can manage pipelines. - To create service connections: You must have the Administrator or Creator role for service connections. |
| GitHub | - A GitHub account. - A GitHub service connection to authorize Azure Pipelines. |
| Azure | An Azure subscription. |
Note
Procedures that use GitHub might require authentication, authorization, or sign in to GitHub organizations or specific repositories. Follow instructions to complete the required processes. For more information, see Access to GitHub repositories.
Fork the sample application
In GitHub, go to the Node.js Hello World repository and select Fork in the top menu.

Select your GitHub organization as fork Owner if not already selected, and then select Create fork.
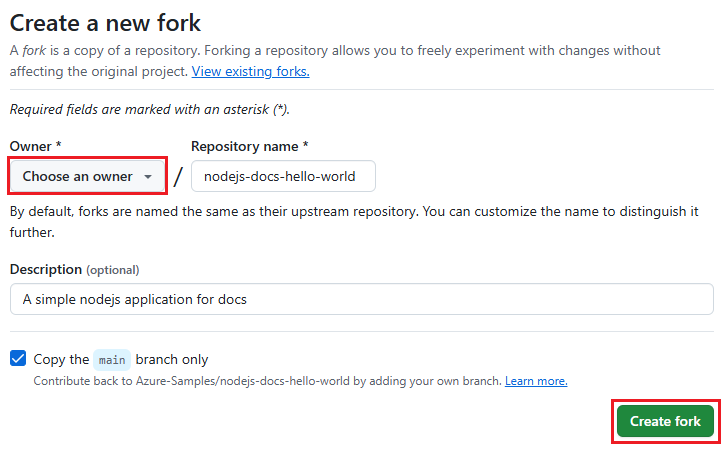
The browser goes to your new fork at URL https://github.com/<owner>/nodejs-docs-hello-world.
Create and deploy the App Service web app
Create your Azure App Service web app by using Cloud Shell in the Azure portal. To use Cloud Shell, sign in to the Azure portal and select the Cloud Shell button on the top toolbar.

The Cloud Shell appears along the bottom of the browser. Make sure Bash is selected as the environment in the dropdown menu.

Tip
To paste into Cloud Shell, use Ctrl+Shift+V or right-click and select Paste from the context menu.
Create and deploy the web app
In Cloud Shell, clone your forked repository to Azure with the following command, replacing
<your-forked-repository-url>with the URL of your forked repository.git clone <your-forked-repository-url>Change directory to the cloned repository folder.
cd nodejs-docs-hello-worldRun the az webapp up command to provision an App Service web app and do the first deployment. The
--sku F1argument creates the web app on the Free pricing tier, which incurs no cost.Running
az webapp upwithout anameparameters automatically assigns a randomly generated web app name that's unique in Azure. You can also use the--name <web-app-name>parameter to assign any name that's unique in Azure, such as a personal or company name with an app identifier, like--name <your-name>-nodeapp.az webapp up --sku F1 --name <app-name>
The az webapp up command recognizes the app as a Node.js app, and takes the following actions:
- Creates a default resource group.
- Creates a default App Service plan.
- Creates a web app with the assigned name and the URL
<your-web-app-name>.azurewebsites.net. - ZIP deploys all files from the current working directory, with build automation enabled.
- Caches the parameters locally in the .azure/config file so you don't need to specify them again when deploying from the project folder with
az webapp upor otheraz webappcommands.
You can override the default actions with your own values by using the command parameters. For more information, see az webapp up.
The command produces status messages as it runs. After the website starts successfully, you can select the link at You can launch the app at https://<your-web-app-name>.azurewebsites.net to go to the Hello World web app.
The az webapp up command produces the following JSON output for the sample web app:
{
  "URL": "<your-web-app-url>",
  "appserviceplan": "<your-app-service-plan-name>",
  "location": "<your-azure-region>",
  "name": "<your-web-app-name>",
  "os": "Linux",
  "resourcegroup": "<your-resource-group-name>",
  "runtime_version": "node|20-LTS",
  "runtime_version_detected": "10.0",
  "sku": "FREE",
  "src_path": "<repository-source-path>"
}
Create the pipeline from a template
In your Azure DevOps project, select Pipelines from the left navigation menu, and then select New pipeline or Create pipeline if this pipeline is the first in the project.
On the Where is your code screen, select GitHub.
On the Select a repository screen, select your forked nodejs-docs-hello-world repository.
Azure Pipelines recognizes the code as a Node.js app, and suggests several pipeline templates on the Configure your pipeline page. Select Node.js Express Web App to Linux on Azure.
On the next screen, select your Azure subscription and select Continue. This action creates a service connection to your Azure resources.
On the next screen, select your Azure web app and select Validate and configure. Azure Pipelines creates an azure-pipelines.yml file and displays it in the YAML pipeline editor.
On the Review your pipeline YAML screen, review the code for your pipeline.
The pipeline takes the following actions:
- Sets a trigger to run on every commit to the main code branch.
- Establishes and uses variables for the service connection, web app, machine image, and environment.
- Installs Node.js on the build agent and uses npm to run and test the app build.
- Packages the built app to a ZIP archive and uploads the ZIP to a drop location.
- Deploys the ZIP package to the App Service app and starts the app.
Save and run the pipeline
After you review the code, select Save and run and Save and run again to save and run your pipeline. The azure-pipelines.yml file saves to your forked repository, and the code deploys to Azure App Service.
Note
The first time the pipeline runs, it asks for permission to access the environment it creates. Select Permit to grant permission for the pipeline to access the environment.
On the run Summary page, select the job to watch your pipeline run and trace its build.
When the run succeeds, select the Azure Web App Deploy task, and select the App Service Application URL to view the deployed website.
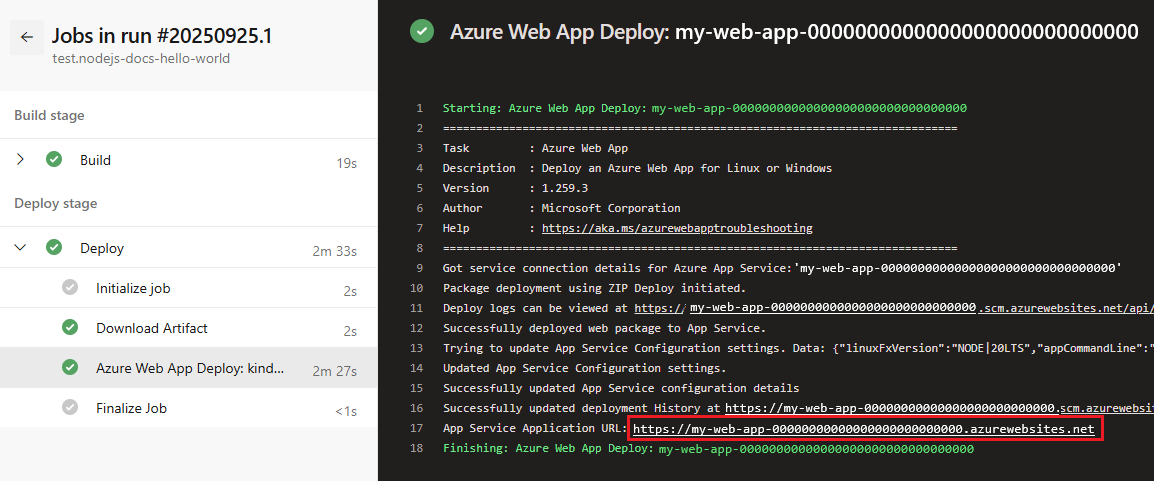
Verify that you see the site running on App Service at the deployed website URL.

Run a CI build and deployment
The trigger: main keyword configures your pipeline to run whenever a change is committed to the main branch of your forked code repository. To run a CI build:
- Go to your forked GitHub repository and make a small change in the README.md file.
- Select Commit changes, and Commit changes again.
- In Azure Pipelines, verify that your nodejs-docs-hello-world pipeline runs again with a description of Individual CI.
Clean up resources
You can delete the resources you created for this article if you don't need them anymore.
To remove the Azure App Service resources, run the following commands in order in Cloud Shell. You must delete the web app before you can delete its app service plan, and you must delete the app service plan before you can delete its resource group.
az webapp delete --name <web-app-name> --resource-group <resource-group-name>
az appservice plan delete --name <app-service-plan-name> --resource-group <resource-group-name>
az group delete --name <resource-group-name>
To remove your pipeline in Azure Pipelines, select the pipeline, select the More actions icon at upper right on the pipeline page, and then select Delete. To remove your Azure DevOps project, see Delete a project.
To delete your forked nodejs-docs-hello-world GitHub repo, go to the repo and select Settings in the top menu bar. Scroll to the bottom of the page, and select Delete this repository.