Note
Access to this page requires authorization. You can try signing in or changing directories.
Access to this page requires authorization. You can try changing directories.
This article describes how to manage the settings for an Azure Native Qumulo resource.
Resource overview
Begin by signing in to the Azure portal.
In the Azure portal search bar, enter All resources and select All resources from the results.
From the Resources list, select your resource.
The Azure portal shows the resource with the Overview page open, by default.
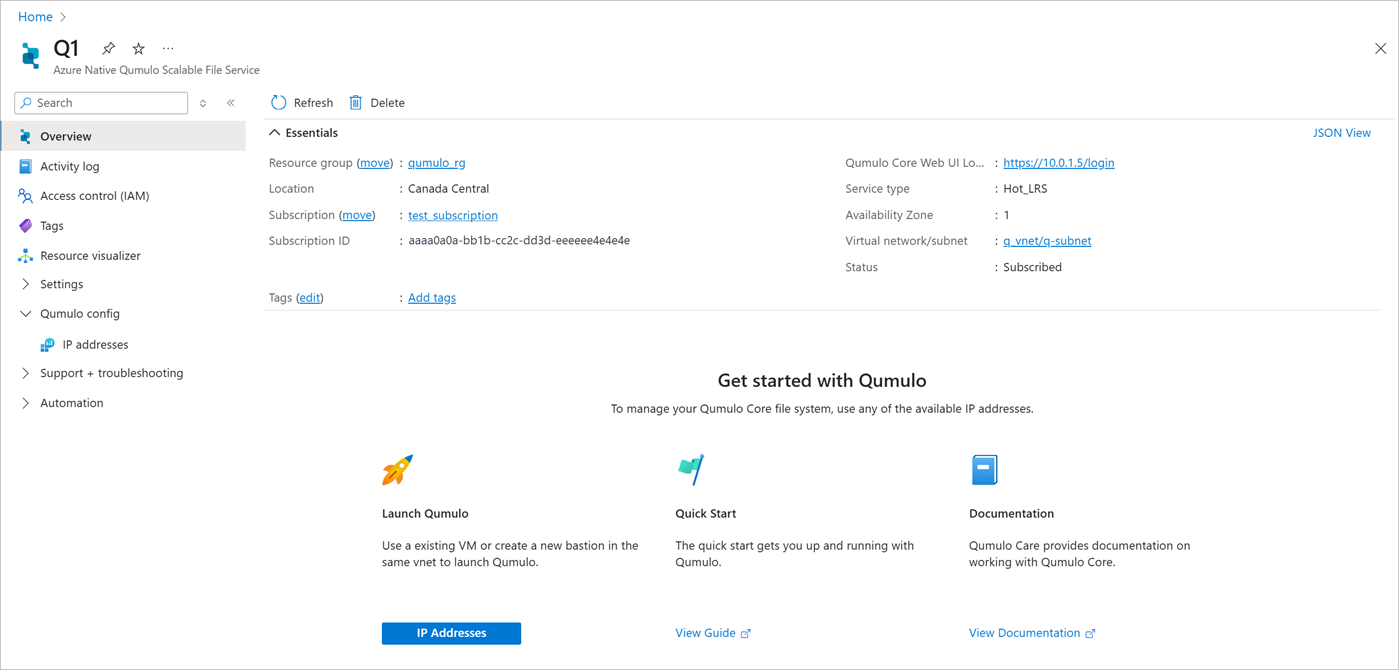
The Essentials details include:
- Resource group
- Location
- Subscription
- Subscription ID
- Tags
- Qumulo Core Web UI Login
- Service type
- Availability Zone
- Virtual network/subnet
- Status
To manage your resource, select the links next to corresponding details.
Below the essentials, you can navigate to other details about your resource.
Manage a resource
To get IP addresses to manage your Qumulo file system or to mount your file system for data access, select Qumulo config > IP addresses from the service menu.
Delete a resource
To delete a resource:
On the command bar, select Delete.
On the Delete Resource pane, optionally select a reason for deleting the resource.
In the Enter resource name to confirm deletion box, enter the name of the resource.
Select Delete.
Select Delete again to confirm deletion.
After the resource is deleted, all billing for that resource through Azure Marketplace stops.
Get support
You can request support from the Azure portal, or go to the Qumulo support page.
Begin by signing in to the Azure portal.
- In the Azure portal, go to the resource.
- From the service menu, select Support + troubleshooting > New Support Request. A support request appears in the working pane.
- Select the partner's link to log a support request.