Note
Access to this page requires authorization. You can try signing in or changing directories.
Access to this page requires authorization. You can try changing directories.
Learn how to deploy a highly available DHCP server in Azure on a virtual machine. This server is used as a target for an on-premises DHCP relay agent to provide dynamic IP address allocation to on-premises clients. The DHCP relay agent forwards unicast DHCP requests from on-premises clients to the DHCP servers running in Azure. Direct broadcast packets from clients to a DHCP server don't work in an Azure Virtual Network by design.
Note
The on-premises client to DHCP Server (source port UDP/68, destination port UDP/67) is still not supported in Azure, since this traffic is intercepted and handled differently. This will result in timeout messages at the time of DHCP RENEW at T1 when the client directly attempts to reach the DHCP Server in Azure. The DHCP RENEW will succeed when the DHCP RENEW attempt is made at T2 via DHCP Relay Agent. For more details on the T1 and T2 DHCP RENEW timers, see RFC 2131.
Prerequisites
- An Azure account with an active subscription. Create one for free.
Create a virtual network and an Azure Bastion host
The following procedure creates a virtual network with a resource subnet, an Azure Bastion subnet, and a Bastion host:
In the portal, search for and select Virtual networks.
On the Virtual networks page, select + Create.
On the Basics tab of Create virtual network, enter, or select the following information:
Setting Value Project details Subscription Select your subscription. Resource group Select Create new.
Enter test-rg for the name.
Select OK.Instance details Name Enter vnet-1. Region Select East US 2. 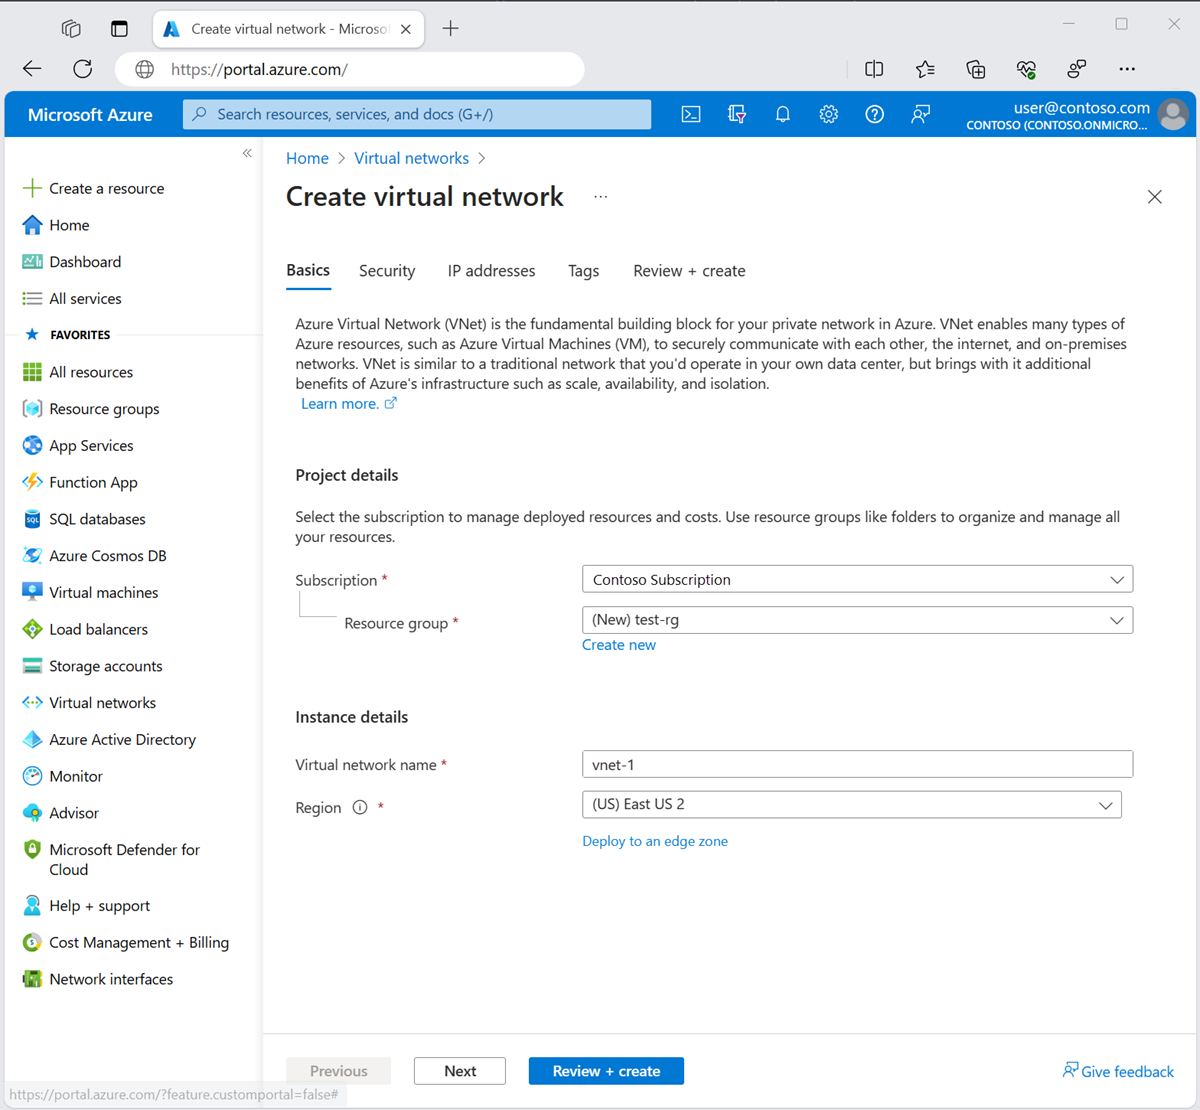
Select Next to proceed to the Security tab.
In the Azure Bastion section, select Enable Azure Bastion.
Bastion uses your browser to connect to VMs in your virtual network over Secure Shell (SSH) or Remote Desktop Protocol (RDP) by using their private IP addresses. The VMs don't need public IP addresses, client software, or special configuration. For more information, see What is Azure Bastion?.
In Azure Bastion, enter or select the following information:
Setting Value Azure Bastion host name Enter bastion. Azure Bastion public IP address Select Create a public IP address.
Enter public-ip-bastion in Name.
Select OK.
Select Next to proceed to the IP Addresses tab.
In the address space box in Subnets, select the default subnet.
In Edit subnet, enter or select the following information:
Setting Value Subnet purpose Leave the default of Default. Name Enter subnet-1. IPv4 IPv4 address range Leave the default of 10.0.0.0/16. Starting address Leave the default of 10.0.0.0. Size Leave the default of /24 (256 addresses). 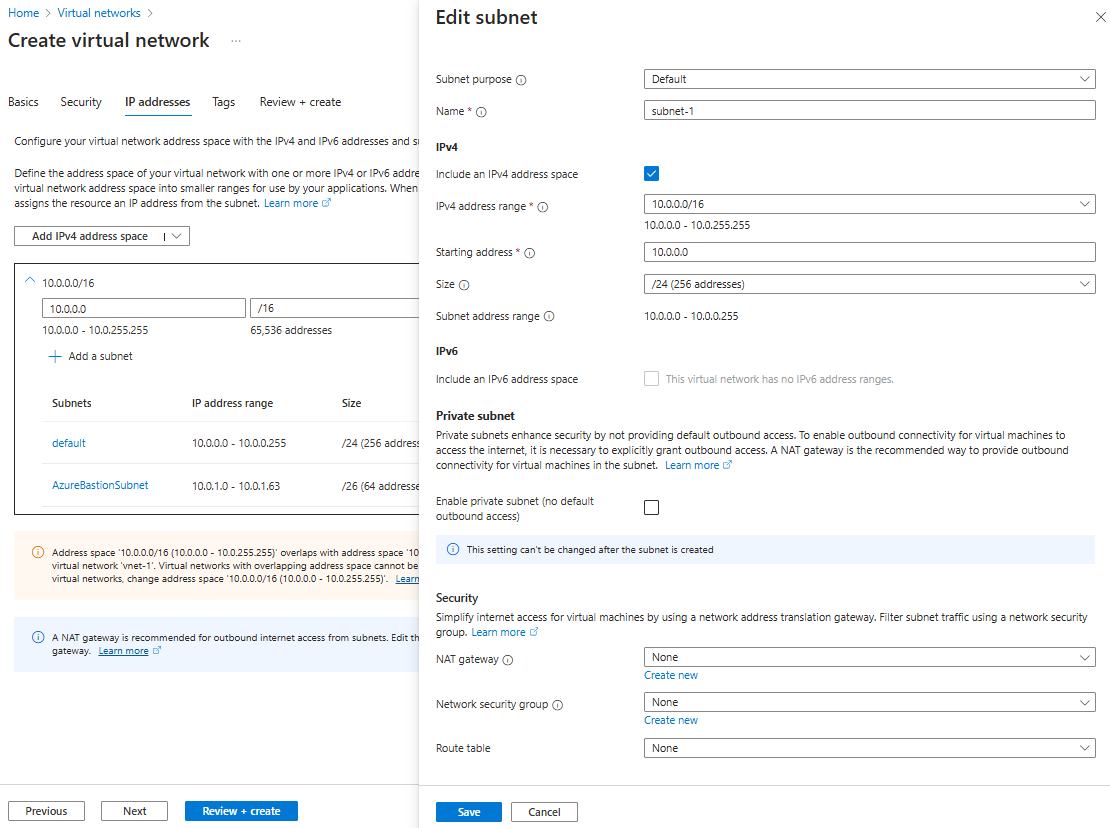
Select Save.
Select Review + create at the bottom of the window. When validation passes, select Create.

Create virtual machines
In this section, you create two VMs (vm-1 and vm-2) in two different availability zones (Zone 1 and Zone 2) to provide high availability for your DHCP service.
In the search box at the top of the portal, enter Virtual machine. Select Virtual machines in the search results.
Select + Create then Azure virtual machine.
In Create a virtual machine, type or select the values in the Basics tab:
Setting Value Project details Subscription Select your subscription. Resource group Select test-rg. Instance details Virtual machine name Enter vm-1. Region Select East US 2. Availability options Select Availability zone. Availability zone Select Zone 1. Security type Select Standard. Image Select Windows Server 2022 Datacenter - x64 Gen2. VM architecture Leave the default of x64. Size Select a size. Administrator account Authentication type Select Password. Username Enter azureuser. Password Enter a password. Confirm password Reenter the password. Inbound port rules Public inbound ports Select None. Select the Networking tab, or select Next: Disks, then Next: Networking.
In the Networking tab, enter or select the following information:
Setting Value Network interface Virtual network Select vnet-1. Subnet Select subnet-1 (10.0.0.0/24). Public IP Select None. NIC network security group Select Basic. Public inbound ports Leave the default of None. Select Review + create.
Review the settings, and then select Create.
Follow the previous steps to create a second VM with the following values and all the other settings the same as vm-1:
Setting VM 2 Name vm-2 Availability zone Zone 2
Configure DHCP server network adapters
You'll sign-in to the virtual machines with Azure Bastion and configure the network adapter settings and DHCP server role for each virtual machine.
In the Azure portal, search for and select Virtual machines.
Select vm-1.
In the vm-1 page, select Connect then Connect via Bastion.
Enter the username and password you created when you created the virtual machine.
Open PowerShell as an administrator.
Run the following command to install the DHCP server role:
Install-WindowsFeature -Name DHCP -IncludeManagementTools
Install Microsoft Loopback Adapter
Use the following steps to install the Microsoft Loopback Adapter by using the Hardware Wizard:
Open Device Manager on the virtual machine.
Select the computer name vm-1 in Device Manager.
In the menu bar, select Action then Add legacy hardware.
In the Add Hardware Wizard, select Next.
Select Install the hardware that I manually select from a list (Advanced), and then select Next
In the Common hardware types list, select Network adapters, and then select Next.
In the Manufacturers list box, select Microsoft.
In the Network Adapter list box, select Microsoft Loopback Adapter, and then select Next.
select Next to start installing the drivers for your hardware.
select Finish.
In Device Manager, expand Network adapters. Verify that Microsoft Loopback Adapter is listed.
Close Device Manager.
Set static IP address for Microsoft Loopback Adapter
Use the following steps to set a static IP address for the Microsoft Loopback Adapter:
Open Network and Internet settings on the virtual machine.
Select Change adapter options.
Right-click Microsoft Loopback Adapter and select Properties.
Select Internet Protocol Version 4 (TCP/IPv4) and select Properties.
Select Use the following IP address.
Enter the following information:
Setting Value IP address Enter 10.0.0.100. Subnet mask Enter 255.255.255.0. Select OK.
Select Close.
Add loopback IP address as secondary IP configuration in Azure
After configuring the loopback adapter IP address on the virtual machine, you must add the same IP address as a secondary IP configuration on the Azure VM's network interface. This critical step ensures that Azure can route unicast DHCP requests to the DHCP server.
In the Azure portal, search for and select Virtual machines.
Select vm-1.
In the vm-1 page, select Networking then Network settings.
Select the network interface name next to Network interface. The network interface name is similar to vm-1123.
In the network interface page, select IP configurations in Settings.
Select + Add.
Enter or select the following information in Add IP configuration:
Setting Value Name Enter ipconfig2. Allocation Select Static. IP address Enter 10.0.0.100. Select OK.
Verify that in IP configurations, you have ipconfig1 and ipconfig2 listed.
Enable routing between the loopback interface and the network adapter
Use the following steps to enable routing between the loopback interface and the network adapter:
Open CMD as an administrator.
Run the following command to list the network interfaces:
netsh int ipv4 show intC:\Users\azureuser>netsh int ipv4 show int Idx Met MTU State Name --- ---------- ---------- ------------ --------------------------- 1 75 4294967295 connected Loopback Pseudo-Interface 1 6 5 1500 connected Ethernet 11 25 1500 connected Ethernet 3In this example, the network interface connected to the Azure Virtual network is Ethernet. The loopback interface that you installed in the previous section is Ethernet 3.
Make note of the
Idxnumber for the primary network adapter and the loopback adapter. In this example the primary network adapter is6and the loopback adapter is11. You'll need these values for the next steps.Caution
Don't confuse the Loopback Loopback Pseudo-Interface 1 with the Microsoft Loopback Adapter. The Loopback Pseudo-Interface 1 isn't used in this scenario.
Run the following command to enable weakhostreceive and weakhostsend on the primary network adapter:
netsh int ipv4 set int 6 weakhostreceive=enabled weakhostsend=enabledRun the following command to enable weakhostreceive and weakhostsend on the loopback adapter:
netsh int ipv4 set int 11 weakhostreceive=enabled weakhostsend=enabledClose the bastion connection to vm-1.
Repeat the previous steps to configure vm-2. Replace the IP address of 10.0.0.100 with 10.0.0.200 in both the static IP address configuration of the loopback adapter and the secondary IP configuration in the Azure portal.
Verify DHCP server binding
After completing the configuration, verify that the DHCP server is correctly bound to the loopback adapter IP address.
Connect to vm-1 via Azure Bastion.
Open PowerShell as an administrator.
Run the following command to verify the DHCP server is listening on the loopback IP address:
netstat -an | Select-String "67"You should see output showing UDP port 67 bound to 10.0.0.100:
UDP 10.0.0.100:67 *:*Alternatively, open the DHCP management console and verify that the loopback adapter is listed and bound to the IP address 10.0.0.100 in the DHCP console.
Close the bastion connection to vm-1.
Configure DHCP relay agent
Configure your on-premises DHCP relay agent to forward DHCP requests to the loopback IP addresses of the DHCP servers in Azure. For high availability, configure the relay agent with both server addresses:
- 10.0.0.100 (vm-1)
- 10.0.0.200 (vm-2)
DHCP relay agents natively support specifying multiple DHCP servers in their configuration, providing failover and redundancy without requiring additional load-balancing components.
Consult your DHCP relay agent manufacturer's documentation for specific configuration steps.
Next step
In this article, you learned how to deploy a highly available DHCP server in Azure on a virtual machine. You configured the network adapters with loopback adapters and added the loopback IP addresses as secondary IP configurations in Azure to ensure proper routing. You also installed the DHCP role on the virtual machines.
Further configuration of the DHCP server is required to provide DHCP services to on-premises clients from the Azure Virtual Machines. The DHCP relay agent on the on-premises network must be configured to forward DHCP requests to the loopback IP addresses (10.0.0.100 and 10.0.0.200) of the DHCP servers in Azure. Consult the manufacturer's documentation for the DHCP relay agent for configuration steps.