Note
Access to this page requires authorization. You can try signing in or changing directories.
Access to this page requires authorization. You can try changing directories.
Important
Some information in this article relates to a prereleased product which may be substantially modified before it's commercially released. Microsoft makes no warranties, express or implied, with respect to the information provided here.
You can create custom agents quickly and intuitively with the new form-based experience. This article explains how to start building your custom agent from scratch using the agent builder in Security Copilot.
Start building your custom agent
From the Build page, create your custom agent from scratch as follows:
Select the card Start from scratch.
Select Get started.
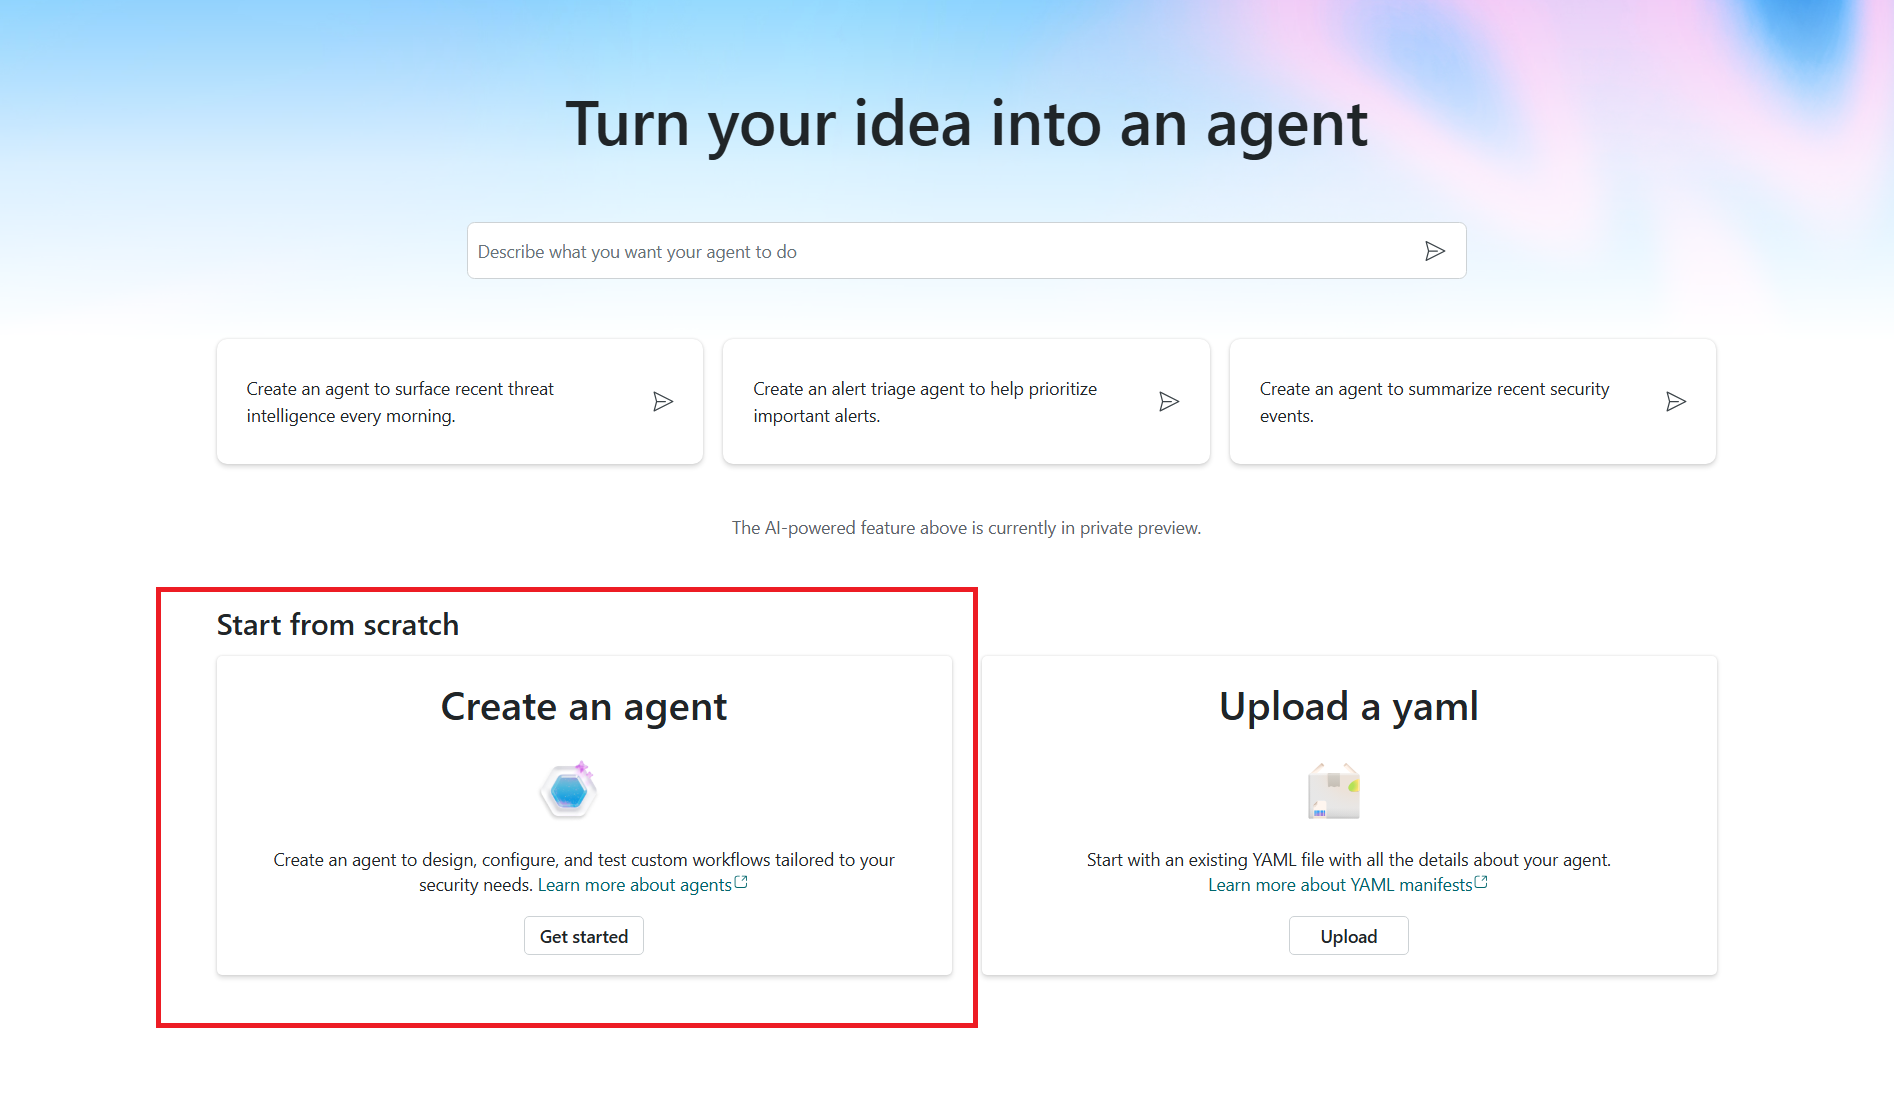
The Agent landing page is displayed.
On the top navigation bar, there are two tabs: Build and Test. Use the Build tab to define your agent and configure its tools. The Test tab lets you validate the agent’s responses.
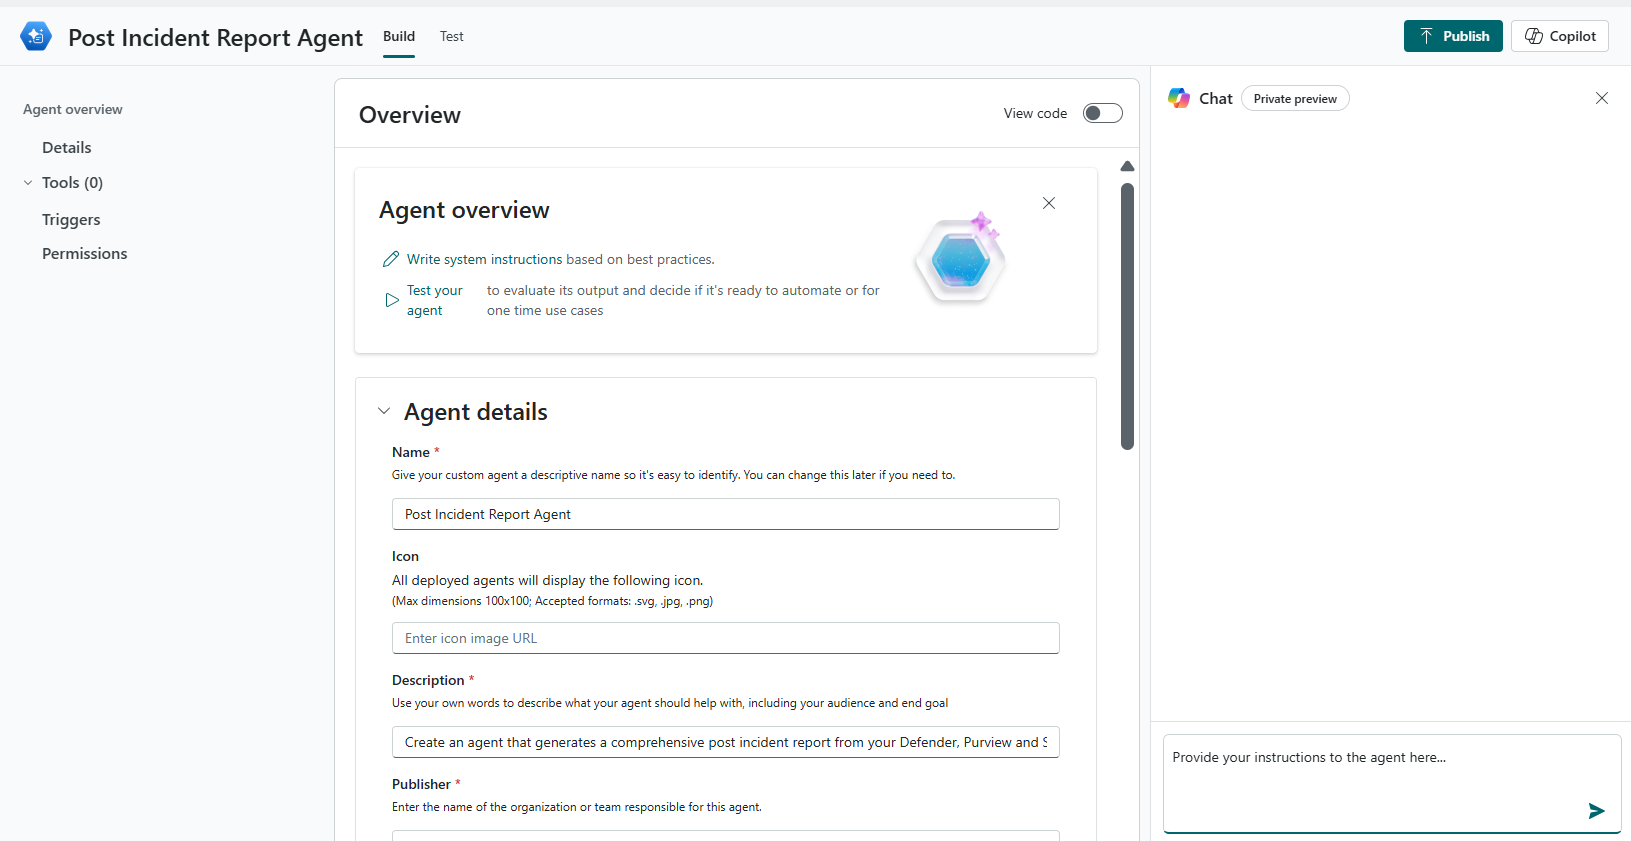
The Agent overview navigation pane displays the agent configuration sections in the agent builder form. You can configure the agent’s Details, Instructions, Inputs, Tools, and Automation to define Triggers and Permissions as applicable. These sections are organized under the agent name and are used to incrementally build and refine the agent.
Select the Copilot button to open the Chat interface, which appears on the right side of the screen. You can alternate between the Chat interface and the agent builder form, to iteratively define your agent and add tools. In the Chat interface, Copilot asks questions to guide you, and uses your responses to fill in the details that define your agent.


Create your custom agent
Use the Agent page to start building your custom agent. You can define your agent’s purpose and scope, and tools to execute tasks. You can configure the following sections on the agent's page:
Agent details
You define the agent’s identity and goal, provide clear instructions, and configure any input parameters the agent requires to run tools effectively. For more information, see Agent YAML.
On the Agent details section:
- Enter Agent display name and Agent description.
- Describe your agent in the description and the end goal it must meet.

- Enter Agent display name and Agent description.
On the Instructions section:
- You can provide clear directions to guide the agent on its goal and how the agent should execute tasks. Typically written in natural language and includes formatting like markdown or comments. For example, provide an ordered list of actions for the agent, including instructions on invoking your tools that you created using the tool types.
On the Inputs section:
- Provide input parameters required for the agent tool. You must guide the AI model in your description, if only some values are possible (for example, "SeverityLevel should be one of
high,medium, orlow"). - You can reference input names in the Instructions field by wrapping them in double curly braces. For example,
{{skillInputName}}. - Select Add input to provide additional inputs to your tools.
- Provide input parameters required for the agent tool. You must guide the AI model in your description, if only some values are possible (for example, "SeverityLevel should be one of

Note
The Agent display name must be a valid identifier, as it's used to uniquely identify your agent. After the agent is deployed to Security Copilot, you can use the name to search.
Tools
Tools represent a specific capability that your agent can use to perform its tasks. A tool is typically a modular component, a function, or even another specialized agent that is designed to execute a predefined task. These tasks often involve enabling agents to interact with external systems or data.
Select Add tool from the extensive Security Copilot tools catalog or select Create tool that enables your agent to perform specific tasks and interact with external systems.

Add tool
You can add tools explicitly to your agent.
Select Add tool to open the Tools catalog modal.
In the Add a tool modal, you can select multiple tools from the catalog: Microsoft tools and the predefined tools that you create such as AGENT, GPT, KQL, API, and MCP.
Search: You can search for the tool in the Search bar (semantic search). The agent uses these skills or tools to accomplish a specific task. You can apply filters to improve discoverability for search. For example, to add Microsoft Sentinel's collection of MCP tools, search by the keyword or filter by Publisher: MCP.Sentinel.
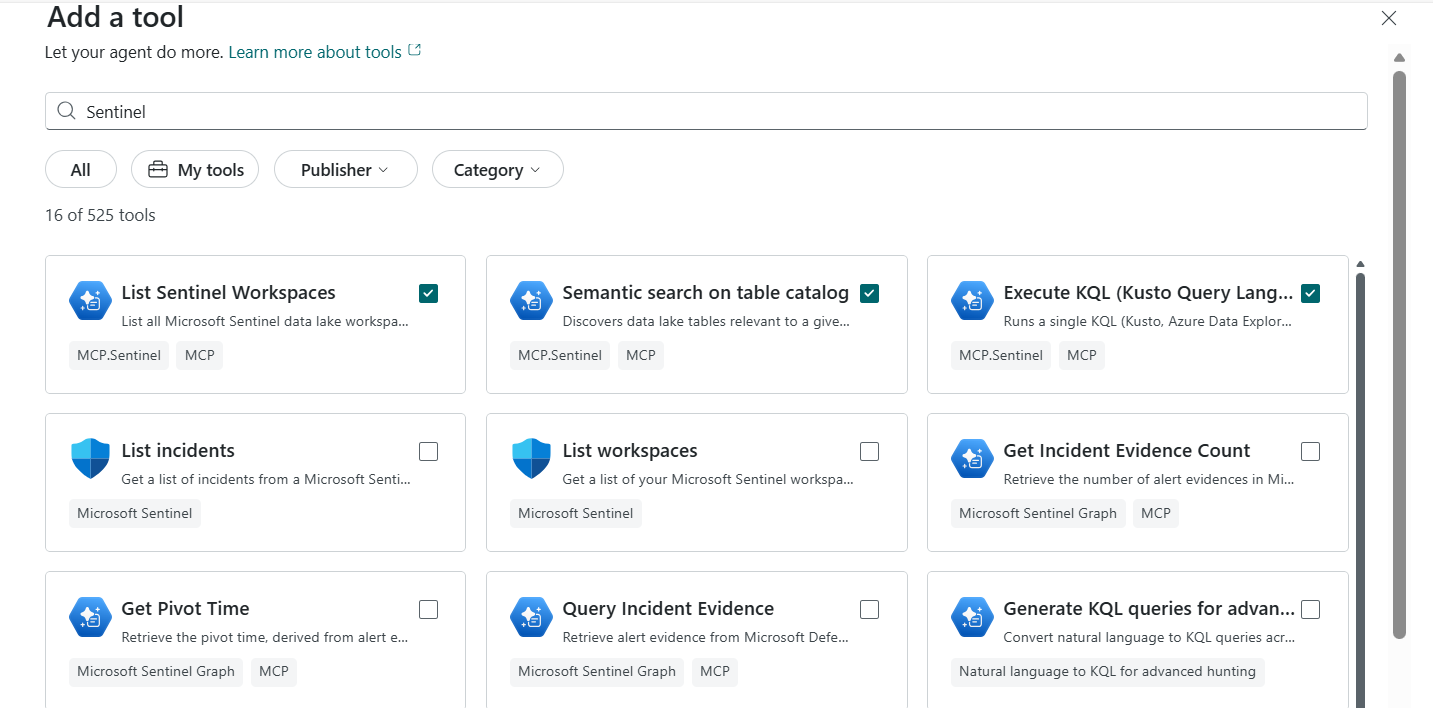
Select Add selected to add the tools to your agent.

The selected tool is added to the Tools section and displayed on the left navigation.
- Select the tool to see the detailed information and the input parameters required for the tool.


Note
Semantic search enhances information retrieval by interpreting the context and intent behind the query. It uses advanced techniques such as Natural Language Processing (NLP) to deliver more relevant and meaningful results.
Delete tool
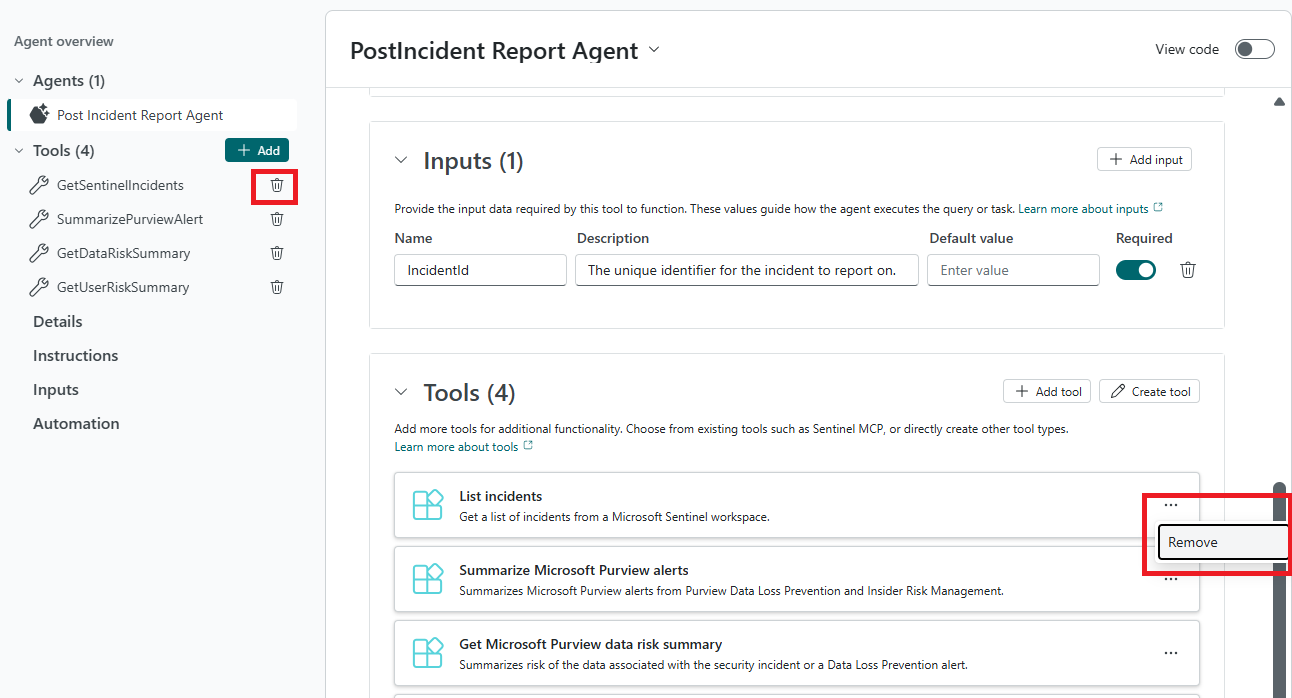
You can use either of the following options to delete the tools added:
Select the ellipsis (…) on the tools to Remove a tool.
Select delete on the left navigation pane.

Create tool
You can extend the capabilities of your custom agent by adding one or more tools.
For creating a tool from the tool types such as GPT, KQL, API, and MCP, see How to create tools.
Automation
You can set up Triggers and Permissions in the Automation section.
Triggers
Triggers activate the agent to run on a schedule.

Provide a Trigger name and Frequency on how often the trigger runs.
Process tool: Tool (skill) that is invoked based on the trigger.
The Process tool functions as an entry point for the agent's workflow. You can add the following types of tools:
A newly created (API, KQL, GPT, MCP) tool from Agent Tools. To create MCP plugin, see Create MCP plugin.
Global tools created in Security Copilot, including MCP tools.
Custom tools created for your organization.
The agent uses these specific tools to accomplish a specific task.
Permissions
You can set whether the agent is allowed to run concurrently and view what plugins are required for it to run.
Select the desired Single tenant constraint for the agent from the dropdown.
Tenant: There can only be one instance per tenant.
Workspace: The agent instance is scoped to a specific collaborative environment within the tenant. Agent runs are visible only to workspace members unless explicitly shared. There can only be one instance per workspace.
None: No restriction. Create as many agent instances as you want.
For more information on workspaces, see Workspaces.
The Required plugins displays the Microsoft or other plugins added for your agent. The plugins are automatically added based on the tools selected in your agent.
View code
You can toggle View code to see the code editor displaying the autogenerated agent code in a YAML format.
You can also copy the YAML directly or download the YAML to edit in your preferred code editor.


Add tools through chat
You can use the chat interface to also build your agent and its underlying custom tools. Select Apply changes to accept.
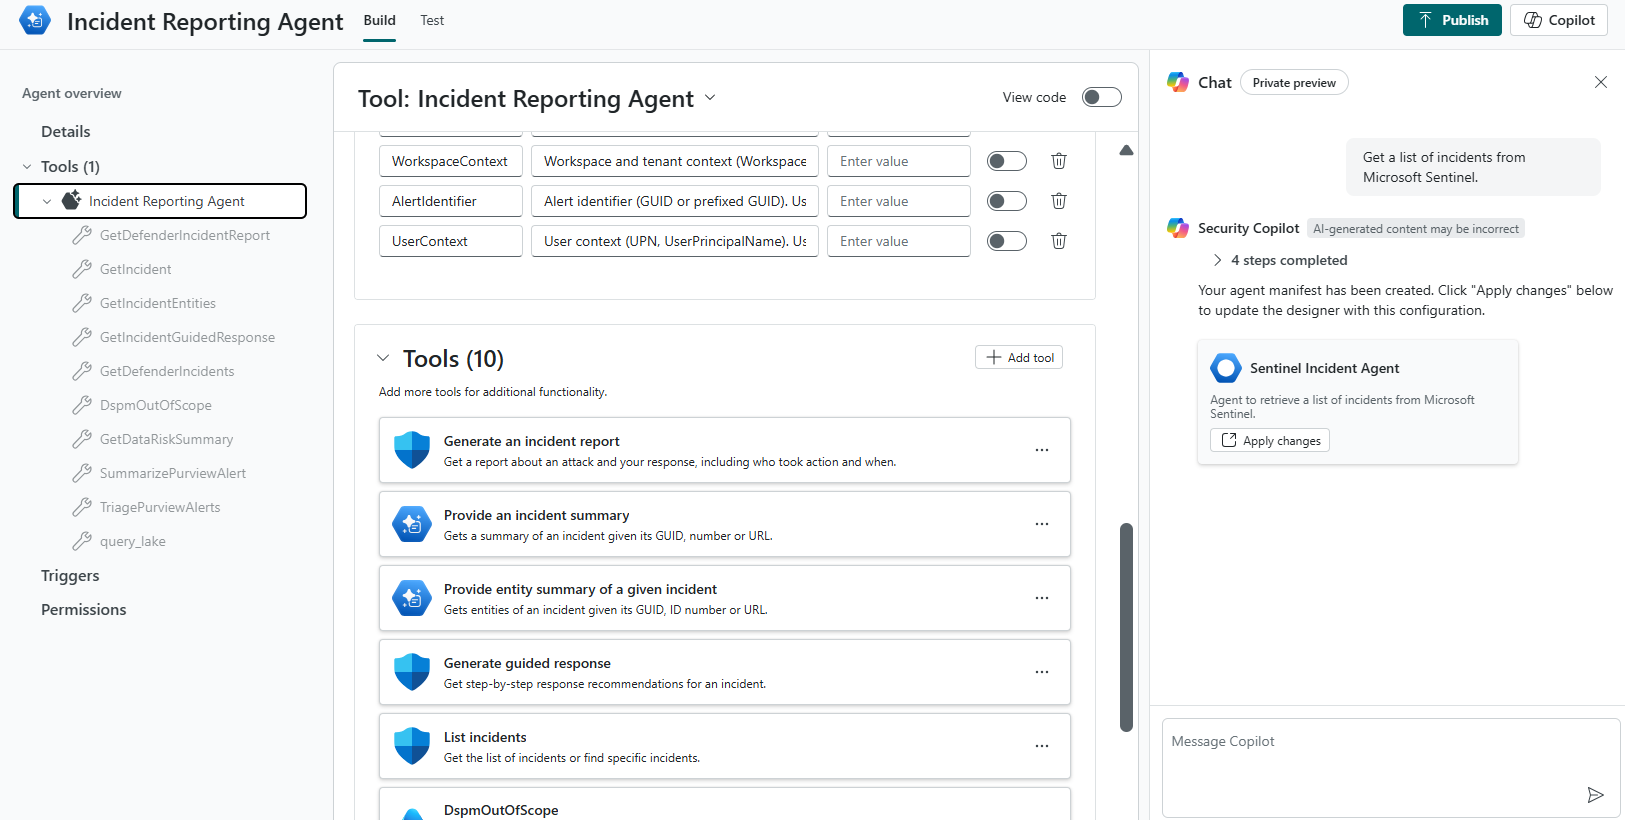
The child tool is added to the Tools section.
