Note
Access to this page requires authorization. You can try signing in or changing directories.
Access to this page requires authorization. You can try changing directories.
The Aspire Visual Studio Code extension provides a set of commands and tools to streamline your work with Aspire within Visual Studio Code. The extension includes commands to create projects, add integrations, configure solutions, and manage deployments. The extension requires the Aspire CLI and provides similar functionality on the Visual Studio Code command palette.
Prerequisites
To work with Aspire, you need the following installed locally:
- .NET 8.0 or .NET 9.0.
- Starting with Aspire 9.4, .NET 10 Preview 5 or later is supported.
- An OCI compliant container runtime, such as:
- Docker Desktop or Podman. For more information, see Container runtime.
- An Integrated Developer Environment (IDE) or code editor, such as:
- Visual Studio 2022 version 17.9 or higher (Optional)
- Visual Studio Code (Optional)
- C# Dev Kit: Extension (Optional)
- JetBrains Rider with Aspire plugin (Optional)
For more information, see Aspire setup and tooling, and Aspire SDK.
In addition, before you can use the Aspire Visual Studio Code extension, you must have the Aspire CLI installed and available on your PATH.
Install the Aspire extension
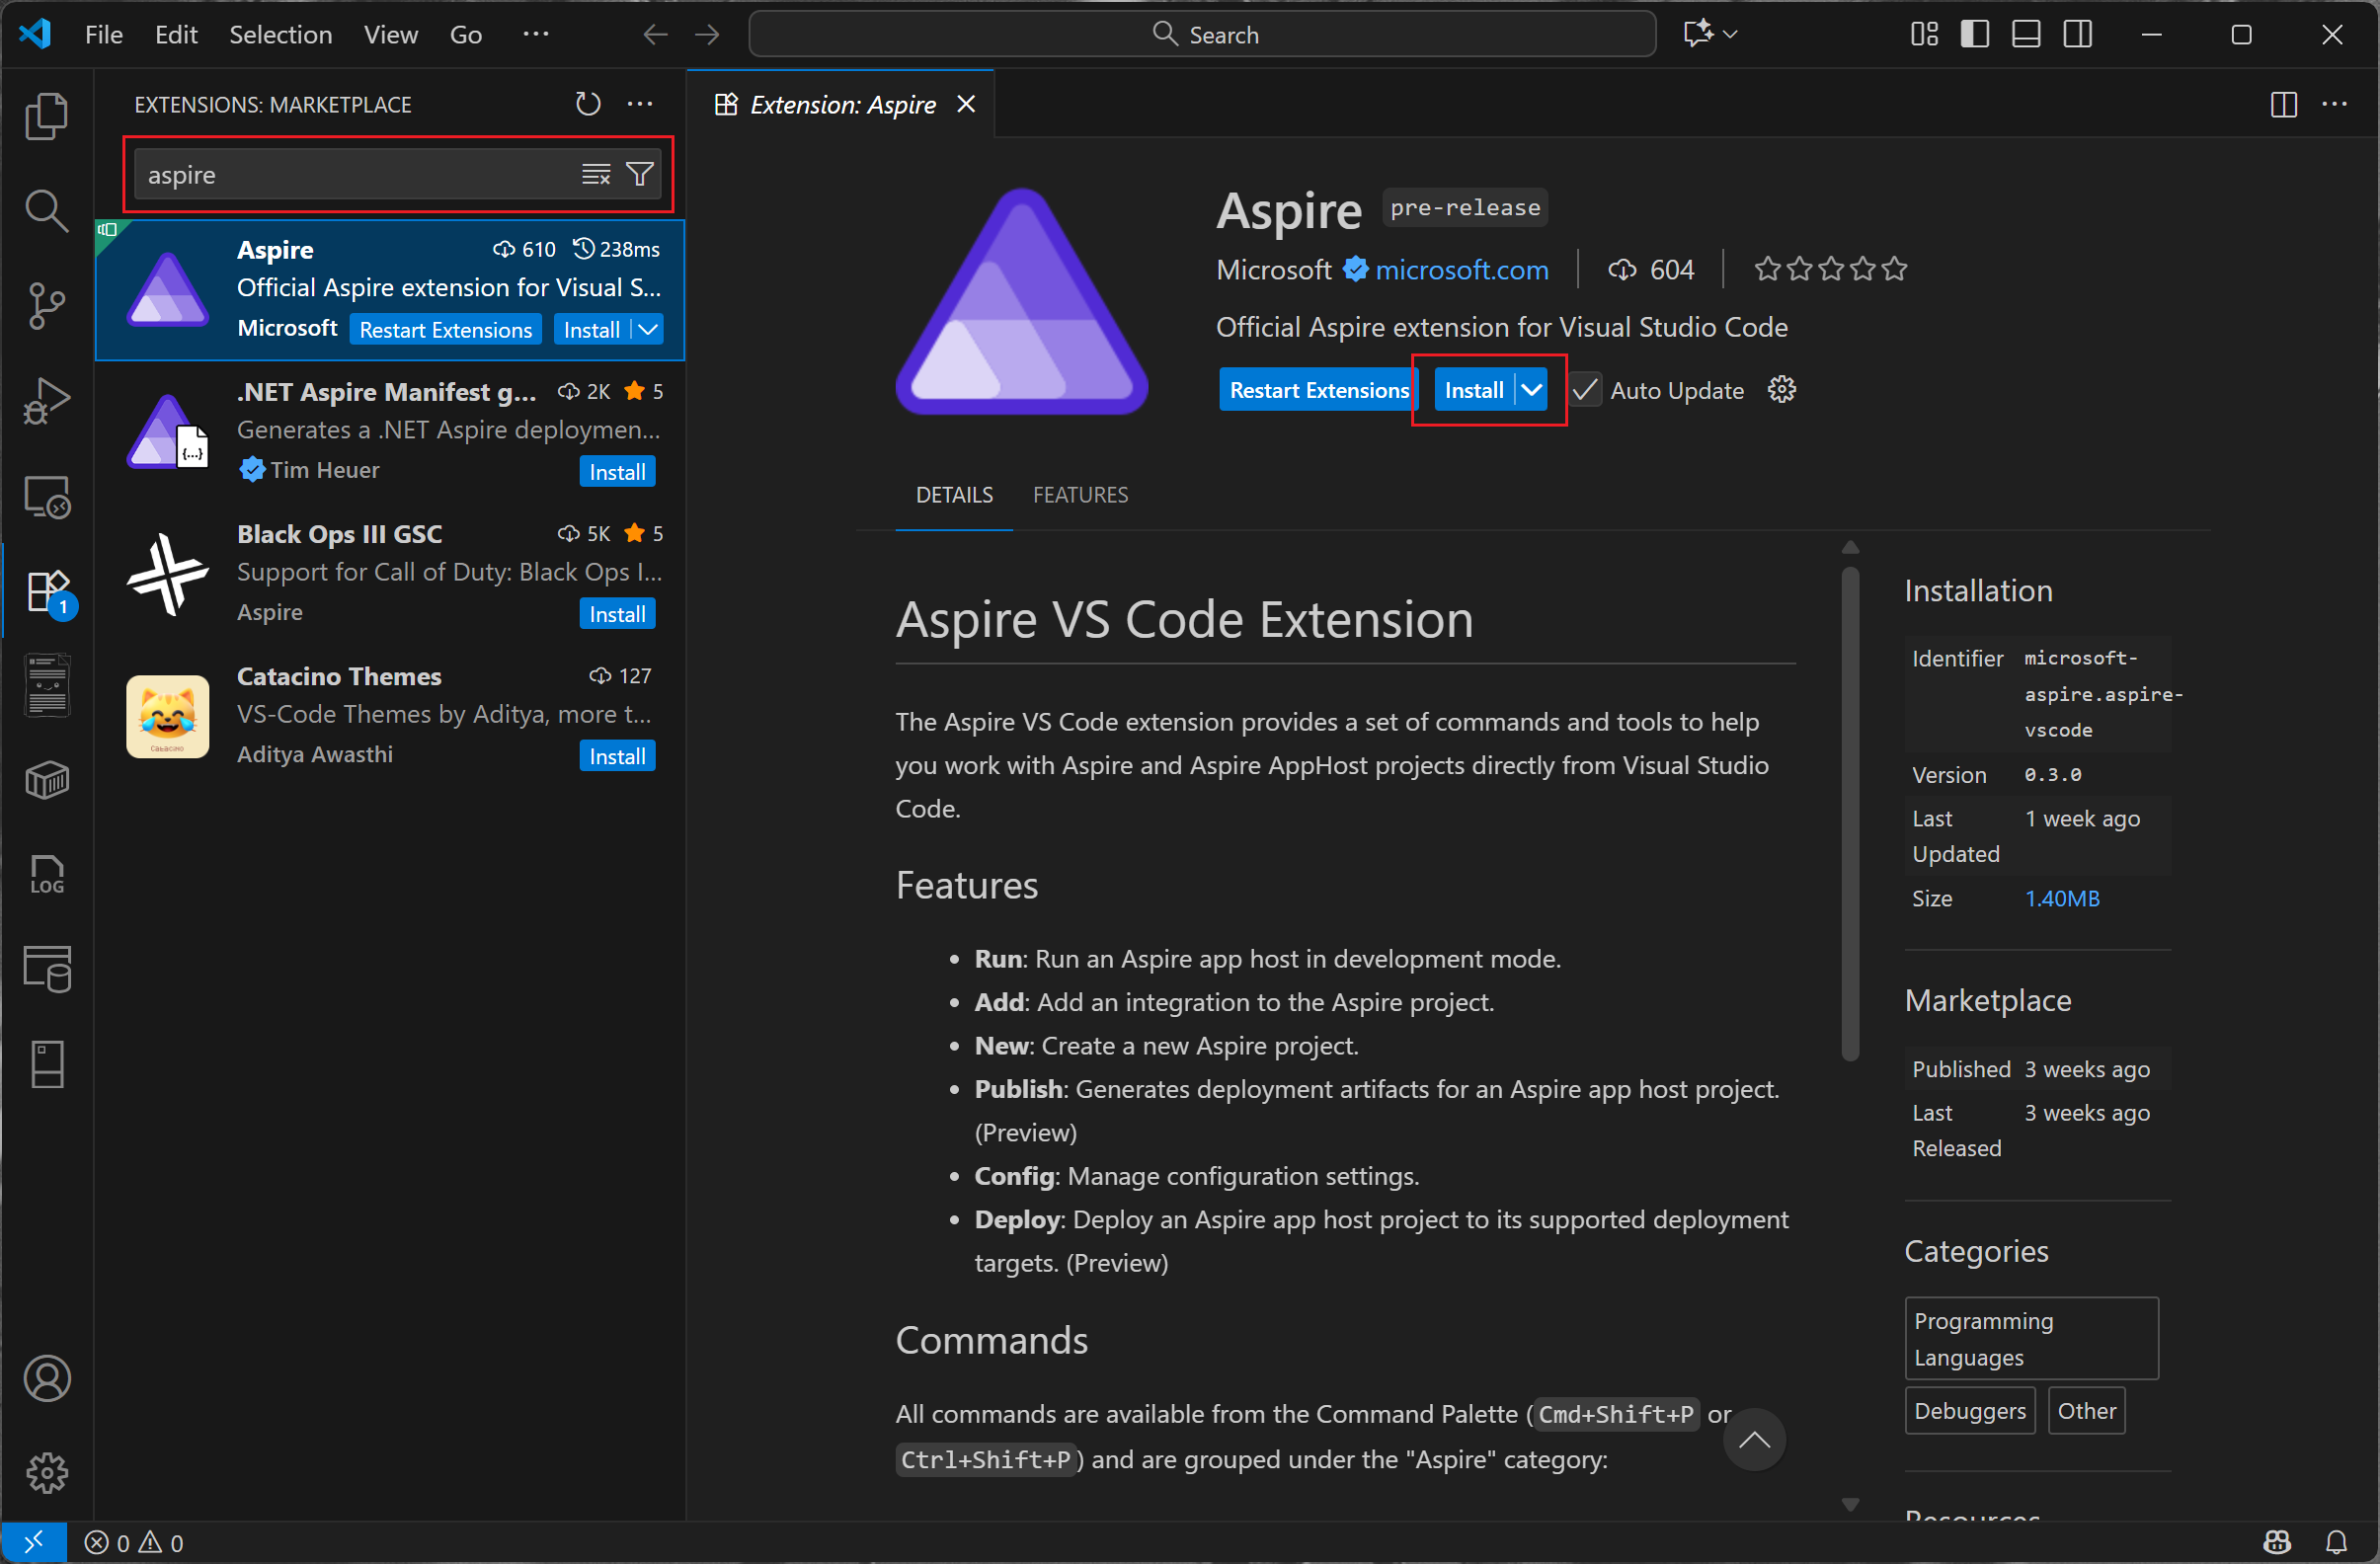
To install the Aspire VS Code extension:
Open VS Code.
Open the Extensions view by selecting View > Extensions or pressing Ctrl+Shift+X (Windows/Linux) or Cmd+Shift+X (macOS).
Search for "Aspire" in the Extensions marketplace.
Select the Aspire extension published by Microsoft.
Select Install.

Alternatively, you can install the extension directly from the VS Code Marketplace.
Access extension commands
All Aspire extension commands are available from the VS Code Command Palette:
- Open the Command Palette by pressing Ctrl+Shift+P (Windows/Linux) or Cmd+Shift+P (macOS).
- Type "Aspire" to filter and display all available Aspire commands.
- Select the desired command from the list.
All commands are grouped under the Aspire category in the Command Palette for easy discovery.
Available commands
The Aspire VS Code extension provides the following commands:
| Command | Description | Availability |
|---|---|---|
| Aspire: New Aspire project | Create a new Aspire apphost or starter app from a template. | Available |
| Aspire: Add an integration | Add a hosting integration (Aspire.Hosting.*) to the Aspire apphost. |
Available |
| Aspire: Configure launch.json | Adds the default Aspire debugger launch configuration to your workspace's launch.json, which will detect and run the apphost in the workspace. |
Available |
| Aspire: Manage configuration settings | Manage configuration settings including feature flags. | Available |
| Aspire: Open Aspire terminal | Open an Aspire VS Code terminal for working with Aspire projects. | Available |
| Aspire: Publish deployment artifacts | Generates deployment artifacts for an Aspire apphost. | Preview |
| Aspire: Deploy app | Deploy the contents of an Aspire apphost to its defined deployment targets. | Preview |
| Aspire: Update integrations | Update hosting integrations and Aspire SDK in the apphost. | Preview |
Create a new Aspire app
To create a new Aspire app using the extension:
Open the Command Palette (Ctrl+Shift+P or Cmd+Shift+P).
Run the Aspire: New Aspire project command.
Select the desired template:
Specify the project name and location.
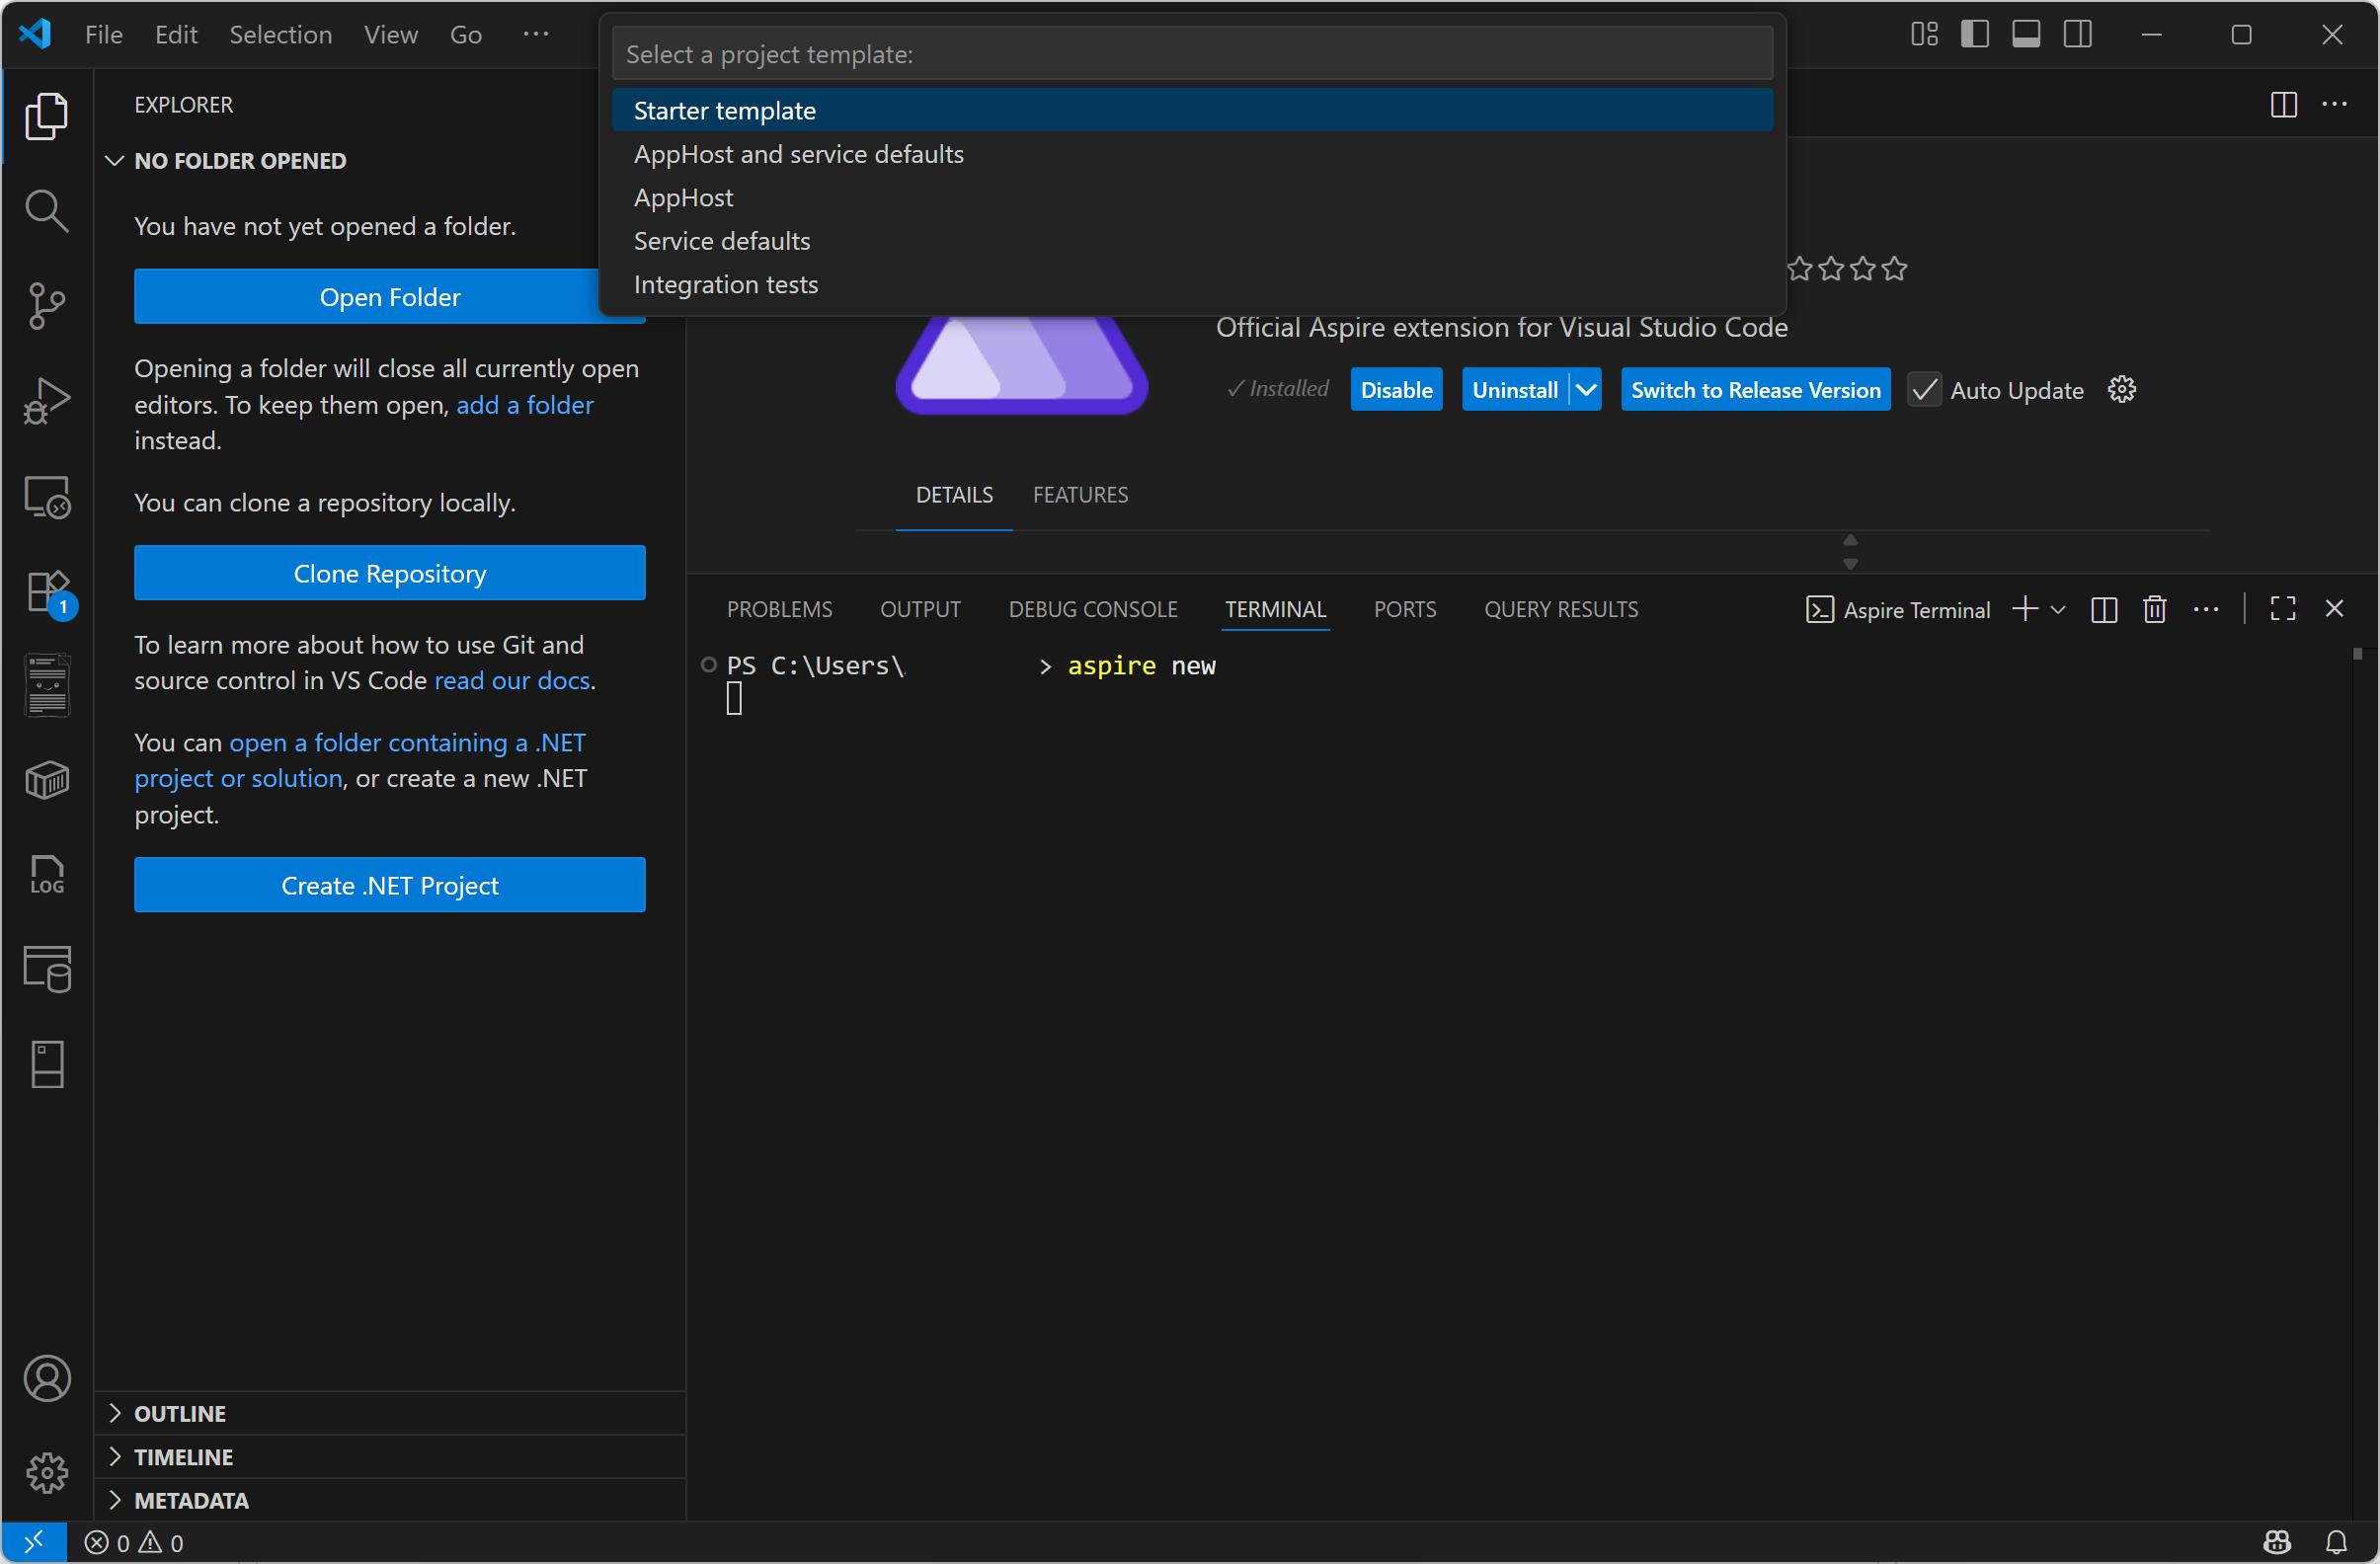

The extension creates the project and opens it in VS Code.
Add an integration to the Aspire solution
Aspire integrations provide pre-configured connections to various cloud services and dependencies. To add an integration:
- Open the Command Palette.
- Run the Aspire: Add an integration command.
- Browse or search for the desired integration package.
- Select the integration to add it to your AppHost project.
The extension adds the appropriate NuGet package reference to your AppHost project.
Note
The Add an integration command adds a hosting integration to the AppHost project. It doesn't add the corresponding client integration to any consuming projects.
Configure an Aspire solution
The Aspire extension includes several commands that configure the behavior of Aspire and the Aspire CLI during development:
Configure launch.json for debugging
To run and debug your Aspire application in VS Code, you need to configure the launch.json file:
- Open the Command Palette.
- Run the Aspire: Configure launch.json command.
- The extension adds a default Aspire debugger configuration to your workspace's
launch.jsonfile.
The default configuration looks like this:
{
    "type": "aspire",
    "request": "launch",
    "name": "Aspire: Launch Default AppHost",
    "program": "${workspaceFolder}"
}
You can customize the program field to point to a specific AppHost project file. For example:
{
    "type": "aspire",
    "request": "launch",
    "name": "Aspire: Launch MyAppHost",
    "program": "${workspaceFolder}/MyAppHost/MyAppHost.csproj"
}
Manage configuration settings
The Aspire: Manage configuration settings command executes aspire config request options and displays the results in the VS Code terminal. Use get and set commands to configure the Aspire CLI. Use the list command to show current configuration values.
Run an Aspire solution in development mode
To run your Aspire application in development mode:
- Ensure you have configured
launch.jsonas described in the Configure launch.json for debugging section. - Open the Run and Debug view by selecting View > Run or pressing Ctrl+Shift+D (Windows/Linux) or Cmd+Shift+D (macOS).
- Select your Aspire launch configuration from the dropdown.
- Select the green Start Debugging button or press F5.
The extension builds and starts the AppHost project, launches the Aspire dashboard in your browser, and enables debugging for all resources in your solution.
Alternatively, you can open an Aspire VS Code terminal using Aspire: Open Aspire terminal and run aspire run --start-debug-session to start a VS Code debug session.
Run or debug from the editor
When an AppHost project is detected in your workspace, you can also run or debug it directly from the editor. Use the run buttons in the editor title bar when viewing an AppHost file.
Publish deployment artifacts
Important
This feature is in Preview.
The Aspire: Publish deployment artifacts command generates deployment artifacts for your Aspire AppHost. This command serializes resources to disk, allowing them to be consumed by deployment tools.
To publish deployment artifacts:
- Open the Command Palette.
- Run the Aspire: Publish deployment artifacts command.
- Select the output location for the generated artifacts.
The command invokes registered publishing callback annotations to generate artifacts such as:
- Bicep files for Azure resources.
- Docker Compose YAML files.
- Kubernetes Helm charts.
For more information about Aspire publishing, see Aspire publishing and deployment overview.
Deploy an Aspire solution
Important
This feature is in Preview.
The Aspire: Deploy app host command deploys the contents of an Aspire AppHost to its defined deployment targets.
To deploy an Aspire solution:
- Open the Command Palette.
- Run the Aspire: Deploy app host command.
- Follow the prompts to select deployment targets and provide any required configuration.
The command publishes deployment artifacts and then invokes deployment callback annotations to deploy resources to the specified targets.
For more information about Aspire deployment, see Aspire publishing and deployment overview.
Open Aspire terminal
The Aspire: Open Aspire terminal command opens a terminal window configured for working with Aspire projects. This terminal provides easy access to Aspire CLI commands and is preconfigured with the appropriate environment variables.
Feedback and issues
To report issues or request features for the Aspire VS Code extension:
- Visit the Aspire GitHub repository.
- Create a new issue and add the
area-extensionlabel.
See also
Collaborate with us on GitHub
The source for this content can be found on GitHub, where you can also create and review issues and pull requests. For more information, see our contributor guide.