Note
Access to this page requires authorization. You can try signing in or changing directories.
Access to this page requires authorization. You can try changing directories.
Applies to: Dynamics 365 Contact Center—embedded, Dynamics 365 Contact Center—standalone, and Dynamics 365 Customer Service
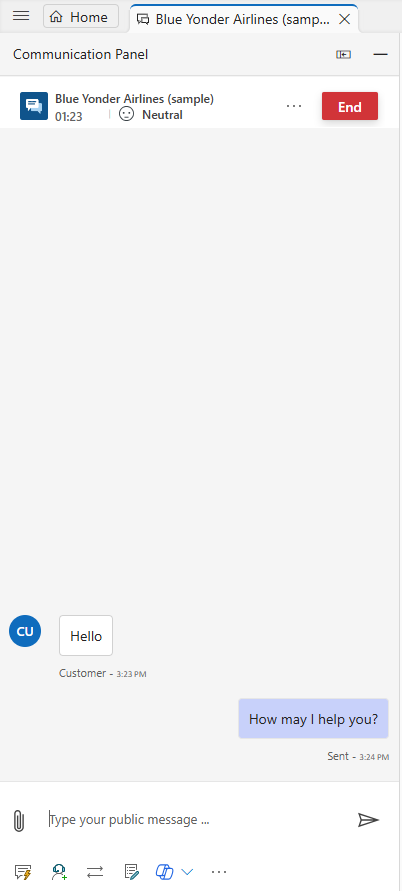
The communication panel is where you, as a customer service representative (service representative or representative), interact with your customer. When you sign in to the application, the communication panel is hidden by default. You can view the communication panel only when you accept an incoming conversation to communicate with the customer.
If you want to minimize the communication panel, select Minimize. The communication panel collapses to a window in the left corner of the Active Conversation form, giving you more screen space.
Use the right edge of the communication panel to resize it to your needs. The resized width of the communication panel is channel specific. For example, if you increase the width of the communication panel for chat, the next time you get a chat conversation, you'll see the resized panel. However, the width remains the same for another channel, such as WhatsApp.
You can resize the communication panel when it's in the expanded mode only.
You can perform the following tasks in the communication panel:
- Send quick replies.
- Search for and share knowledge articles with the customer you're interacting with.
- Transfer the conversation (work item) to another representative or queue.
- Use the consult option if you need help with resolving the work item.
- Generate a summary of the conversation. Learn more in View and share auto-summarized conversations.
- Use Copilot to summarize conversations.
Enhance productivity by using keyboard commands
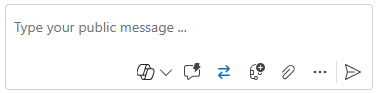
The communication panel has options that you can use to perform actions, such as see quick replies, consult, and transfer, and launch notes control. You can also use keyboard commands to perform these actions.
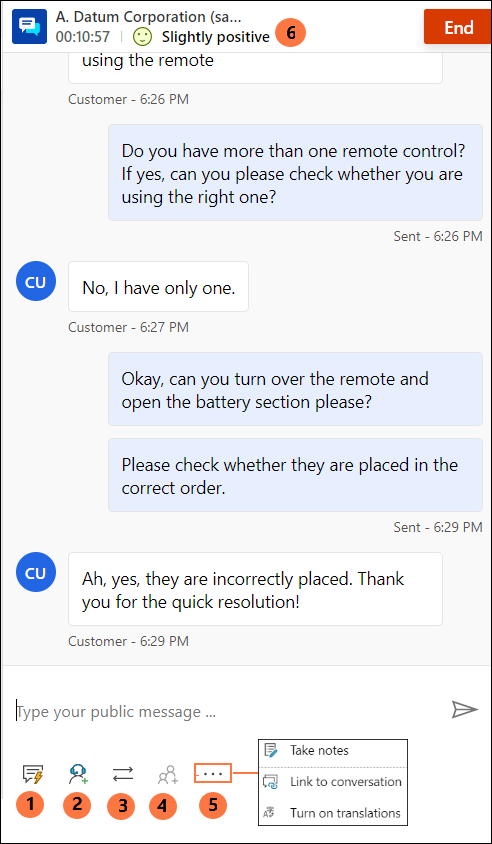
The following table lists the options and the keyboard shortcuts that you can use.
| Annotation | Option | Description | command |
|---|---|---|---|
| 1 | Quick replies | Send templated messages you create as personal quick replies or quick replies created by your administrator | /q or /1 |
| 2 | Consult | View list to consult with other users | /c or /4 |
| 3 | Transfer | View list of queues to transfer the conversation | /t, /tq, or /2 Note: Use /3 to transfer directly to a queue. |
| 4 | Add to chat | Is enabled when the second representative accepts a consult request | |
| 5 | - Take notes - Link to conversation - Translation |
- Take notes specific to conversation - Link the record to this conversation - If translation of messages is enabled, you can turn on or off the translation |
|
| 6 | Customer sentiment | View real-time customer satisfaction levels |
Send quick replies
The communication panel lets you send predefined messages to a customer you're interacting with. Store these predefined messages as quick replies.
Use the following options to use quick replies in your conversation:
Select the Quick replies button to retrieve the messages and send them to the customers and representatives with whom you consult.
Use a keyboard command to see the list of quick replies. Type the forward slash (/) key and the letter q (/q). When you type /q, the Quick replies panel is displayed.
Select View all. The quick replies are displayed in the right pane. You can select a quick reply in the list to send to the customer. You can also choose a language of your choice and search for the quick replies.
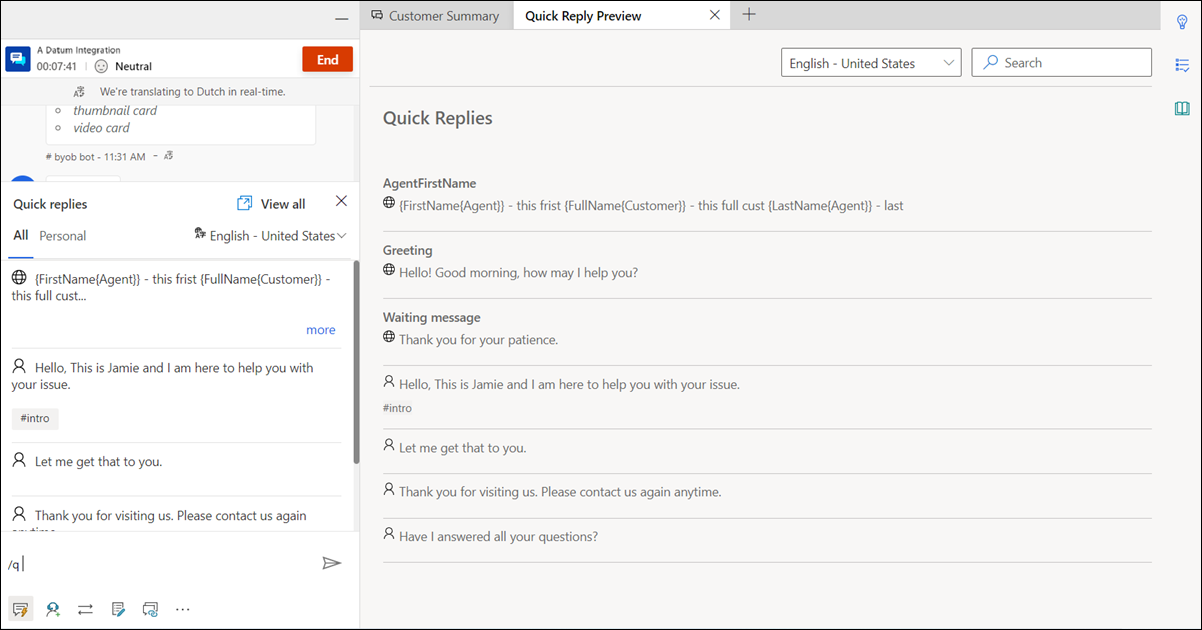
You or the administrator can create the quick replies. If your administrator enables personal quick replies, you can create them. Your quick replies are available on the Personal tab of the Quick replies panel. Quick replies created by the administrator are available on the All tab. Use the personal quick replies when you're in a conversation with a customer by doing the following steps:
Select the quick responses icon
 at the bottom of your conversation window. The Quick replies panel displays the available predefined messages on the All and Personal tabs.
Select the Personal tab, and type the number sign (#) in the compose box to list the tags and search for the personal quick replies that are available for your use.
Use the more option to view the complete text of the quick reply.

Search for quick replies and tags
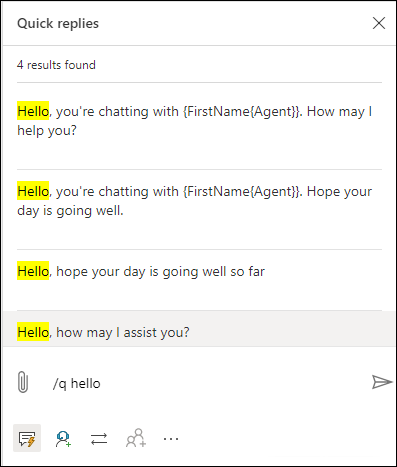
After you type /q in the communication panel messaging area, continue typing any keywords. If the Quick replies library has at least one message associated with the word, it filters and displays the messages to you. You can also use the number sign (#) to search for the predefined messages.
Type any of the following options in the compose box to search for the messages that you can use:
- Type /q, followed by <keyword>, to list messages that match the keyword.
- Type /q, followed by the number sign (#), to list all tags.
- Type /q, followed by <tagname> <keyword>, to list quick replies that match the tag and keyword.
- Type /q, followed by <tagname>, to list all quick replies that match the tag. Additionally, you can also add another tag after the <tagname> for example, type /q, followed by <tagname> <tagname>, to further refine the quick replies matching both the tags.
Share reconnection link with customers
If your administrator configured the reconnection link, you can share the link with customers during the session. Customers can use it to connect back to the chat when they're disconnected for some reason, such as loss of connectivity or restart of their computer. The reconnection link information is available as a quick response.
Important
You can share the reconnection link only when you don't end the chat session by using the End button.
Consult with representative or supervisor
You can consult with other representatives or supervisors by using the consult option. You can invite the representative or supervisor by selecting the Consult button in the communication panel and choosing from the list of available representatives.
Default consult experience
If you enable block capacity for consult, the system blocks the capacity of all the consulted representatives for the consulted conversation that you invoke by using the consult with representatives option on the communication panel.
You can search for representatives to consult within the same queue or other queues.
Select and invite a representative, then start a consultation.
The following events are common to all consult experiences:
The secondary representative receives a notification for the consult request.
When the secondary representative accepts the consult request, a separate pane with an option to end the consult opens beside the communication panel for the primary representative.
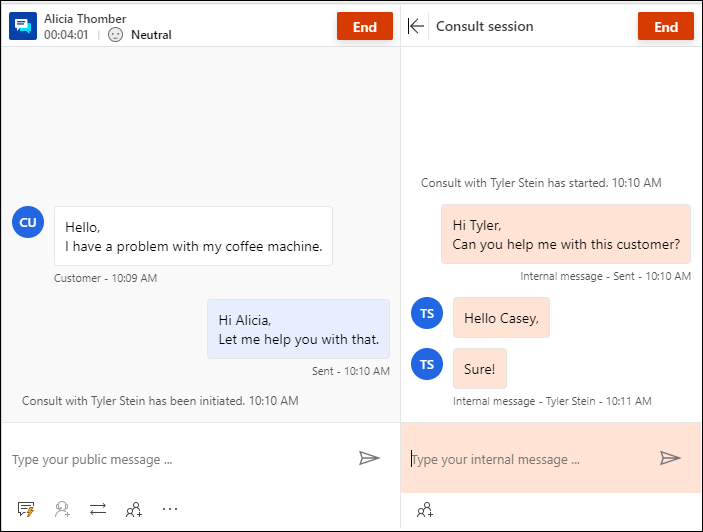
The secondary representative sees a consultation window on the page with an option to leave. They also have a read-only view of the messages exchanged between the primary representative and customer. Consulting on a chat conversation doesn't affect the secondary representative's capacity.
The primary representative can add the secondary representative to the customer conversation by selecting the people icon. The secondary representative can join the customer conversation only after the primary representative selects to add the representative.
If the representative refreshes the browser, the consult session isn't reestablished. However, based on the consult type or block capacity setting, the representative capacity continues to be blocked.
Additionally, the following considerations apply:
- You can use the UI buttons to collapse and expand the consult pane. When the primary representative selects the option to take notes, the consult pane is in collapsed mode.
- The primary representative can end the consult or the secondary representative can leave. After that, the secondary representative can't view the interaction between the primary representative and customer.
You can also use a keyboard command to see the list of representatives and or supervisors who are available for consultation. Type the forward slash (/) key and the letter c (/c). Type forward slash and the letters caq (/caq) to view the list of queues.
Note
We recommend that you invite no more than five consulting representatives when conversing with the customer.
After you type /c in the communication panel messaging area, you can continue typing the name of the participant. If the name is present, the system filters and displays the names to you.
Type /caq (forward slash, letter c, letter a, letter q) or /4 (forward slash, number 4) to search for the queue in the Queues tab of the consult window.
Type /cq (forward slash, letter c, letter q) or /5 (forward slash, number 5) to invoke the consult to queue action.
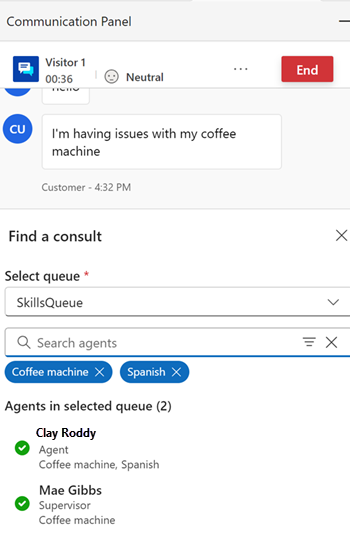
When skill-based routing is enabled, during the consult, the Consult panel shows users sorted by matched skills. The system doesn't check for representative skills and any representative can be consulted.
When a conversation needs to be consulted from one queue to another, the match conditions used in the conversation are reused to find a representative in the new queue. For example, if exact match was used to attach the skills to the conversation, the same condition is used to find the representative in the new queue.
Consult to queue
When you enable Consult to queue for representatives,
The Queue tab appears on the communication panel.
After you select the queue, a timer and option to cancel the consultation appear. The unified routing engine tries to find the best representative to consult with.
The system tries to match a representative until the time-out period set by the administrator.
If the consult request times out, a message is displayed to the representative that no representatives are available.
If the selected representative rejects the consult request or request times out, the consult request ends, and the representative can initiate a fresh request.
Irrespective of the work distribution mode, the consult is always pushed to the representative.
Consult to queue always blocks capacity of the representative.
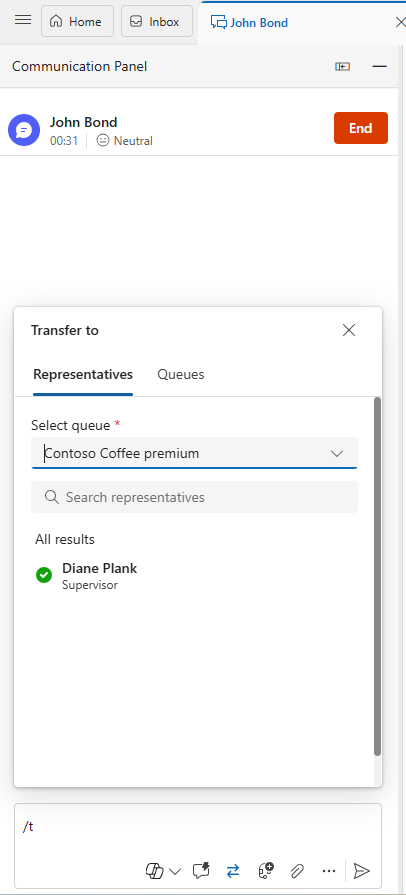
Transfer conversations
If your administrator enables the Transfer to representatives setting in the Copilot Service admin center, the Representatives tab appears when you select the transfer icon. You can transfer the conversation to another representative.
In the communication panel, you can transfer the work item to a representative or queue. If operating hours are configured for the queues, you can successfully transfer the conversation to those queues only that are operational at the transfer time.
Note
When you transfer a conversation to a queue, the assignment strategy runs to find the best representative in the queue. If the queue doesn't have any representatives, the application automatically sets the status of the conversation to Closed.
After the transfer is complete, the representative who initiated the transfer can't participate in the conversation any more. The primary representative's capacity and presence status are updated accordingly.
Representatives whose presence is set to Busy-DND, Away, or Offline don't appear in the representative list of the transfer pane.
Use the keyboard command to see the list of representatives and the supervisor who is available for transfer. Type the forward slash (/) key and the letter t (/t).
Use the keyboard command to see the list of queues to transfer the conversation request. Press the forward slash (/) key and the letters T and Q (/tq).
/t (forward slash, letter t) launches the Representatives and Queues tabs. Select a tab and then select the representative or the queue from the list to transfer the conversation. The /t command keeps the focus on the Representatives tab whereas the /tq command keeps the focus on the Queues tab.
Use /taq (forward slash, letter t, letter a, letter q) or /2 (forward slash, number 2) to search for the queue in the Queues tab of the transfer window.
When skill-based routing is enabled, then during the transfer, the Transfer panel shows users sorted in the order of matching skills. A check for representative skills isn't done by the app and the conversation can be transferred to any representative irrespective of the skill match.
When a conversation needs to be transferred from one queue to another, the matching criteria that were used in the conversation is reused to find a representative in the new queue. For example, if exact match was used to attach the skills to the conversation, the same criteria is used to find the representative in the new queue.
Search representatives or queues for transfer of conversation requests
After you type /t or /tq in the communication panel messaging area, you can continue typing the name of the participant and if it's present, the representative or queues names are filtered and displayed to you.
/taq (forward slash, letter t, letter a, letter q) helps you search for the queue in the Representatives tab of the transfer window.
Take notes specific to conversations
Use the notes option to capture information specific to the conversation when you interact with customers. Use the More commands option in the communication panel to launch the notes.
To learn more, see Take notes specific to conversation.
Link to conversations
Note
Link to conversation isn't applicable to the embedded experience in Dynamics 365 Contact Center.
When you have a conversation with a customer, you can use the link option that's at the bottom of the conversation control to link the conversation to the case, account, or contact record.
To learn more, see Search, link, and unlink a record to the conversation.
Monitor real-time customer satisfaction
As a representative, you can view the real-time customer satisfaction levels on the communication panel. A sentiment icon is displayed at the top of the communication panel based on the previous six customer messages sent to you.
To learn more, see Monitor real-time customer sentiment
Close or end a conversation
When you select the close button (X) to close the communication panel, a confirmation message appears to let you know that the session will end. Select Close on the dialog if you want to end the session.
When you select the End button, the conversation ends, and the customer receives a message that the service representative has ended the conversation.
The conversation behavior is dependent on the channel through which it comes. Learn more in How conversations are handled on close or end.
Related information
Monitor real-time customer sentiment
Introduction to the agent interface
Manage sessions
Manage applications
Manage presence status
View customer information on Active Conversation form
Search for and share knowledge articles
Take notes specific to conversation
View active conversations for an incoming conversation request