Note
Access to this page requires authorization. You can try signing in or changing directories.
Access to this page requires authorization. You can try changing directories.
Note
Community interest groups have now moved from Yammer to Microsoft Viva Engage. To join a Viva Engage community and take part in the latest discussions, fill out the Request access to Finance and Operations Viva Engage Community form and choose the community you want to join.
This article is for customers who sign up for the current versions of finance and operations apps. Partners who work with customers to help them move through the lifecycle of their Microsoft Dynamics 365 Lifecycle Services project also find this information useful.
Lifecycle Services workspace for the current versions of the finance and operations apps
When you sign up for the current versions of finance and operations apps, your subscription includes an Implementation project workspace. After you activate the service, the tenant administrator must sign in at the preferred Lifecycle Services endpoint by using the tenant account. The project workspace is automatically created for your organization. The workspace includes the following elements:
- Enabled features, based on the offer that you selected
- Environments that Microsoft deploys and manages
- Guidance that the Action center provides to help you complete required actions
- A new methodology experience that includes tasks that lock as you move through the implementation
- A more complete history that specifies who completed each methodology phase and task
- Milestones that you can use to track critical project dates
- Various services to help you with your implementation
Methodologies
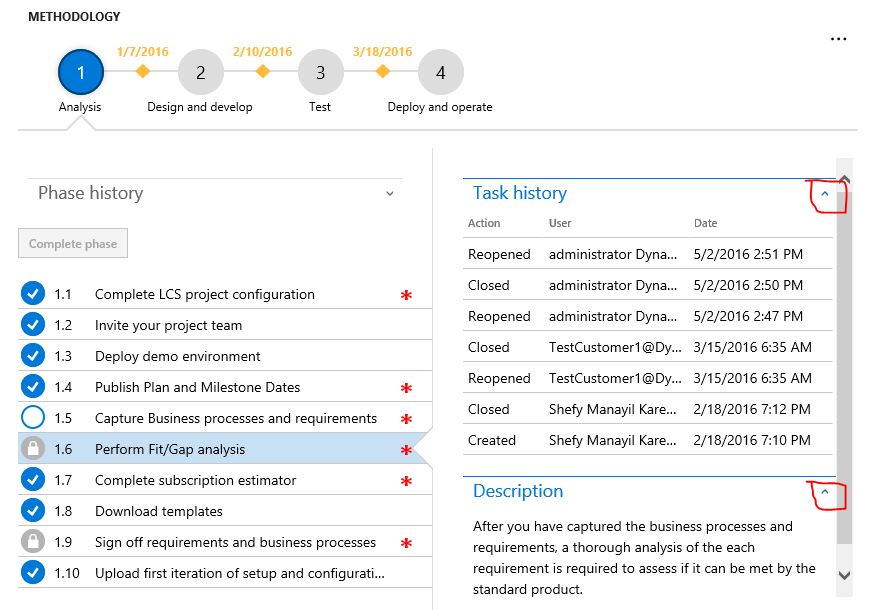
As a customer, you must complete the steps that the methodology outlines to gain access to the production environment. Before you can mark a phase as completed, you must complete the specified mandatory tasks. Locked tasks, such as tasks 1.6 and 1.9 in the following screenshot, unlock after you complete the required actions. To learn which actions must be completed before a specific task can be unlocked, select the lock icon for that task.
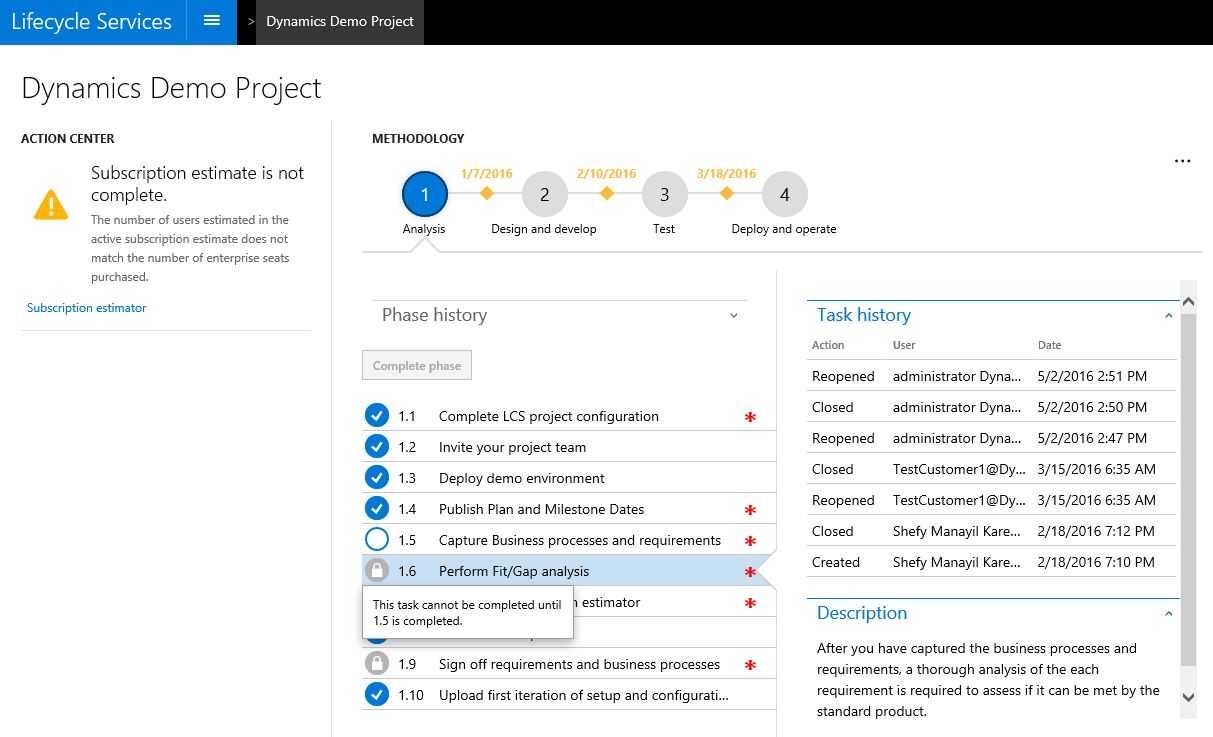 In the case of prerequisites, after you complete the required tasks, you can mark the dependent tasks as completed. For example, in the following screenshot, tasks 1.6 and 1.9 depend on task 1.5. Because task 1.5 is now completed, the two dependent tasks can be marked as completed.

Milestones
Define high-level milestones for your project. Milestones help you track the deliverables that you must complete and your progress toward the milestone goals. Color indicators help you quickly see whether you're behind schedule. For example, in the following screenshot, the milestones are yellow. To enter or update the milestone dates, select the diamond shape in the methodology, and then select the Edit button (pencil icon). You can change milestone dates at any time.
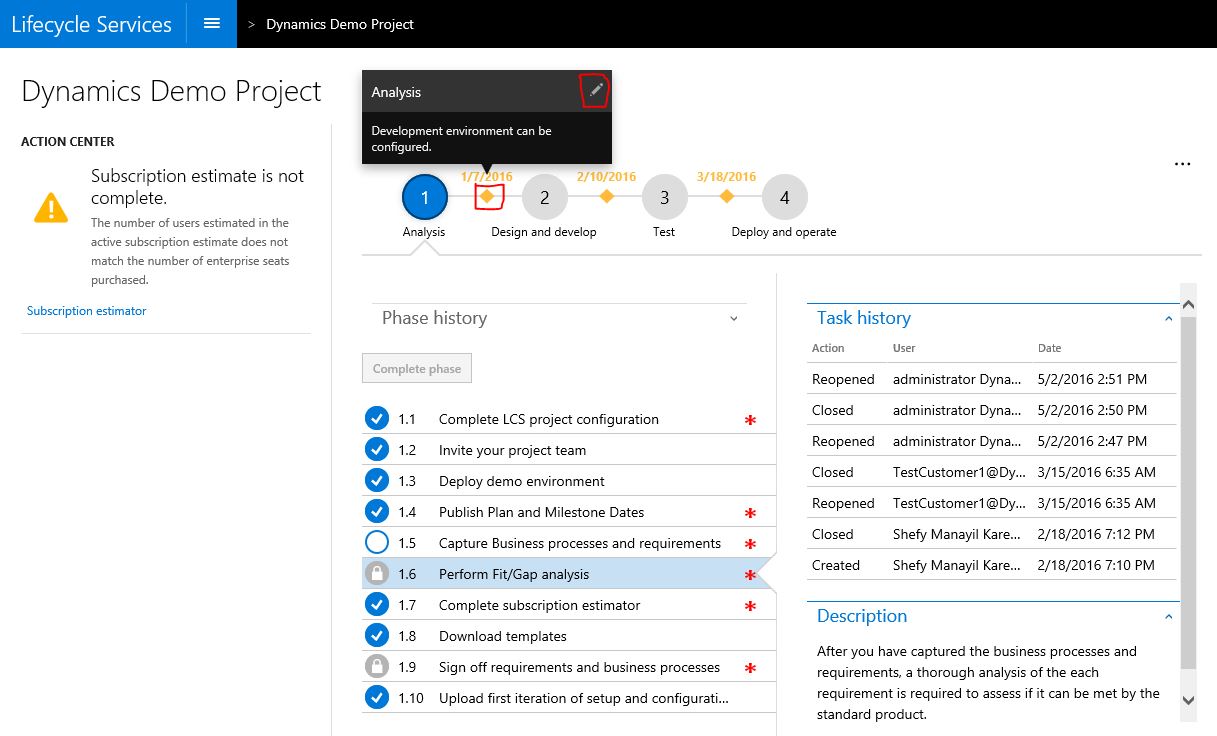
When you finish entering milestones, the Publish plan and milestone task opens, and you can mark it as completed.

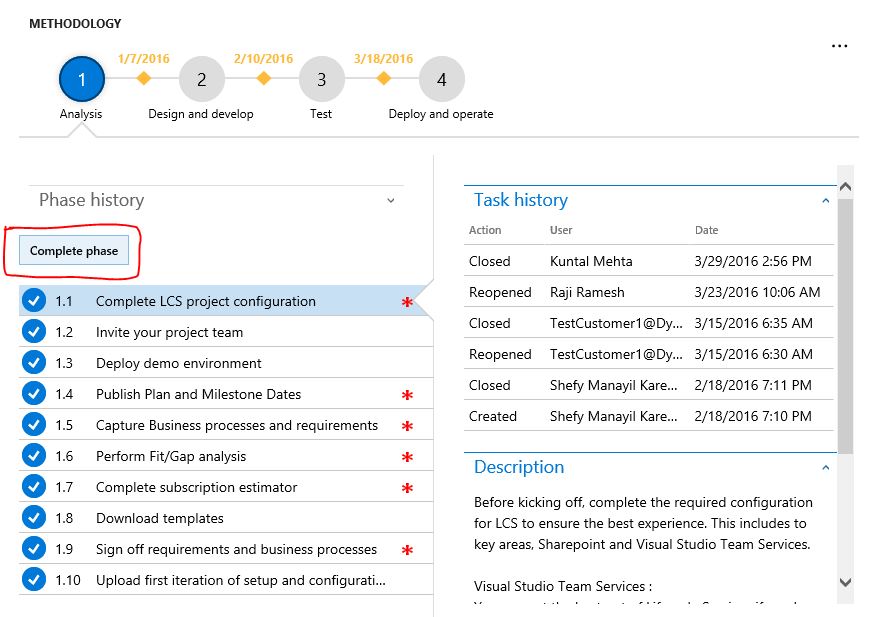
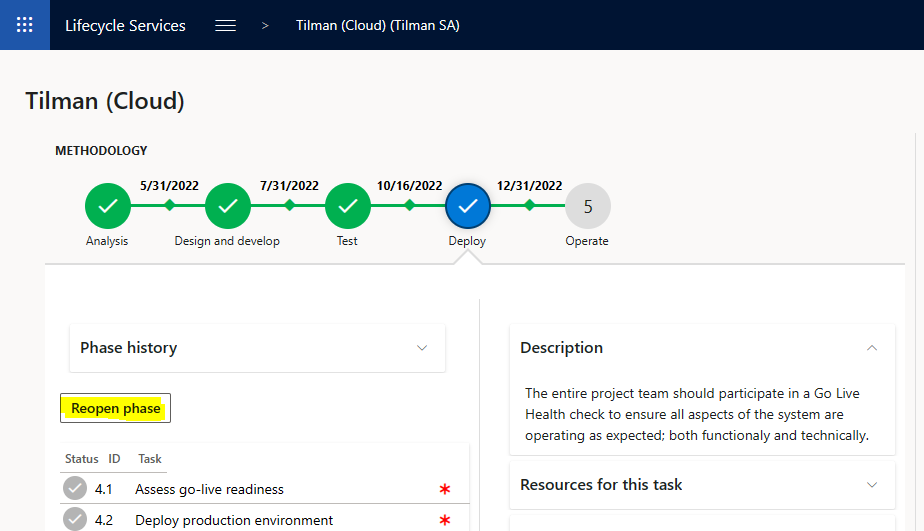
When you complete all the required tasks in a phase, select Complete phase to mark the phase as completed. After you mark a phase as completed, next steps become available in Lifecycle Services.
Reopen a completed milestone
If you need to make any changes to your completed milestone tasks or dates, select the Reopen phase button on a prior milestone. You can then make edits and complete it again.
Methodology description and history
Descriptions can help you understand what is expected of you for a specific methodology task or phase. You can expand the methodology description to learn more about each task, and then collapse the description when you've finished. The task and phase history can tell you when a task or phase was completed or reopened. If you're a project manager, this information can help you stay on top of the high-level tasks that are required for your implementations.
Subscription estimator
Use the Subscription estimator tool to evaluate your subscription requirements for the current versions of the finance and operations apps. To use Subscription estimator, download the usage profile, which is a Microsoft Excel workbook. Then, in the workbook, complete the following worksheets:
- Deployment details
- Instance Characteristics
- Retail & Commerce
After you complete the worksheets, enter the data from the summary sheet into Subscription estimator by selecting + New estimate. You must make one estimate the active estimate. Make sure that the estimate that you mark as active is the same as the offer that you bought through the VL or CSP channel.
New deployment experience
To provision your environment, you must complete a configuration checklist. As you make progress through the methodology, environments become available to you. Select Configure to add deployment information.
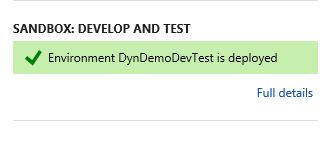
Because the information that you enter determines your experience, carefully review your input. After you enter all the required information, sign out is required for the deployment request. The user who completes the sign out becomes the system administrator on the instance. Verify that the correct user completes the sign out for the deployment. After the sign out is completed, the Microsoft site reliability engagement team reviews the request. After the team reviews the information that you entered, it initiates the provisioning. If the information isn't correct, the team contacts you. After the provisioning is completed, the status is updated to indicate that the environment is deployed, as shown in the following screenshot. If the provisioning takes longer than expected, the Microsoft site reliability engagement team reviews the status and takes appropriate actions. These actions might include contacting you. After the environment is provisioned, select Full details to open the Detailed environment page, where you can sign in to the system, view the monitoring status, or view relevant updates.