Note
Access to this page requires authorization. You can try signing in or changing directories.
Access to this page requires authorization. You can try changing directories.
Applies to:  External tenants (learn more)
You can integrate third-party Web Application Firewall (WAF) solutions with Microsoft Entra External ID to improve overall security. A WAF helps protect your organization from attacks such as distributed denial of service (DDoS), malicious bots, and Open Worldwide Application Security Project (OWASP) Top-10 security risks.
Akamai Web Application Firewall (Akamai WAF) protects your web apps from common exploits and vulnerabilities. By integrating Akamai WAF with Microsoft Entra External ID, you add an extra layer of security for your applications.
This article provides step-by-step guidance for configuring your external tenant with Akamai for Web Application Firewall (WAF) settings.
Solution overview
The solution uses three main components:
- External tenant – Acts as the identity provider (IdP) and authorization server, enforcing custom policies for authentication.
- Azure Front Door (AFD) – Handles custom domain routing and forwards traffic to Microsoft Entra External ID.
- Akamai account – The account used to manage Akamai services. You can create an Akamai account on the Cloud Computing Services page.
- Akamai WAF – The Web Application Protector firewall that manages traffic sent to the authorization server.
Prerequisites
To get started, you need:
- An external tenant.
- A Microsoft Azure Front Door (AFD) configuration. Traffic from the Akamai WAF routes to Azure Front Door, which then routes to the external tenant.
- An Akamai account. If you don’t have one, go to the Security Store to create and purchase your account.
- An Akamai Web Application Firewall (WAF) that manages traffic sent to the authorization server.
- A custom domain in your external tenant that’s enabled with Azure Front Door (AFD).
Akamai setup steps
First you need to set up Akamai WAF to protect your custom URL domains for Microsoft Entra External ID. Follow these steps to configure Akamai WAF.
Configure Akamai WAF
After you have a contract with Akamai, you can access the portal, which lets you manage all your Akamai WAF settings and more. To build your initial setup, you can choose between two options:
- The Quick start wizard provides a guided workflow to help you deploy the building blocks that protect traffic with WAF—recommended if you're new to Akamai. You can update these settings later to meet your requirements.
- The Advanced mode gives you granular control by configuring individual interfaces for detailed customization.
To explore all the capabilities of the Akamai WAF solution, see the user guide.
Akamai provides a quick start wizard to help you onboard new hostnames and protect them with its WAF solution, called App & API Protector.
Ion Standard is an extra solution that improves application performance and optimizes content delivery on the Akamai platform.
To access the wizard, select Get Started > App & API Protector + Ion Standard. The initial screen displays the steps required to complete onboarding. Select Start to begin.
For more information, see the steps in Configure Akamai WAF in the Akamai documentation.

Grant access to the Akamai API to perform actions
Create EdgeGrid authentication credentials and note all the generated information (client_secret, host, access_token, client_token). You reuse these values in Step 3.
Additionally, update the API restrictions for the actions to the appropriate access level shown in the following table:
| Title | Description | Access level |
|---|---|---|
| Microsoft Edge Diagnostics | Microsoft Edge Diagnostics | READ-WRITE |
| Property Manager (PAPI) | Property Manager (PAPI). PAPI requires access to Microsoft Edge Hostnames. Edit your authorizations to add HAPI to your API Client. | READ-ONLY |
Set up an Akamai WAF in External ID
After completing the configuration steps, verify that Akamai WAF is protecting your external tenant by connecting the authentication credentials to the WAF configuration.
WAF provider configuration
- Sign in to the Microsoft Entra admin center as at least a Security Reader.
- If you have access to multiple tenants, use the Settings icon
 in the top menu to switch to the external tenant you created earlier from the Directories + subscriptions menu.
 - Browse to Entra ID > Security Store.
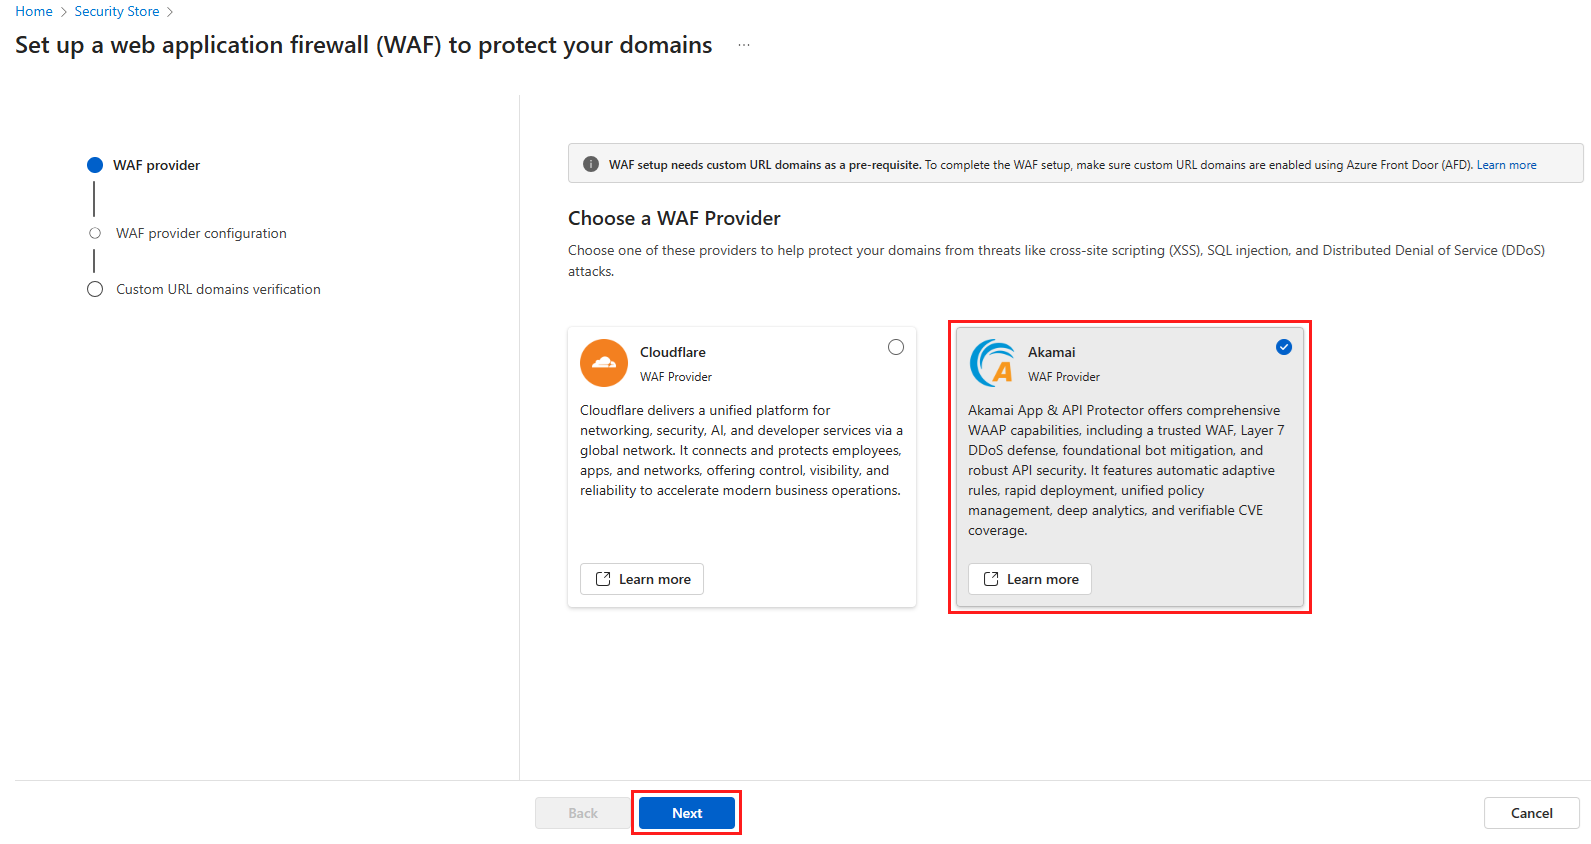
- Select the Protect apps from DDoS with WAF tile by selecting Get started.
- Under Choose a WAF Provider select Akamai and then select Next.
- Create an Akamai account. If you don’t have an account yet, create and purchase one in the Security Store. Then return here to complete the setup.
- Under Configure Akamai WAF, you can select an existing configuration or create a new one. If you're creating a new configuration add the following information:
- Configuration name: A name for the WAF configuration.
- Host prefix: The host prefix from your Akamai EdgeGrid API credentials.
- Client secret: The client secret from your Akamai EdgeGrid API credentials.
- Access token: The access token from your Akamai EdgeGrid API credentials.
- Client token: The client token from your Akamai EdgeGrid API credentials.

- Select Next to go to the next step.
Domain verification
Select the custom URL domains that are enabled through Azure Front Door (AFD) to verify and connect them to your Akamai WAF configuration. This step ensures that the selected domains are protected with advanced security features.
- Select Verify domain to start the verification process.
- Select the custom URL domains you want to protect with Akamai WAF and then select Verify.

- After verification, select Done to complete the process.

Troubleshooting
| Scenario | Details |
|---|---|
| Request blocked by Akamai WAF | When Akamai WAF blocks a request, it returns an Akamai reference code such as 18.6f64d440.1318965461.2f2b078. You can debug this code by using the Security Event Error Translator. |
| Other troubleshooting tools | Various tools are available for troubleshooting. Explore these tools here. |
Additional resources
Manage your security settings
- The security configuration presets set WAF to Alert only mode. To actively mitigate threats with Akamai, change the Action to Deny.
- Akamai provides comprehensive security protections. Learn more here.
- At a minimum:
- Change DoS Protection for the three Rate Limiting policies to Deny after verifying thresholds for your traffic.
- Change the Group Action for Command Injection, Cross-Site Scripting, Local File Inclusion, Remote File Inclusion, SQL Injection, Web Attack Tool, Web Platform Attack, and Web Protocol Attack to Deny.
Manage delivery and performance settings
- Explore useful information to get familiar with Akamai here.
View flagged requests
- View requests flagged (alerted or denied) by Akamai WAF in Web Security Analytics.
- Watch short videos to accelerate your journey.