Microsoft Entra Connect uses the Microsoft Entra Connector account to authenticate and sync identities from Active Directory to Microsoft Entra Connect. This account uses a username and password to authenticate requests.
To enhance the security of the service, we're rolling out an application identity that uses Oauth 2.0 client credential flow with certificate credentials. In this new method, Microsoft Entra or an administrator creates a single tenant non-Microsoft application in Microsoft Entra ID and uses one of the following relevant certificate management options for the credentials.
Microsoft Entra Connect provides three options for application and certificate management:
Note
The Application Administrator role grants the ability to consent for application permissions, except for application permissions for Azure AD Graph and Microsoft Graph. This means that the application administrator can still consent to application permissions for other apps, notably the AWS first-party app, and SSPR first-party app.
This role also grants the ability to manage application credentials. User assigned to this role can add credentials to an application (notably the Connect Sync) and use those credentials to impersonate the application's identity. This might be an elevation of privilege over what the user can do via their role assignments.
Managed by Microsoft Entra Connect (default)
Microsoft Entra Connect manages the application and certificate, which includes creation, rotation, and deletion of the certificate. The certificate is stored in the CURRENT_USER store. For optimal protection of the certificate's private key, we recommend that the machine should use a Trusted Platform Module (TPM) solution to establish a hardware-based security boundary.
When a TPM is available, key service operations are performed within a dedicated hardware environment. In contrast, if a TPM can't be used, Microsoft Entra Connect defaults to storing the certificate in the default Microsoft Software Key Storage Provider and marks the private key as nonexportable for extra protection. Without the hardware isolation provided by a TPM, only software safeguards secure the private key, which doesn't achieve the same level of protection.
For more information on TPM technology, see Trusted Platform Module technology overview.

We recommend the Microsoft Entra Connect certificate management (default) option because we manage the keys and automatically rotate the certificate on expiry.
Microsoft Entra Connect Sync uses the scheduler to check if the certificate is due for rotation and then automatically rotate the certificate. If the scheduler is suspended, automatic certificate rotation can't happen even though Microsoft Entra Connect Sync manages the certificate.
Bring Your Own Certificate
In the Bring Your Own Certificate (BYOC) setup, the administrator manages the certificate credential that the application uses. The administrator is responsible for creating the certificate, rotation, and deletion of unused or expired certificates. The certificate must be stored in the LOCAL_MACHINE store.
The administrator is responsible for securing the private key of the certificate and ensuring that only Microsoft Entra Connect Sync can access the private key for signing.
We recommend that you use a TPM or a Hardware Security Module (HSM) to provide a hardware-based security boundary, as opposed to the default. To check the status of the TPM, use the Get-TPM PowerShell cmdlet.
If you use Hyper-V virtual machines (VMs), you can enable the TPM by selecting Security > Enable Trusted Platform Module. You can do this step only on generation 2 VMs. Generation 1 VMs can't be converted to generation 2 VMs. For more information, see Generation 2 VM security settings for Hyper-V and Enable trusted launch on existing Azure Gen2 VMs.
Bring Your Own Application
In the Bring Your Own Application (BYOA) setup, administrator manages the application that Microsoft Entra Connect Sync uses to authenticate to Microsoft Entra ID, the application permissions, and the certificate credential that the application uses.
The administrator registers a Microsoft Entra app and creates a service principal. The application needs the required permissions to configure Microsoft Graph PowerShell commands.
Note
Microsoft Entra Connect Sync version 2.5.76.0 or later is required to proceed with the following steps to authenticate to Microsoft Entra ID by using application identity.
Note
Using BYOA requires having your own certificate.
Prerequisites
The following prerequisites are required to implement authentication by using application identity.
Important
New Microsoft Entra Connect Sync versions are available only via the Microsoft Entra admin center.
Following up on the What's New communication, new versions of Microsoft Entra Connect Sync are only available on the Microsoft Entra Connect pane within the Microsoft Entra admin center and will no longer be released to the Microsoft Download Center.
The following extra requirements are needed for BYOA and BYOC certificate management option:
- A certificate is created in an HSM or TPM by using a Cryptography API: Next Generation provider. The private key is marked as Non-Exportable. A warning event 1014 is emitted if TPM isn't used. The following certificate configurations are supported:
KeyUsage: DigitalSignatureKeyLength: 2048KeyAlgorithm: RSAKeyHashAlgorithm: SHA256
- The created certificate is stored in the
LOCAL_MACHINE store.
- Grant the Microsoft Entra Connect Sync account permission to perform signing by using the private key.
The following extra requirements are needed for the BYOA application management option:
- The customer creates a certificate as instructed in the preceding BYOC prerequisites.
- The customer registers an application in Microsoft Entra ID and creates a service principal. The necessary permissions are granted to the application.
- The customer registers the certificate with the application.
View the current authentication configuration
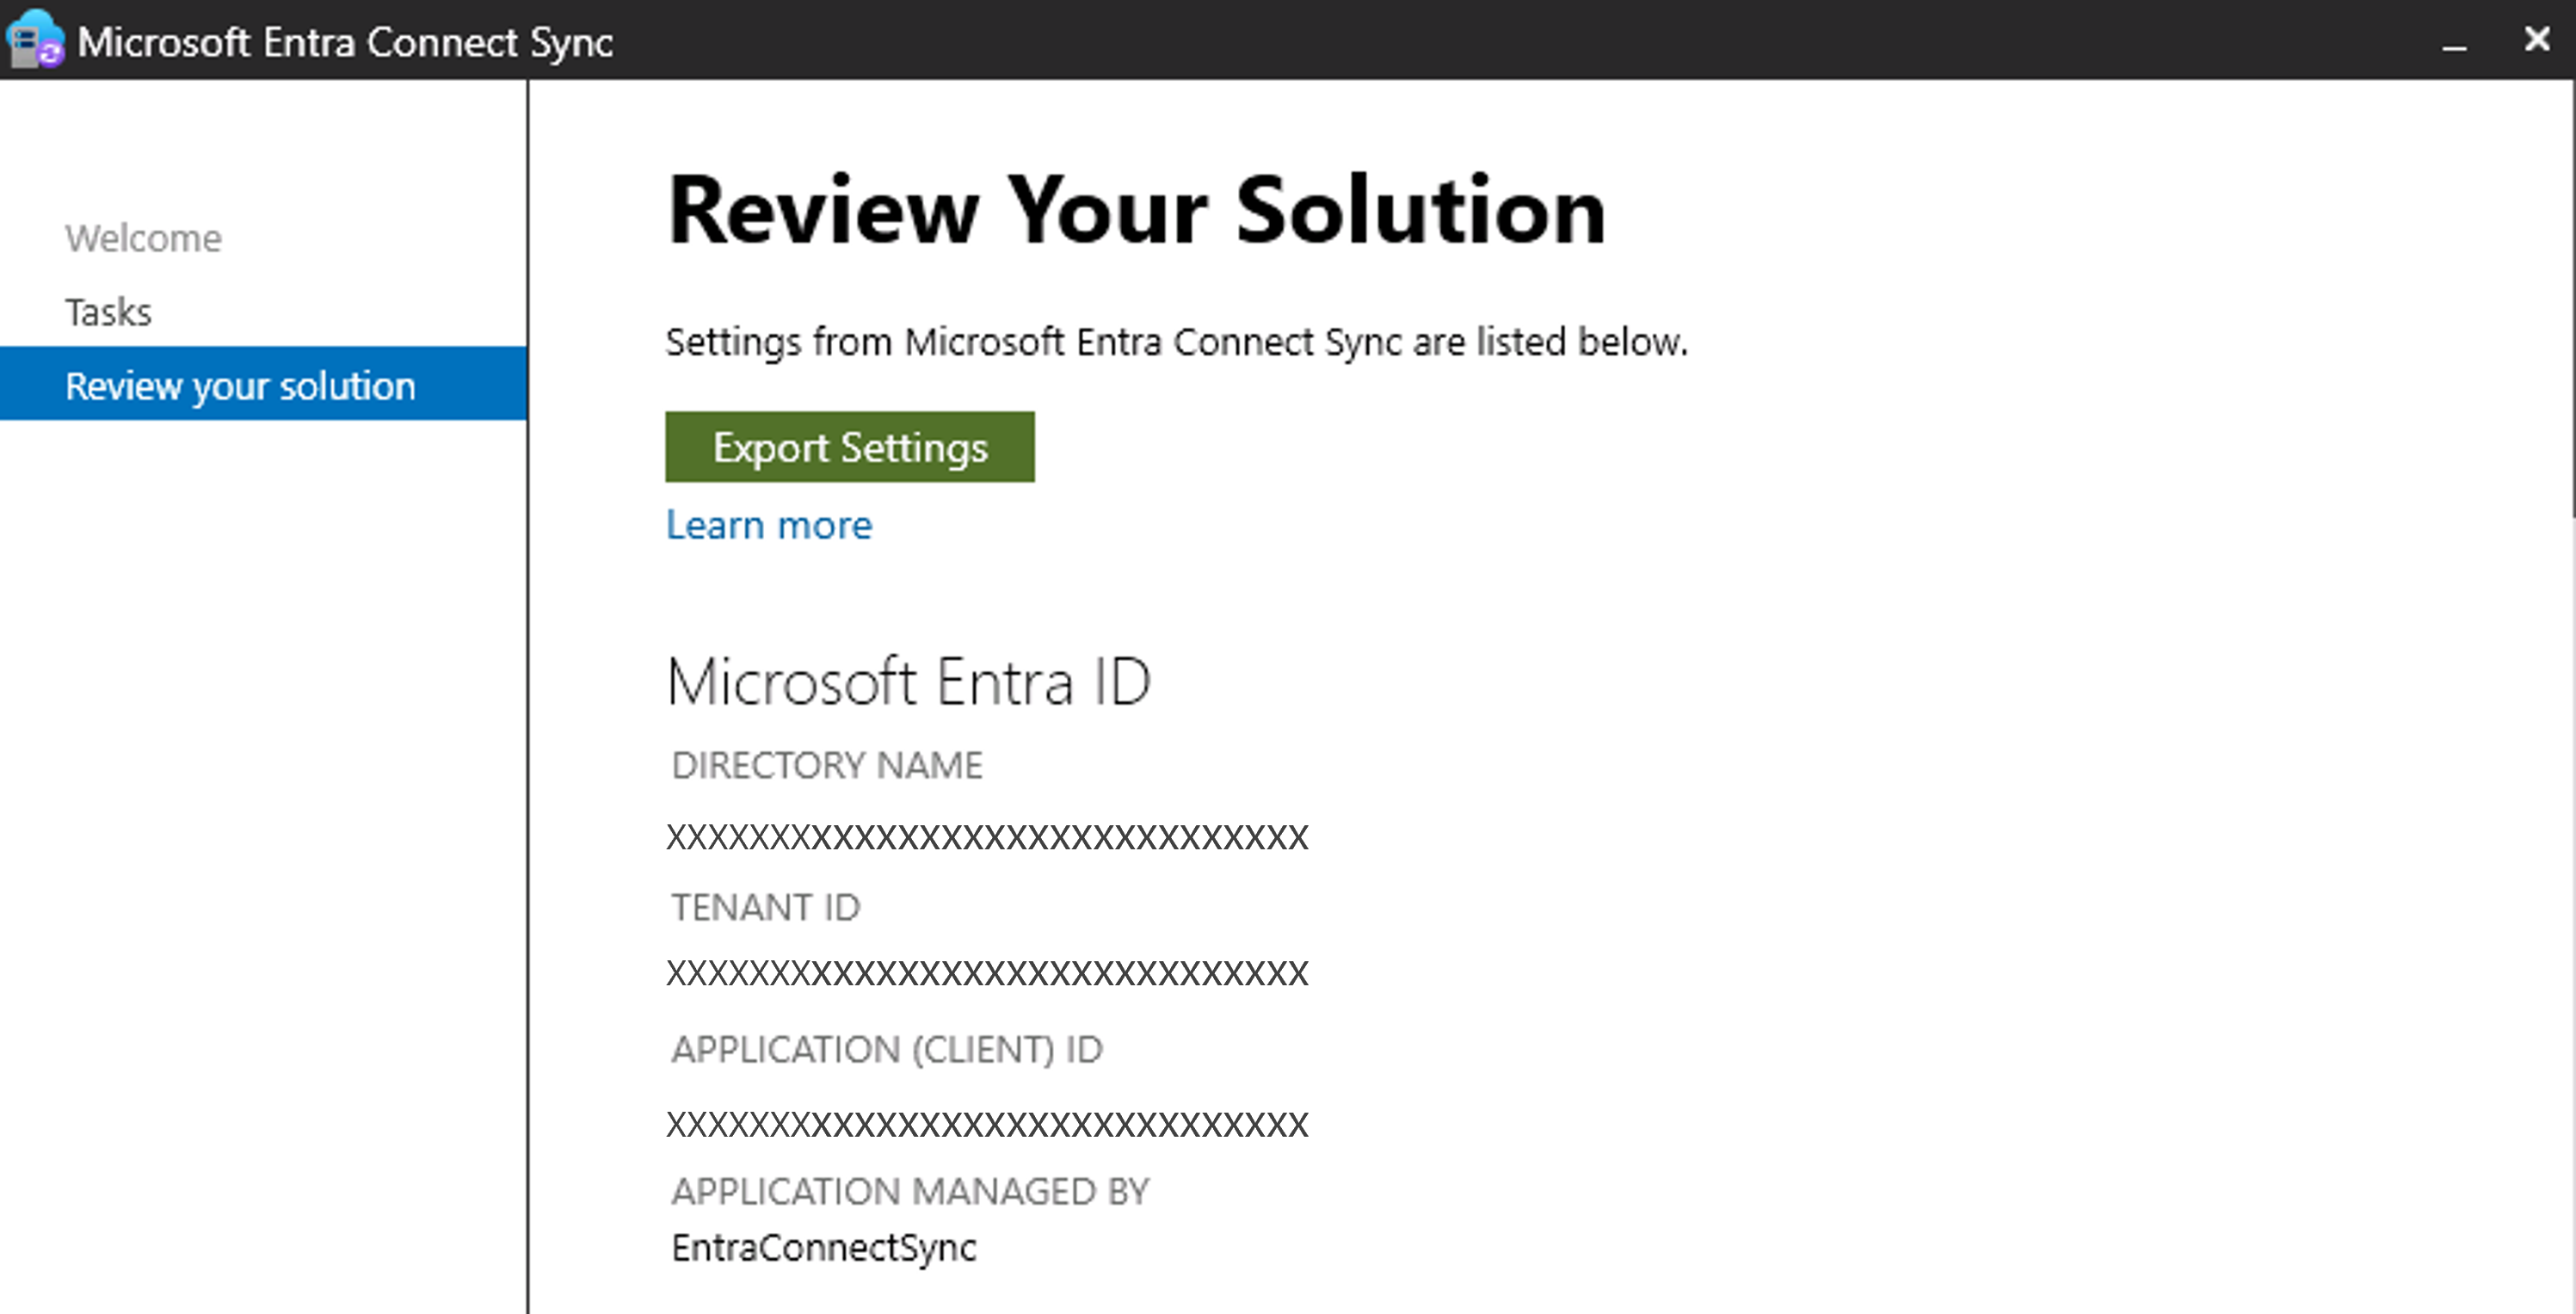
To view the current authentication configuration, run the Wizard and go to Tasks, and then select View or export current configuration.
If the server is configured to use application-based authentication, you should be able to see the application (client) ID as shown in the following screenshot.
Scroll down to the certificate details. The following table provides information about the certificate.
| Property |
Description |
| Certificate managed by |
Whether Microsoft Entra Connect Sync or BYOC manages the certificate |
| Automatic rotation enabled |
Whether automatic rotation or manual rotation is enabled |
| Certificate thumbprint |
Unique identifier for the certificate |
| Certificate SHA256 hash |
A fingerprint for the certificate generated by using the SHA-256 hashing algorithm |
| Subject name |
Identifies the entity associated with the certificate |
| Issued by |
Who is the issuer of the certificate |
| Serial number |
Uniquely identifies the certificate among certificates by the same issuer |
| Not valid before |
The first date that the certificate is valid |
| Not valid after |
The last date that the certificate is valid |

If the server is using username and password, you should be able to see the account name as shown in the following screenshot.

Installation and upgrade (managed by Microsoft Entra Connect)
The Microsoft Entra Connect Sync managed application and credential is automatically set up during initial installation or manual interactive upgrades. To confirm that Microsoft Entra Connect is using the application identity, you can view the current authentication configuration.
Onboard to application-based authentication
Automatic
Starting with version 2.5.76.0 or higher, the service will automatically configure application authentication within a six-hour window if the service is using username and password to authenticate to Microsoft Entra ID.
Manual
If application authentication wasn't automatically configured, you can switch to application-based authentication manually.
If you want to configure application-based authentication using the default option (Managed by Microsoft Entra Connect), you can use the wizard. However, if you want to configure application-based authentication using BYOC or BYOA, you must use PowerShell.
Start the Microsoft Entra Connect wizard
Go to Additional tasks > Configure application-based authentication to Microsoft Entra ID and then follow the prompts.

Note
Ensure that you're on the Microsoft Entra Connect server and that the Microsoft Entra Connect Sync (ADSync) PowerShell module is installed.
Use the current authentication configuration wizard view to confirm that Microsoft Entra Connect is using the application identity, or use PowerShell command to verify the current authentication method.
Get-ADSyncEntraConnectorCredential
This command returns the ConnectorIdentityType value currently in use. The value can be ServiceAccount or Application. If the authentication is using ServiceAccount, then proceed with the following steps to switch from ServiceAccount to Application. If the authentication is using Application, then skip to Change Application certificate to your own certificate steps.
Switch from ServiceAccount to Application
Start the Microsoft Entra Connect wizard.
Go to Additional tasks > Configure application-based authentication to Microsoft Entra ID and then follow the prompts.
Change application certificate to your own certificate
Export the certificate (.cer) file to upload it to Microsoft Entra app registration using one of the following options:
Option 1: Using mmc console to export a certificate from the Windows certificate stores:
Open the certificate management console for the local computer by running the following command. Some methods of running this command are from the Start menu, the Windows Run prompt, PowerShell prompt, or command prompt.
certlm.msc
In the console tree, navigate to the certificate you want to export.
Right-click the certificate, select All Tasks, and then select Export.
On the screen, select Welcome to the Certificate Export Wizard, select Next.
If prompted to export the private key, select No, do not export the private key, then select Next.
For the file format, select DER encoded binary X.509 (.CER), then select Next.
Enter or browse to the file path, then select Next.
Review the summary, then select Finish.
Option 2: Use PowerShell to export the certificate:
$cerFile  = "C:\Temp\MyBYOC.cer"
$cert = Get-ChildItem Cert:\LocalMachine\My | Where-Object {$_.Subject -eq 'CN=YOUR_CERTIFICATE_SUBJECT'}
Export-Certificate -Cert $cert -FilePath $cerFile
In the Microsoft Entra Admin Center, navigate to Entra ID App Registrations, and select the application that was created during the installation, configuration or the upgrade of Connect Sync. To confirm which application is used by Connect Sync, you can run the Get-ADSyncEntraConnectorCredential command to retrieve the application (client) ID. The username format is {AppID}@tenantName.onmicrosoft.com. Under Certificate & secrets select Upload certificate and upload the exported .cer file and select Add:

Get the certificate Hash using the following PowerShell commands
$cert = Get-ChildItem Cert:\LocalMachine\My | Where-Object {$_.Subject -eq 'CN=YOUR_CERTIFICATE_SUBJECT'}

# Get raw data from X509Certificate cert
$certRawDataString = $cert.GetRawCertData()

# Compute SHA256Hash of certificate
$sha256 = [System.Security.Cryptography.SHA256]::Create()
$hashBytes = $sha256.ComputeHash($certRawDataString)
If you're using PowerShell version 7, use the following command:
$certHash = [System.Convert]::ToHexString($hashBytes)
If you're using older PowerShell versions or PowerShell ISE, use the following command:
$certHash = ($hashBytes|ForEach-Object ToString X2) -join ''
Grant Connect Sync (ADSync) service account permissions to retrieve the certificate private key:
$rsaCert = [System.Security.Cryptography.X509Certificates.RSACertificateExtensions]::GetRSAPrivateKey($cert)
If the certificate was issued by a Certificate Authority (CA), use the following $path variable:
$path = "$env:ALLUSERSPROFILE\Microsoft\Crypto\RSA\MachineKeys\$($rsaCert.key.UniqueName)"
If you're using a self-signed certificate, use the following $path variable:
$path = "$env:ALLUSERSPROFILE\Microsoft\Crypto\Keys\$($rsaCert.key.UniqueName)"
Run the following commands to grant the permission:
$permissions = Get-Acl -Path $path
$serviceAccount = (Get-ItemProperty -Path HKLM:\SYSTEM\CurrentControlSet\Services\ADSync -Name ObjectName).ObjectName
$rule = New-Object Security.Accesscontrol.FileSystemAccessRule "$serviceAccount", "read", allow
$permissions.AddAccessRule($rule)
Set-Acl -Path $path -AclObject $permissions

# Verify permissions
$permissions = Get-Acl -Path $path
$permissions.Access
Disable the sync scheduler
Set-ADSyncScheduler -SyncCycleEnabled $false
Import ADSync module
If you're using PowerShell version 7, use the following command to import ADSync module:
Import-Module -Name "C:\Program Files\Microsoft Azure AD Sync\Bin\ADSync" -UseWindowsPowerShell
If you're using older PowerShell versions or PowerShell ISE, use following command to import ADSync module:
Import-Module -Name "C:\Program Files\Microsoft Azure AD Sync\Bin\ADSync"
Update the application certificate using the certificate rotation command
Invoke-ADSyncApplicationCredentialRotation -CertificateSHA256Hash $certHash
Use the current authentication configuration wizard view to confirm that Microsoft Entra Connect is using your new certificate.
Enable the sync scheduler
Set-ADSyncScheduler -SyncCycleEnabled $true
Remove the Directory Synchronization Account (DSA) from Microsoft Entra ID (recommended).
Create the application using PowerShell
Connect to your tenant
Connect-MgGraph -scopes "Application.ReadWrite.All", "AppRoleAssignment.ReadWrite.All"
Create and initialize BYOA application
$BYOApp = New-MgApplication -DisplayName "My BYOA For Connect Sync serverName"
Create and initialize BYOA service principal name
$BYOA_ServicePrincipal = New-MgServicePrincipal -AppId $BYOApp.AppId
Initialize ConnectSyncAppId and ConnectSyncSPId variables:
$ConnectSyncAppId = $BYOApp.AppId
$ConnectSyncSPId = $BYOA_ServicePrincipal.Id
Initialize SynchronizationServiceAppId variable that represents the application (client) ID for Microsoft Entra AD Synchronization Service. The value is 6bf85cfa-ac8a-4be5-b5de-425a0d0dc016 for all clouds:
$SynchronizationServiceAppId = "6bf85cfa-ac8a-4be5-b5de-425a0d0dc016"
Initialize SynchronizationServiceSPId variable:
$SynchronizationServiceSPId = (Get-MgServicePrincipal -Filter "appId eq '$SynchronizationServiceAppId'").Id
Initialize SynchronizationServiceAppRoleId variable:
$SynchronizationServiceAppRoleId = (Get-MgServicePrincipal -Filter "appId eq '$SynchronizationServiceAppId'").AppRoles | Where-Object {$_.Value -eq "ADSynchronization.ReadWrite.All"} | Select-Object -ExpandProperty Id
Note
If you're using Password Writeback feature then proceed with the following steps, otherwise you can skip to step 11.
Initialize PasswordResetServiceAppId variable:
For all clouds except Arlington use:
$PasswordResetServiceAppId = "93625bc8-bfe2-437a-97e0-3d0060024faa"
For Arlington cloud use:
$PasswordResetServiceAppId = "2e5ecfc8-ea79-48bd-8140-c19324acb278"
Initialize PasswordResetServiceSPId variable:
$PasswordResetServiceSPId = (Get-MgServicePrincipal -Filter "appId eq '$PasswordResetServiceAppId'").Id
Initialize Password Reset AppRoles variables:
$PasswordResetServiceServiceOffboardClientAppRoleId = (Get-MgServicePrincipal -Filter "appId eq '$PasswordResetServiceAppId'").AppRoles | Where-Object {$_.Value -eq "PasswordWriteback.OffboardClient.All"} | Select-Object -ExpandProperty Id
$PasswordResetServiceServiceRegisterClientAppRoleId = (Get-MgServicePrincipal -Filter "appId eq '$PasswordResetServiceAppId'").AppRoles | Where-Object {$_.Value -eq "PasswordWriteback.RegisterClientVersion.All"} | Select-Object -ExpandProperty Id
$PasswordResetServiceServiceRefreshClientAppRoleId = (Get-MgServicePrincipal -Filter "appId eq '$PasswordResetServiceAppId'").AppRoles | Where-Object {$_.Value -eq "PasswordWriteback.RefreshClient.All"} | Select-Object -ExpandProperty Id
Initialize RequiredResourceAccess variable to configure required permissions for Microsoft Entra AD Synchronization Service and Microsoft password reset service:
If you don’t use Password writeback, then use:
$RequiredResourceAccess = @(
    @{
        ResourceAppId = $SynchronizationServiceAppId
        ResourceAccess = @(
            @{
                Id = $SynchronizationServiceAppRoleId
                Type = "Role"
            }
        )
    }
)
If you use Password writeback, then use:
$RequiredResourceAccess = @(
    @{
        ResourceAppId = $SynchronizationServiceAppId
        ResourceAccess = @(
            @{
                Id = $SynchronizationServiceAppRoleId
                Type = "Role"
            }
        )
    },
    @{
        ResourceAppId = $PasswordResetServiceAppId
        ResourceAccess = @(
            @{
                Id = $PasswordResetServiceServiceOffboardClientAppRoleId
                Type = "Role"
            },
            @{
                Id = $PasswordResetServiceServiceRegisterClientAppRoleId
                Type = "Role"
            },
            @{
                Id = $PasswordResetServiceServiceRefreshClientAppRoleId
                Type = "Role"
            }
        )
    }
)
Update the application with the required permissions:
Update-MgApplication -ApplicationId $BYOApp.Id -RequiredResourceAccess $RequiredResourceAccess
Create app role assignment for Synchronization Service:
$SyncAppRoleAssignment = New-MgServicePrincipalAppRoleAssignment -ServicePrincipalId $BYOA_ServicePrincipal.Id -PrincipalId $BYOA_ServicePrincipal.Id -ResourceId $SynchronizationServiceSPId -AppRoleId $SynchronizationServiceAppRoleId
Note
If you're using Password Writeback feature then proceed with following steps, otherwise you can skip to step #15.
Create app role assignment for Password Writeback feature:
 $OffboardAppRoleAssignment = New-MgServicePrincipalAppRoleAssignment -ServicePrincipalId $BYOA_ServicePrincipal.Id -PrincipalId $BYOA_ServicePrincipal.Id -ResourceId $PasswordResetServiceSPId -AppRoleId $PasswordResetServiceServiceOffboardClientAppRoleId

 $RegisterAppRoleAssignment = New-MgServicePrincipalAppRoleAssignment -ServicePrincipalId $BYOA_ServicePrincipal.Id -PrincipalId $BYOA_ServicePrincipal.Id -ResourceId $PasswordResetServiceSPId -AppRoleId $PasswordResetServiceServiceRegisterClientAppRoleId

 $RefreshAppRoleAssignment = New-MgServicePrincipalAppRoleAssignment -ServicePrincipalId $BYOA_ServicePrincipal.Id -PrincipalId $BYOA_ServicePrincipal.Id -ResourceId $PasswordResetServiceSPId -AppRoleId $PasswordResetServiceServiceRefreshClientAppRoleId
Export the certificate (.cer) file to upload it to Microsoft Entra app registration using one of the following options:
Option 1: Using mmc console to export a certificate from the Windows certificate stores:
Open the certificate management console for the local computer by running the following command. Some methods of running this command are from the Start menu, the Windows Run prompt, PowerShell prompt, or command prompt.
certlm.msc
In the console tree, navigate to the certificate you want to export.
Right-click the certificate, select All Tasks, and then select Export.
On the Welcome to the Certificate Export Wizard screen, select Next.
If prompted to export the private key, select No, do not export the private key, then select Next.
For the file format, select DER encoded binary X.509 (.CER), then select Next.
Enter or browse to the file path, then select Next.
Review the summary, then select Finish.
Option 2: Use PowerShell to export the certificate:
$cerFile  = "C:\Temp\MyBYOC.cer"
$cert = Get-ChildItem Cert:\LocalMachine\My | Where-Object {$_.Subject -eq 'CN=YOUR_CERTIFICATE_SUBJECT'}
Export-Certificate -Cert $cert -FilePath $cerFile
In the Microsoft Entra admin center, navigate to Entra ID > App Registration, and select the application that was created in step 2. Under Certificate & secrets, select Upload certificate and upload the exported .cer file and select Add:

Get the certificate Hash using the following PowerShell commands:
$cert = Get-ChildItem Cert:\LocalMachine\My | Where-Object {$_.Subject -eq 'CN=YOUR_CERTIFICATE_SUBJECT'}

# Get raw data from X509Certificate cert
$certRawDataString = $cert.GetRawCertData()

# Compute SHA256Hash of certificate
$sha256 = [System.Security.Cryptography.SHA256]::Create()
$hashBytes = $sha256.ComputeHash($certRawDataString)
If you're using PowerShell version 7, use the following command:
$certHash = [System.Convert]::ToHexString($hashBytes)
If you're using older PowerShell versions or PowerShell ISE, use the following command:
$certHash = ($hashBytes|ForEach-Object ToString X2) -join ''
Grant Connect Sync (ADSync) service account permissions to retrieve the certificate private key:
$rsaCert = [System.Security.Cryptography.X509Certificates.RSACertificateExtensions]::GetRSAPrivateKey($cert)
If the certificate was issued by a Certificate Authority (CA), use the following $path variable:
$path = "$env:ALLUSERSPROFILE\Microsoft\Crypto\RSA\MachineKeys\$($rsaCert.key.UniqueName)"
If you're using a self-signed certificate, use the following $path variable:
$path = "$env:ALLUSERSPROFILE\Microsoft\Crypto\Keys\$($rsaCert.key.UniqueName)"
Run the following commands to grant the permission:
$permissions = Get-Acl -Path $path
$serviceAccount = (Get-ItemProperty -Path HKLM:\SYSTEM\CurrentControlSet\Services\ADSync -Name ObjectName).ObjectName
$rule = New-Object Security.Accesscontrol.FileSystemAccessRule "$serviceAccount", "read", allow
$permissions.AddAccessRule($rule)
Set-Acl -Path $path -AclObject $permissions

# Verify permissions
$permissions = Get-Acl -Path $path
$permissions.Access
Disable the sync scheduler
Set-ADSyncScheduler -SyncCycleEnabled $false
Import ADSync module:
If you're using PowerShell version 7, use the following command to import ADSync module:
Import-Module -Name "C:\Program Files\Microsoft Azure AD Sync\Bin\ADSync" -UseWindowsPowerShell
Switch to using your new application for authentication
Add-ADSyncApplicationRegistration -CertificateSHA256Hash $certHash –ApplicationAppId $ConnectSyncAppId
Use the current authentication configuration wizard view to confirm that Microsoft Entra Connect is using the application identity, or use PowerShell command to verify the current authentication method.
Get-ADSyncEntraConnectorCredential
Enable the sync scheduler
Set-ADSyncScheduler -SyncCycleEnabled $true
Remove the Directory Synchronization Account (DSA) from Microsoft Entra ID (recommended).
Remove a legacy service account
After you transition to application-based authentication and Microsoft Entra Connect Sync is working as expected, we strongly recommend that you remove the legacy DSA username and password service account by using PowerShell. If you use a custom account that can't be removed, deprivilege it and remove the DSA role from it.
Follow these steps to remove the legacy service account.
Add the service account username and password.
$HACredential = Get-Credential
You're prompted to enter the Microsoft Entra administrator UserPrincipalName value and the password. Enter the username and password.
Next, remove the service account.
Remove-ADSyncAADServiceAccount -AADCredential $HACredential -Name <$serviceAccountName>
The ServiceAccountName value is the first part of the UserPrincipalName value of the service account used in Microsoft Entra ID. You can find this user in the list of users in the Microsoft Entra admin center. If the UPN is Sync_Server_id@tenant.onmicrosoft.com, use Sync_Server_id as the ServiceAccountName value.
Roll back to a legacy service account by using PowerShell
If you want to go back to the legacy service account, you can use PowerShell to revert to using the service account to promptly mitigate the issue. Use the following steps to roll back to the service account.
As part of the rollback, we're re-creating the DSA account. This new account might take up to 15 minutes to take effect, so you might get an "Access Denied" error when you reenable the sync cycle.
Disable the scheduler to ensure that no sync cycles run until this change is completed.
Set-ADSyncScheduler -SyncCycleEnabled $false
Add the service account. You're prompted to enter the Microsoft Entra administrator UserPrincipalName value and the password. Enter the credentials.
Add-ADSyncAADServiceAccount
Get the current authentication mechanism and confirm that the ConnectorIdentityType value is back to ServiceAccount.
Get-ADSyncEntraConnectorCredential
Reenable the scheduler to begin the synchronization service.
Set-ADSyncScheduler -SyncCycleEnabled $true
Certificate rotation
Microsoft Entra Connect warns if the certificate rotation is due. That is, if expiration is less than or equal to 150 days. It emits an error if the certificate is already expired. You can find these warnings (Event ID 1011) and errors (Event ID 1012) in the Application event log.
This message is emitted at the scheduler frequency if the scheduler isn't suspended. Run Get-ADSyncScheduler to see if the scheduler is suspended.
Automatic
If Microsoft Entra Connect manages the certificate, no action is required from you unless the scheduler is suspended, Microsoft Entra Connect Sync adds the new certificate credential to the application, and tries to remove the old certificate credential.
If it fails to remove the old certificate credential, an error event appears in the application logs in the Event Viewer.
If you see this error, run the following cmdlet in PowerShell to clean up the old certificate credential from Microsoft Entra ID. The cmdlet takes the CertificateId value of the certificate that must be removed, which you can obtain from the log or the Microsoft Entra admin center.
Remove-EntraApplicationKey -CertificateId <certificateId>
Manual
If your configuration isn't eligible for automatic certificate rotation, you can rotate the certificate at any point in time, even if the current certificate is still not due for rotation or the current certificate expired.
- Start the Microsoft Entra Connect wizard
- Go to Additional tasks > Rotate application certificate and then follow the prompts.

When you get a warning from Microsoft Entra Connect Sync, we highly recommend that you generate a new key and certificate and rotate the certificate that Microsoft Entra Connect Sync uses.
Export the certificate (.cer) file to upload it to Microsoft Entra app registration using one of the following options:
Option 1: Using mmc console to export a certificate from the Windows certificate stores:
Open the certificate management console for the local computer by running the following command. Some methods of running this command are from the Start menu, the Windows Run prompt, PowerShell prompt, or command prompt.
certlm.msc
In the console tree, navigate to the certificate you want to export.
Right-click the certificate, select All Tasks, and then select Export.
On the screen Welcome to the Certificate Export Wizard, select Next.
If prompted to export the private key, select No, do not export the private key, then select Next.
For the file format, select DER encoded binary X.509 (.CER), then select Next.
Enter or browse to the file path, then select Next.
Review the summary, then select Finish.
Option 2: Use PowerShell to export the certificate:
$cerFile  = "C:\Temp\MyBYOC.cer"
$cert = Get-ChildItem Cert:\LocalMachine\My | Where-Object {$_.Subject -eq 'CN=YOUR_CERTIFICATE_SUBJECT'}
Export-Certificate -Cert $cert -FilePath $cerFile
In the Microsoft Entra admin center navigate to App Registration, and select the application that was created during the installation, configuration or the upgrade of Connect Sync. To confirm which application used by Connect Sync, you can run the Get-ADSyncEntraConnectorCredential command to retrieve the application (client) ID. The username format is {AppID}@tenantName.onmicrosoft.com. Under Certificate & secrets, select Upload certificate and upload the exported .cer file and select Add:
Get the certificate Hash using the following PowerShell commands
$cert = Get-ChildItem Cert:\LocalMachine\My | Where-Object {$_.Subject -eq 'CN=YOUR_CERTIFICATE_SUBJECT'}

# Get raw data from X509Certificate cert
$certRawDataString = $cert.GetRawCertData()

# Compute SHA256Hash of certificate
$sha256 = [System.Security.Cryptography.SHA256]::Create()
$hashBytes = $sha256.ComputeHash($certRawDataString)
If you're using PowerShell version 7, use the following command:
$certHash = [System.Convert]::ToHexString($hashBytes)
If you're using older PowerShell versions or PowerShell ISE, use following command:
$certHash = ($hashBytes|ForEach-Object ToString X2) -join ''
Grant Connect Sync (ADSync) service account permissions to retrieve the certificate private key:
$rsaCert = [System.Security.Cryptography.X509Certificates.RSACertificateExtensions]::GetRSAPrivateKey($cert)
If the certificate was issued by a Certificate Authority (CA), use following $path variable:
$path = "$env:ALLUSERSPROFILE\Microsoft\Crypto\RSA\MachineKeys\$($rsaCert.key.UniqueName)"
If you're using a self-signed certificate, use the following $path variable:
$path = "$env:ALLUSERSPROFILE\Microsoft\Crypto\Keys\$($rsaCert.key.UniqueName)"
Run the following commands to grant the permission:
$permissions = Get-Acl -Path $path
$serviceAccount = (Get-ItemProperty -Path HKLM:\SYSTEM\CurrentControlSet\Services\ADSync -Name ObjectName).ObjectName
$rule = New-Object Security.Accesscontrol.FileSystemAccessRule "$serviceAccount", "read", allow
$permissions.AddAccessRule($rule)
Set-Acl -Path $path -AclObject $permissions

# Verify permissions
$permissions = Get-Acl -Path $path
$permissions.Access
Disable the sync scheduler
Set-ADSyncScheduler -SyncCycleEnabled $false
Import ADSync module:
If you're using PowerShell version 7, use following command to import ADSync module:
Import-Module -Name "C:\Program Files\Microsoft Azure AD Sync\Bin\ADSync" -UseWindowsPowerShell
If you're using older PowerShell versions or PowerShell ISE, use following command to import ADSync module:
Import-Module -Name "C:\Program Files\Microsoft Azure AD Sync\Bin\ADSync"
Update the application certificate using the certificate rotation command
Invoke-ADSyncApplicationCredentialRotation -CertificateSHA256Hash $certHash
Use the current authentication configuration wizard view to confirm that Microsoft Entra Connect is using your new certificate.
Enable the sync scheduler
Set-ADSyncScheduler -SyncCycleEnabled $true
Remove the old certificate from the LOCAL_MACHINE store.
When you get a warning from Microsoft Entra Connect Sync, we highly recommend that you generate a new key and certificate and rotate the certificate that Microsoft Entra Connect Sync uses.
Export the certificate (.cer) file to upload it to the Microsoft Entra app registration using one of the following options:
Option 1: Using mmc console to export a certificate from the Windows certificate stores:
Open the certificate management console for the local computer by running the following command. Some methods of running this command are from the Start menu, the Windows Run prompt, PowerShell prompt, or command prompt.
certlm.msc
In the console tree, navigate to the certificate you want to export.
Right-click the certificate, select All Tasks, and then select Export.
On the screen Welcome to the Certificate Export Wizard, select Next.
If prompted to export the private key, select No, do not export the private key, then select Next.
For the file format, select DER encoded binary X.509 (.CER), then select Next.
Enter or browse to the file path, then select Next.
Review the summary, then select Finish.
Option 2: Use PowerShell to export the certificate:
$cerFile  = "C:\Temp\MyBYOC.cer"
$cert = Get-ChildItem Cert:\LocalMachine\My | Where-Object {$_.Subject -eq 'CN=YOUR_CERTIFICATE_SUBJECT'}
Export-Certificate -Cert $cert -FilePath $cerFile
In the Microsoft Entra admin center, navigate to App Registration, and select the application that was created during the installation, configuration or the upgrade of Connect Sync. To confirm which application is used by Connect Sync, you can run the Get-ADSyncEntraConnectorCredential command to retrieve the application (client) ID. The username format is {AppID}@tenantName.onmicrosoft.com. Under Certificate & secrets, select Upload certificate and upload the exported .cer file and select Add:
Get the certificate Hash using following PowerShell commands
$cert = Get-ChildItem Cert:\LocalMachine\My | Where-Object {$_.Subject -eq 'CN=YOUR_CERTIFICATE_SUBJECT'}

# Get raw data from X509Certificate cert
$certRawDataString = $cert.GetRawCertData()

# Compute SHA256Hash of certificate
$sha256 = [System.Security.Cryptography.SHA256]::Create()
$hashBytes = $sha256.ComputeHash($certRawDataString)
If you're using PowerShell version 7, use the following command:
$certHash = [System.Convert]::ToHexString($hashBytes)
If you're using older PowerShell versions or PowerShell ISE, use the following command:
$certHash = ($hashBytes|ForEach-Object ToString X2) -join ''
Grant Connect Sync (ADSync) service account permissions to retrieve the certificate private key:
$rsaCert = [System.Security.Cryptography.X509Certificates.RSACertificateExtensions]::GetRSAPrivateKey($cert)
If the certificate was issued by a Certificate Authority (CA), use the following $path variable:
$path = "$env:ALLUSERSPROFILE\Microsoft\Crypto\RSA\MachineKeys\$($rsaCert.key.UniqueName)"
If you're using a self-signed certificate, use the following $path variable:
$path = "$env:ALLUSERSPROFILE\Microsoft\Crypto\Keys\$($rsaCert.key.UniqueName)"
Run the following commands to grant the permission:
$permissions = Get-Acl -Path $path
$serviceAccount = (Get-ItemProperty -Path HKLM:\SYSTEM\CurrentControlSet\Services\ADSync -Name ObjectName).ObjectName
$rule = New-Object Security.Accesscontrol.FileSystemAccessRule "$serviceAccount", "read", allow
$permissions.AddAccessRule($rule)
Set-Acl -Path $path -AclObject $permissions

# Verify permissions
$permissions = Get-Acl -Path $path
$permissions.Access
Disable the sync scheduler
Set-ADSyncScheduler -SyncCycleEnabled $false
Import ADSync module:
If you're using PowerShell version 7, use the following command to import ADSync module:
Import-Module -Name "C:\Program Files\Microsoft Azure AD Sync\Bin\ADSync" -UseWindowsPowerShell
If you're using older PowerShell versions or PowerShell ISE, use the following command to import ADSync module:
Import-Module -Name "C:\Program Files\Microsoft Azure AD Sync\Bin\ADSync"
Update the application certificate using the certificate rotation command
Invoke-ADSyncApplicationCredentialRotation -CertificateSHA256Hash $certHash
Use the current authentication configuration wizard view to confirm that Microsoft Entra Connect is using your new certificate.
Enable the sync scheduler
Set-ADSyncScheduler -SyncCycleEnabled $true
Remove the old certificate from the LOCAL_MACHINE store.
Certificate revocation process
For self-signed certificates, either Microsoft Entra Managed or BYOC, an administrator must perform manual revocation by removing the keyCredential value from Microsoft Entra ID. An on-demand rotation of the certificate is also an option.
For BYOC certificates issued by a Certificate Authority registered with Microsoft Entra ID, the administrator can follow the certificate revocation process.
Related content


