Note
Access to this page requires authorization. You can try signing in or changing directories.
Access to this page requires authorization. You can try changing directories.
The event processing editor is a no-code experience in which you drag items to design processing logic for event data. This article describes how to use the editor to design your processing logic.
Note
Enhanced capabilities are enabled by default when you create eventstreams. If you have eventstreams that you created via standard capabilities, those eventstreams will continue to work. You can still edit and use them as usual. We recommend that you create a new eventstream to replace standard eventstreams so that you can take advantage of additional capabilities and benefits of enhanced eventstreams.
Prerequisites
- Access to a workspace in the Microsoft Fabric capacity license mode or the trial license mode with Contributor or higher permissions.
Design event processing by using the editor
To perform processing operations on your data streams by using a no-code editor, follow these steps:
Select Edit on the ribbon if you aren't already in Edit mode. Ensure that the upstream node for the connected operations has a schema.
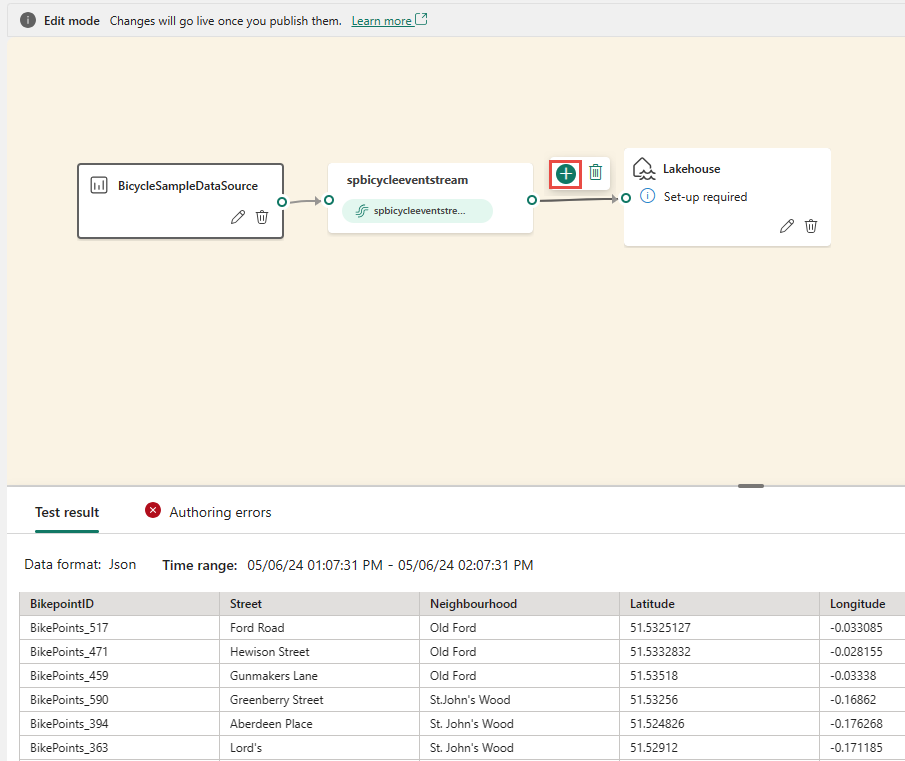
To insert an event processing operator between the stream node and the destination in Edit mode, you can use one of the following two methods:
Insert the operator directly from the connection line. Hover over the connection line and then select the + button. A dropdown menu appears on the connection line, and you can select an operator from this menu.
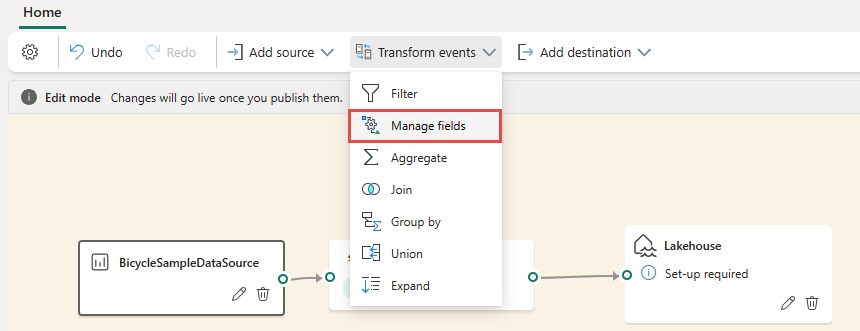
Insert the operator from the ribbon menu or canvas:
On the ribbon, you can select an operator from the Transform events menu.
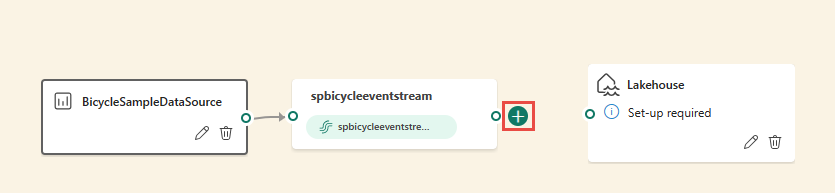
Alternatively, you can hover over one of the nodes and then select the + button if you deleted the connection line. A dropdown menu appears next to that node, and you can select an operator from this menu.
After you insert the operator, you need to reconnect these nodes. Hover over the left edge of the stream node, and then drag the green circle to connect it to the Manage fields operator node. Follow the same process to connect the Manage fields operator node to your destination.

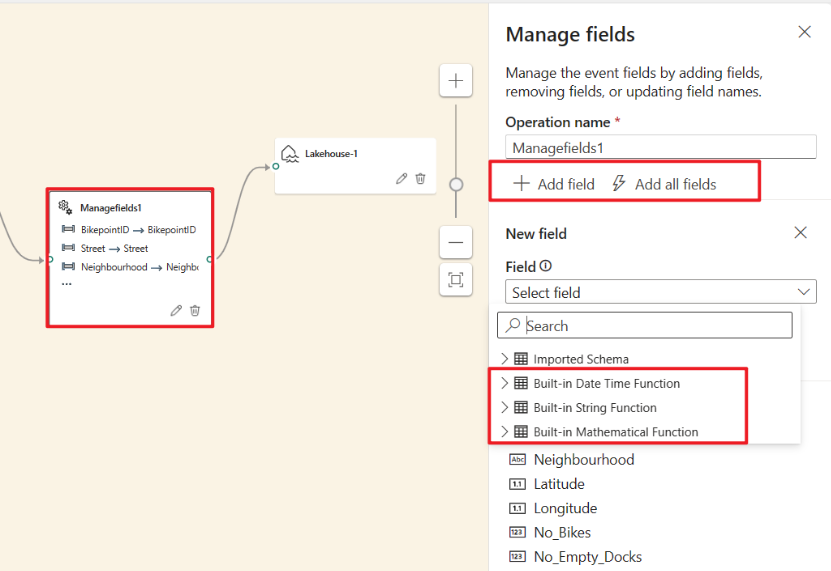
Select the Manage fields operator node. On the Manage fields configuration pane, select the fields that you want to use for output. If you want to add all fields, select Add all fields.
You can also add a new field by using the built-in functions to aggregate the data from upstream. Currently, the supported built-in functions are string functions, date and time functions, and mathematical functions. To find them, search for built-in.
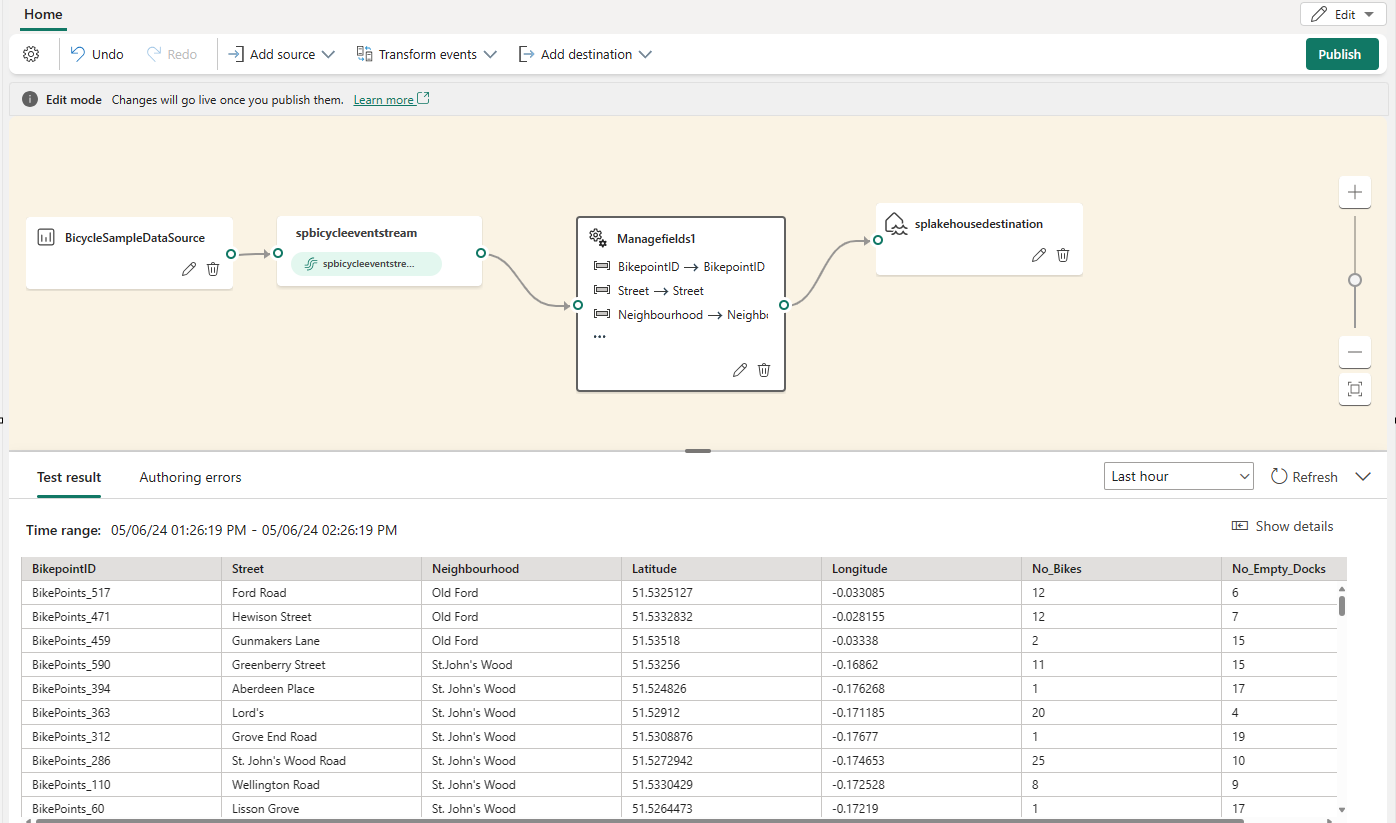
After you configure the Manage fields operator, select Refresh to validate the test result that this operator produces.
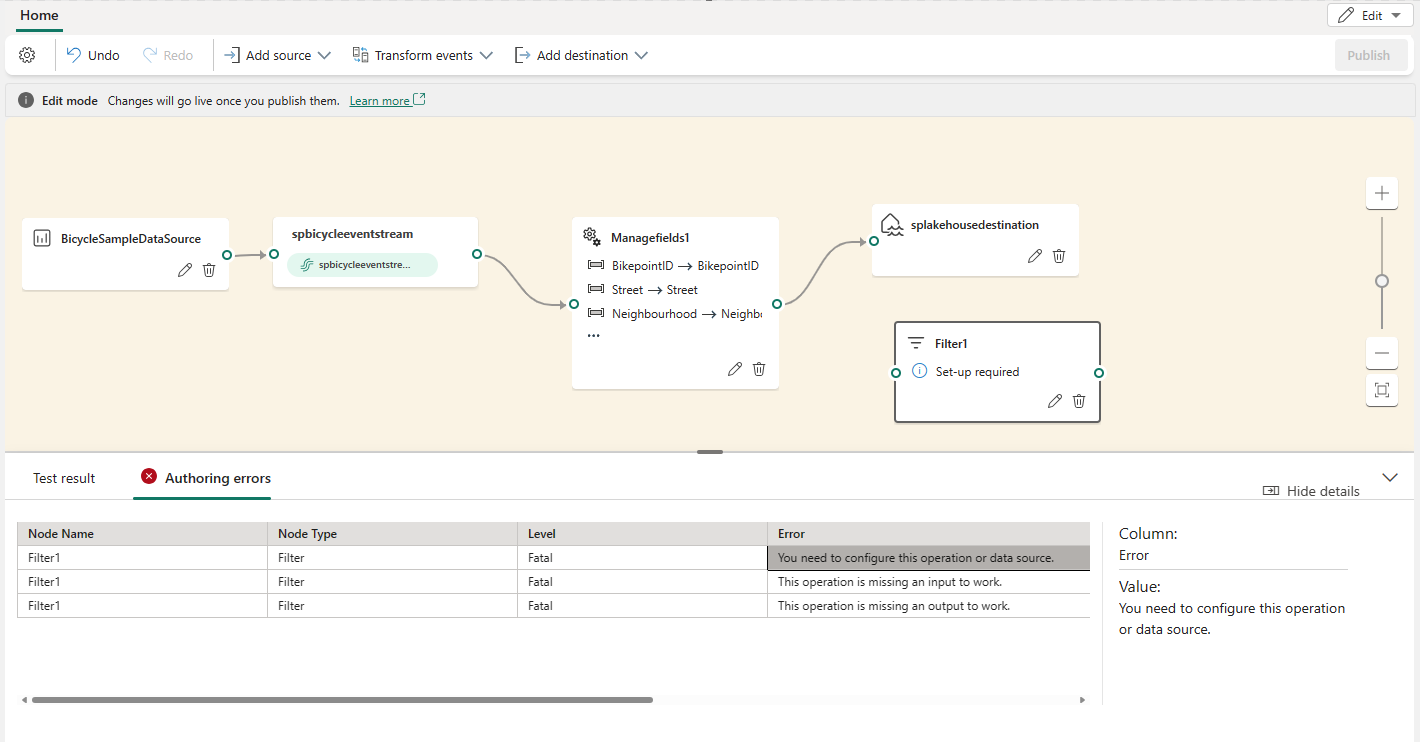
If you have any configuration errors, they appear on the Authoring errors tab on the lower pane.
If your test result looks correct, select Publish to save the event processing logic and return to Live view.
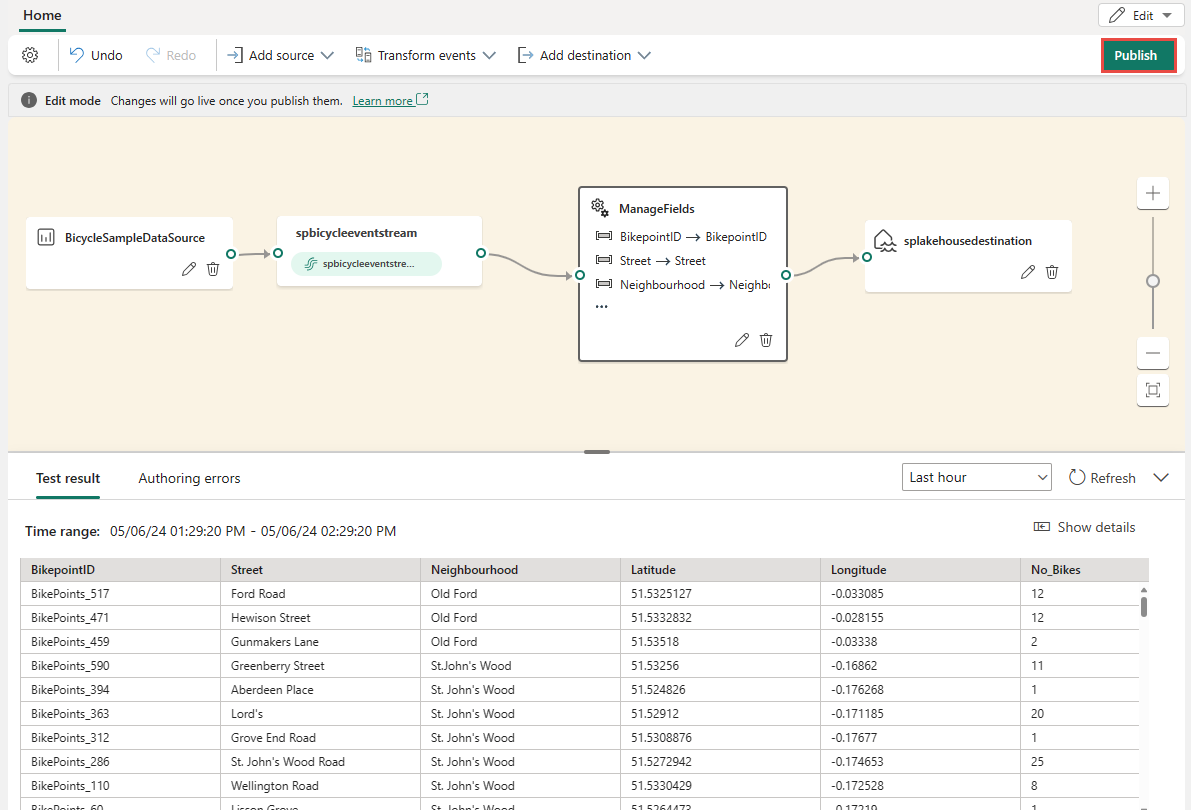
After you complete the preceding steps, you can visualize how your eventstream starts streaming and processing data in Live view.


Transform data by using the editor
You can use the event processing editor (the canvas in Edit mode) to transform data into various destinations. Enter Edit mode to design stream processing operations for your data streams.

Edit mode includes a canvas and lower pane where you can:
- Build the transformation logic for event data by dragging.
- Preview the test result in each of the processing nodes from beginning to end.
- Discover any authoring errors within the processing nodes.
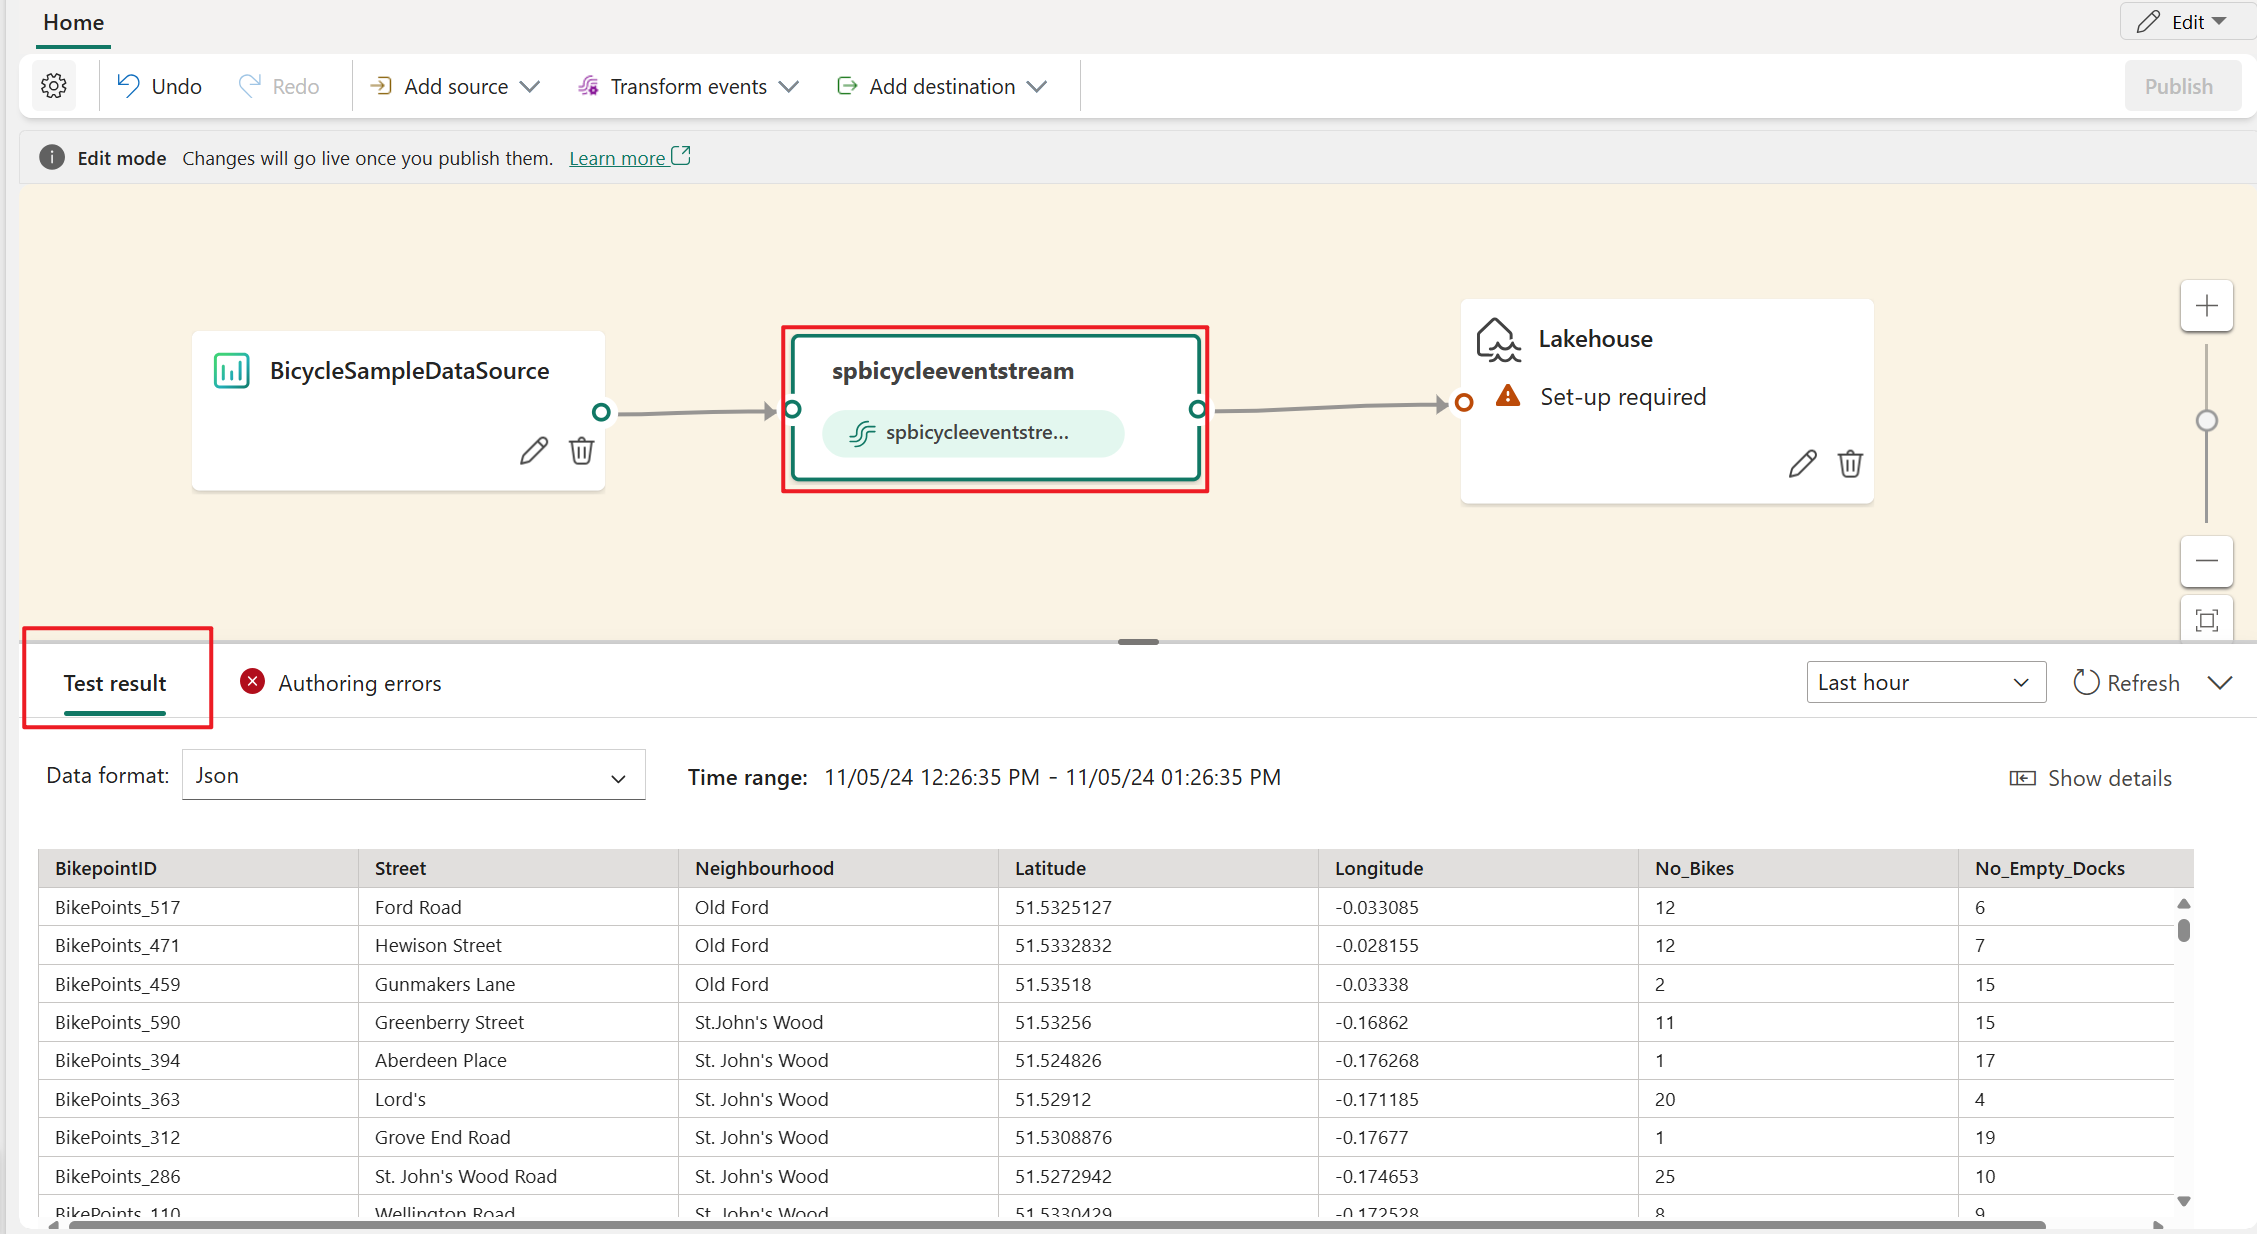
Editor layout
The event processing editor consists of three sections numbered in the following image.

On the pane that contains the ribbon menu and canvas, you design your data transformation logic by selecting an operator (from the Transform events menu) and connecting the stream and the destination nodes via the newly created operator node. You can drag connecting lines or select and delete connections.
On the right editing pane, you configure the selected node or view the stream name.
On the lower pane, you preview the test result in a selected node by using the Test result tab. The Authoring errors tab lists any incomplete or incorrect configuration in the operation nodes.
Supported node types and examples
Here are the destination types that support adding operators before ingestion:
- Lakehouse
- Eventhouse (event processing before ingestion)
- Derived stream
- Activator
Note
For destinations that don't support the addition of a pre-ingestion operator, you can first add a derived stream as the output of your operator. Then, append your intended destination to this derived stream.
