Note
Access to this page requires authorization. You can try signing in or changing directories.
Access to this page requires authorization. You can try changing directories.
Note
This tutorial is part of a series. For the previous section, see: Tutorial part 1: Set up Eventhouse.
In this part of the tutorial, you browse the Real-Time hub, create an eventstream, transform events, and create a destination to send the transformed events to a KQL database.
Create an eventstream
Select Real-Time on the left navigation bar.
Select + Add data in the top-right corner of the page.

On the Sample scenarios page, select Connect on the Bicycle rentals tile.
On the Connect data source page, for Source name, enter TutorialSource.
In the Stream details section, select the pencil button, and change the name of the eventstream to TutorialEventstream, and then select Next.
On the Review + connect page, review settings, and select Connect.

Transform events - add a timestamp
Once the eventstream source is created, you can open the eventstream and add more settings.
Once the eventstream is created, on the Review + connect page, select Open Eventstream.

You can also browse to the eventstream from the My data streams by selecting the stream and then by selecting Open Eventstream.
From the menu ribbon, select Edit. The authoring canvas, which is the center section, turns yellow and becomes active for changes.

In the eventstream authoring canvas, select the down arrow on the Transform events or add destination tile, and then select Manage fields. The tile is renamed to
ManageFields.
Select the pencil icon in the Manage fields pane, and do the following actions:
In Operation name, enter TutorialTransform.
Select Add all fields

Select + Add field.
From the Field dropdown, select Built-in Date Time Function > SYSTEM.Timestamp()
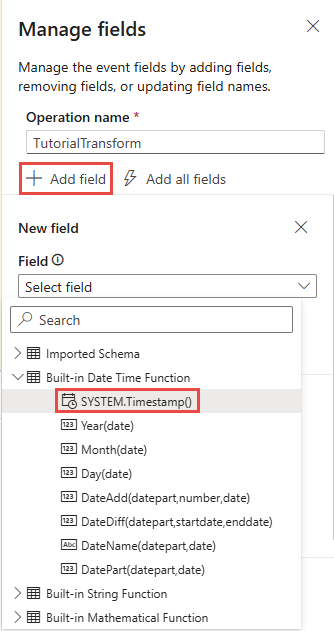
In Name, enter Timestamp.
Select Add.
Confirm that Timestamp is added to the field list, and select Save. The TutorialTransform tile now displays but with an error, because the destination isn't configured yet.


Create a destination for the timestamp transformation
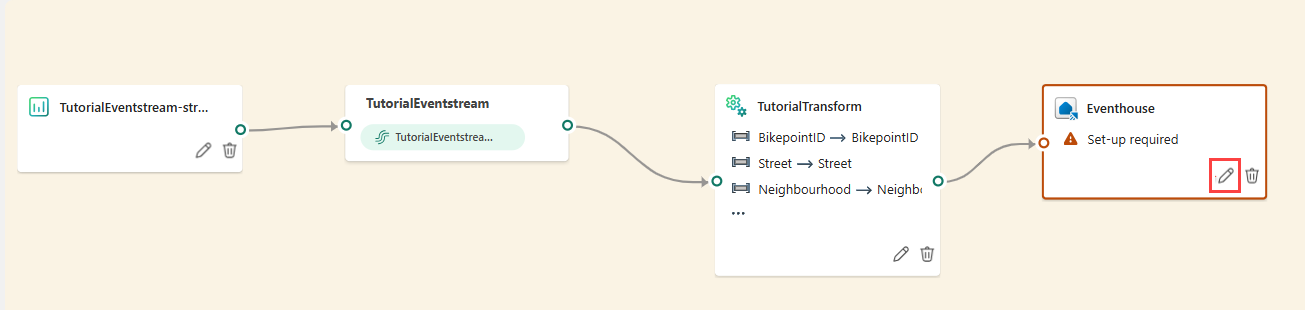
Hover over the right edge of the TutorialTransform tile and select the green plus icon.
Select Destinations > Eventhouse. A new tile is created entitled Eventhouse.
Select the pencil icon on the Eventhouse tile.
Enter the following information in the Eventhouse pane:
Field Value Data ingestion mode Event processing before ingestion Destination name TutorialDestination Workspace Select the workspace in which you created your resources. Eventhouse Tutorial KQL Database Tutorial Destination table Create new - enter RawData as table name Input data format Json Ensure that the box Activate ingestion after adding the data is checked.
Select Save.
From the menu ribbon, select Publish.
The eventstream is now set up to transform events and send them to a KQL database.

Related content
For more information about tasks performed in this tutorial, see: