Note
Access to this page requires authorization. You can try signing in or changing directories.
Access to this page requires authorization. You can try changing directories.
In this Quickstart, walk through setting up a working Python Agent framework agent using Agent 365 for tooling, notifications, observability, and testing the agent using Agents Playground and Teams.
Prerequisites
If you plan to use Visual Studio Code, you must have .NET installed. (.NET 8.0 is recommended.)
Python 3.11+ installed
UV Package manager installed. Install this in a terminal using
pip install uv.Microsoft Agents Toolkit / Agent Framework dependencies
The sample used in the walkthrough relies on the Agent Framework libraries provided through the Microsoft 365 Agents Toolkit or ATK. You will automatically install these when you Use the Agents Toolkit extension in VS Code to scaffold the sample, or you can install the package manually using this command:
uv pip install -e . --find-links ../dist --preAccess to GitHub
An existing AI Agent project. This quick start uses an Agent 365 sample agent from Microsoft 365 agent toolkit also known as ATK in VS Code.
Set up the Agent framework + Python sample from the Microsoft 365 Agents Toolkit
To get everything ready, you install the Microsoft 365 Agents Toolkit in VS Code, open the sample gallery, and scaffold the Agent framework + Python sample locally so you can configure and run it later. The following screenshots show what you should expect to see as you go.
Open Visual Studio Code, then open the Extensions panel Ctrl+Shift+X.
In the search bar, type "Agents Toolkit".
You should see the result shown in the screenshot here:
Select Microsoft 365 Agents Toolkit.
Select Install.
VS Code shows the extension details view similar to:

Once installed, the M365 Agents Toolkit icon appears in the left navigation bar.
Select it to open the welcome experience.
You should now see options like Build a Declarative Agent, Create a New Agent/App, and View Samples, as shown here:
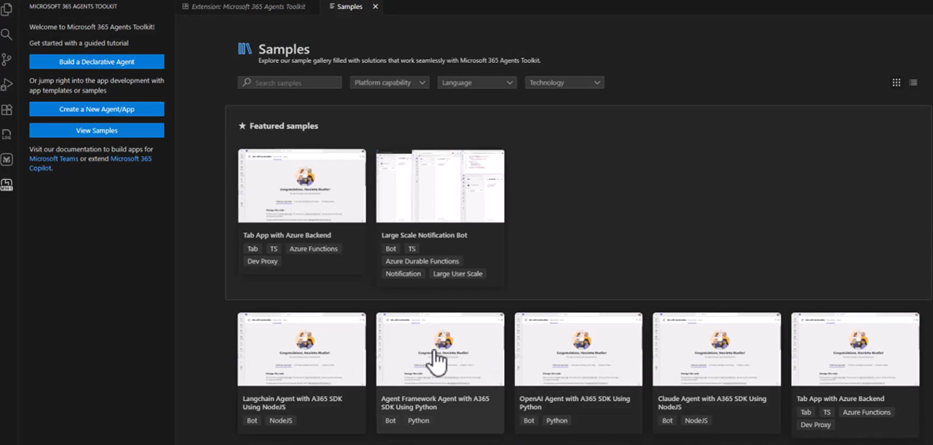
Select View Samples.
In the samples list, scroll to find the Agent framework + Python agent sample.
Select it.
You will see two choices: Create (scaffold locally) or View on GitHub.
Choose Create.
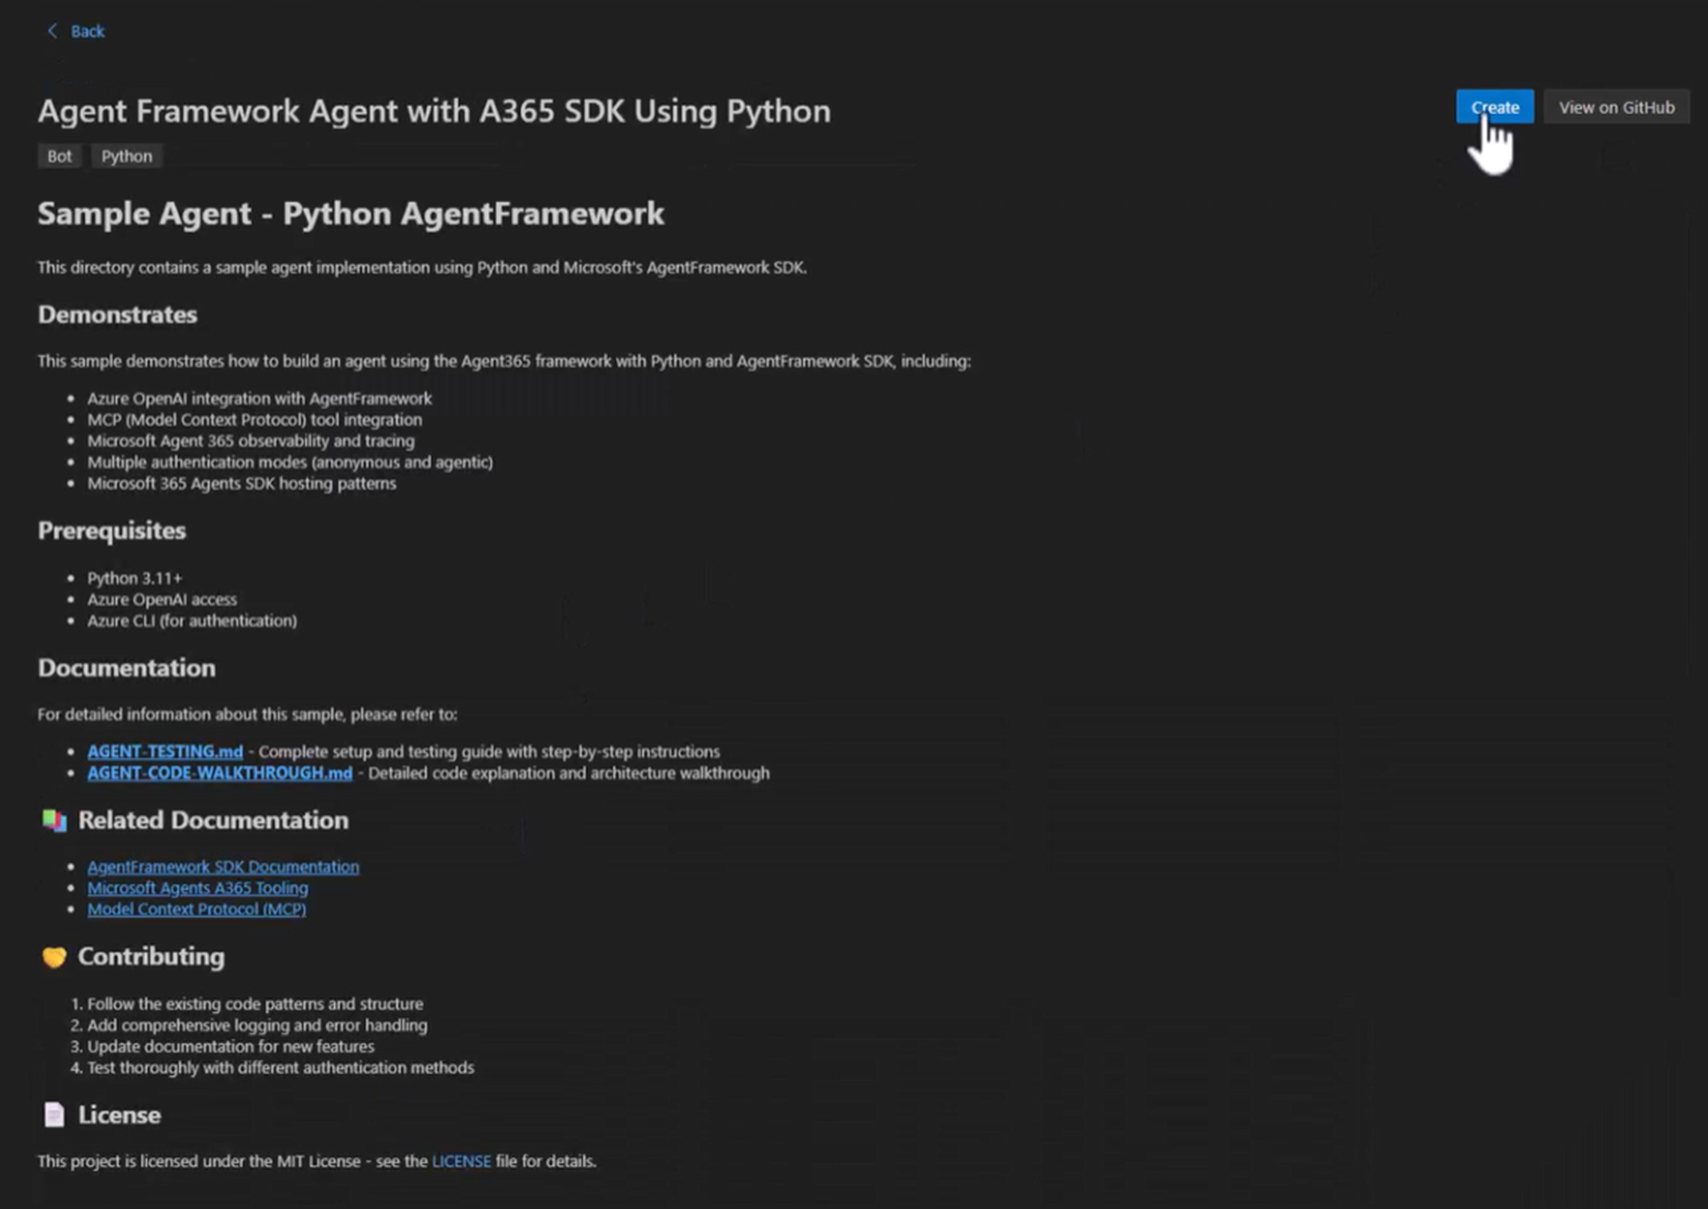
When prompted, select a folder on your machine where the sample should be generated. For example:
C:\A365-python-sampleThe toolkit scaffolds the Agent framework + Python sample into a subfolder (such as sample_agent) and then opens it automatically in VS Code.
Once scaffolding completes, you now have a fully functional Agent framework + Python agent project on your machine
Install required Agent 365 packages
Before running the sample, open the
package.jsonin your project and confirm that all required Agent 365 and Agent framework dependencies are listed. The sample generated by the Microsoft 365 Agents Toolkit already includes these entries.Once you've reviewed the package.json, install everything by running this command:
uv pip install -eThis pulls down all Agent 365 SDK libraries, Agent framework dependencies, hosting components, and any other dependencies defined in the sample.
After installation, verify the project builds and runs by starting the dev server using this command:
uv run python start_with_generic_host.py
Add Microsoft 365 tools (MCP servers)
You can explore and manage MCP servers using the a365 develop commands in the CLI.
When working with MCP servers, you can:
- Discover which MCP servers are available for use
- Add one or more MCP servers to your agent's configuration
- Review the MCP servers currently configured
- Remove MCP servers you no longer need
After MCP servers are added, your agent's tooling manifest expands to include entries similar to:
{
   "mcpServers": [
      {
         "mcpServerName": "mcp_MailTools",
         "mcpServerUniqueName": "mcp_MailTools",
         "scope": "McpServers.Mail.All",
         "audience": "api://00001111-aaaa-2222-bbbb-3333cccc4444"
      }
   ]
}
Learn how to add and manage tools
Notification subscription and handling
The sample agent subscribes to all Agent 365 SDK notifications using onAgentNotification("*") and routes them to a single handler. This handler allows the agent to react to background or system events, not just direct user messages.
The following code shows how notification is configured in the agent.py file.
if notification_type == NotificationTypes.EMAIL_NOTIFICATION:
if not hasattr(notification_activity, "email") or not notification_activity.email: return "I could not find the email notification details."
email = notification_activity.email
email_body = getattr(email, "html_body", "") or getattr(email, "body", "")

message = (
    "You have received the following email. "
    "Please follow any instructions in it. "
    f"{email_body}"
)

result = await self.agent.run(message)
return self._extract_result(result) or "Email notification processed."
Observability
This snippet shows the minimal changes needed to enable observability in the sample. It initializes the Agent 365 Observability SDK and wraps each agent invocation in an InferenceScope so inputs, outputs, and metadata can be captured automatically.
The following code shows a streamlined observability example in the agent.py file.
def _enable_agentframework_instrumentation(self):
"""Enable Agent Framework instrumentation."""
try:
AgentFrameworkInstrumentor().instrument()
logger.info("✅ Instrumentation enabled")
 except Exception as e:
logger.warning(f"⚠️ Instrumentation failed: {e}")
This code is the full observability setup required for the Python + Agent framework sample. Learn more about observability
Test your agent
Set the required environment variables, select an authentication mode, and start the agent locally. You can test everything end-to-end with Agents Playground without needing a Microsoft 365 tenant unless you want to publish the agent and use it in apps like Teams or Outlook.
Testing steps overview
- Add your API keys and model settings to a
.envfile so the sample can talk to an LLM. - Choose your authentication mode. For local development, the sample supports Agentic Auth using values created from your Agent Blueprint.
- Start the agent locally, which exposes it to tools like the Agents Playground.
- Use Agents Playground to test messages, tools, and notifications without setting up a tenant or deploying anything.
- When you're ready for real-world behavior, publish a Microsoft 365 tenant and test the agent inside Teams, Outlook, or other Microsoft 365 surfaces.
Publish your agent
When your agent is ready for actual Microsoft 365 experiences like Teams chats, Outlook messages, Word @mentions, you publish it to a Microsoft 365 tenant. The Agent 365 CLI publish command handles the packaging: it updates your manifest, bundles everything, and uploads the agent to the Microsoft Admin Center.
During publishing, review and customize the agent's name, description, icons, and version before completing the upload. Once published, your agent becomes discoverable and installable inside the tenant.
You can view published agents here: https://admin.cloud.microsoft/#/agents/all
Learn more about the full workflow and step-by-step instructions