Note
Access to this page requires authorization. You can try signing in or changing directories.
Access to this page requires authorization. You can try changing directories.
This article explains how to use triggers and actions with various cloud flow types.
A trigger is an event that starts a cloud flow. It defines the conditions under which your flow runs. Actions are the events you want the flow to do after the trigger event takes place. For example, you can create a flow that sends you a notification in Microsoft Teams (the action) when someone sends you an email (the trigger). To save a cloud flow, it must have at least a trigger and one action.
- Learn more about the types of cloud flows
- Learn more about triggers
- Learn more about actions
If you're using Copilot to create your flow, Copilot automatically chooses the appropriate cloud flow type and trigger for you based on your description. If you're creating a flow without Copilot, you need to make these choices on your own.
Replace the trigger in an existing cloud flow
If you change your mind about the trigger you selected, you can replace it with a different one.
You work with triggers in the designer. Power Automate allows you to use either the new designer or the classic designer to configure your cloud flow. The steps are similar in both designers. Learn more (with examples) in Identify differences between the new designer and the classic designer.
Sign in to Power Automate.
Open the cloud flow that you want to edit:
- On the navigation pane to the left, select My flows.
- Select the flow that you want to edit.
- On the command bar at the top of the page, select Edit.
In the flow designer, select the trigger that you want to replace.
At the top of the configuration pane, select the vertical ellipsis (⋮) and then select Delete.
To confirm the deletion, select OK in the dialog box that appears.
After you delete the trigger, Power Automate replaces the current trigger with the Add a trigger card.
Select the Add a trigger card. The Add a trigger pane opens.
Search for the connector or trigger you want to use. You can search for a specific trigger by typing a name in the search field, or by selecting the right arrow (>) next to an option in a trigger category.
The Add a trigger pane is organized in the same way as the Add an action pane. Learn more in Explore the cloud flows designer.
Select the trigger that you want to use. The configuration pane opens to allow you to configure the trigger.
Configure the trigger settings, if needed.
Close the configuration pane and return to the flow designer by selecting <<.
The new trigger is now the first step in your flow.
If you want to save your flow, you need to add at least one action. Then, you can select Save on the command bar at the top of the page.
Add actions to your cloud flow
You work with actions in the designer. Power Automate allows you to use either the new designer or the classic designer to add actions to your cloud flow. The steps are similar in both designers. Learn more (with examples) in Identify differences between the new designer and the classic designer.
Below the trigger or action where you want the new action to appear, select the plus sign (+).
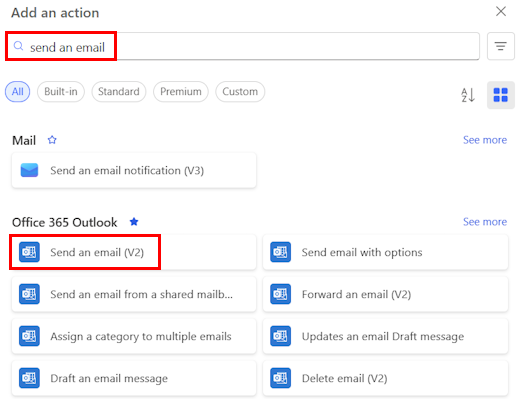
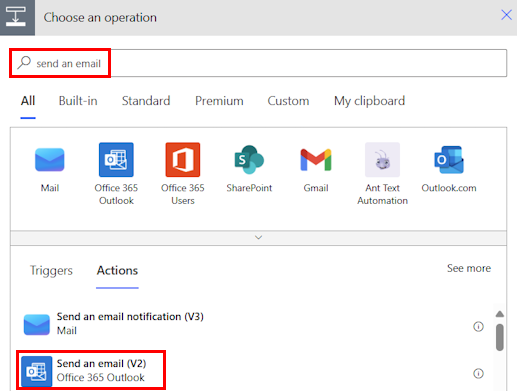
In the Add an action pane, search for and select the action you want to add. For example, you can enter send an email to find the Send an email (V2) action.
In the Office 365 Outlook list, select the action you want to add. The action is added to your flow.
If you want a list of actions to choose from instead, you can select from four categories in the Add an action pane: Favorites, AI capabilities, Built-in tools, and By connector. Learn how to quickly find the action you need in Configuration pane.
If the action you want to add isn't in the list, select See more to display more actions.
On the command bar at the top of the screen, select Save.
Add another action
In this procedure, you add an action in the middle of the flow. This action saves a file in your Dropbox, archiving the item in the list.
Sign into Power Automate.
On the left navigation pane, select My flows.
In the list of flows, select the Edit icon next to the flow you want to edit.
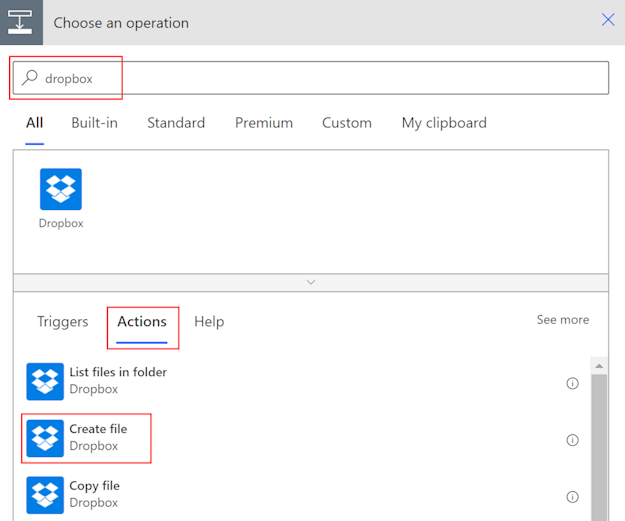
Select New step, enter dropbox in the search field, and select Create file - Dropdown in the Actions list.
If prompted, provide your Dropbox credentials.
Select the folder icon on the right side of the Folder path box.
Select >, and then choose the folder in which you want to place the new file.
Enter the name of the new file into the File name box. Be sure to append an extension, such as ".txt", to the file name. Here, let's use the TweetId in the file's name to ensure uniqueness of the files. You might have to select See more to find the TweetId token.
Add the text that you want the file to contain by typing into the File content box. You can also add tokens into the File content box.
If the file name you enter matches an existing file's name in the selected folder, the existing file is overwritten.
Save your flow.
Send a tweet that contains the keyword you specified.
In about a minute, a file is created in your Dropbox account.