Exercise - Use Azure Resource Manager functions to create expressions
In this exercise, you create an expression by using Azure Resource Manager (ARM) template functions. The expression creates a unique name for each resource group by combining a prefix input with a hash of the resource group ID. It results in Azure storage account names like dev2hu6sbtr5 and staging5his8hgr67.
Note
This exercise is optional. If you want to complete this exercise, you'll need to create an Azure subscription before you begin. If you don't have an Azure account or you don't want to create one at this time, you can read through the instructions so you understand the information that's being presented.
Create the ARM template file
In the previous module, you created an ARM template that deployed a storage account. You added parameters and an output to this file. Here, you start with that file, but the output is removed to reduce the overhead.
Open Visual Studio Code and create a file called azuredeploy.json. If you have this file from the previous module, you can use that file.
Replace the contents of the file with the following code:
{
  "$schema": "https://schema.management.azure.com/schemas/2019-04-01/deploymentTemplate.json#",
  "contentVersion": "1.0.0.0",
  "parameters": {
    "storageName": {
      "type": "string",
      "minLength": 3,
      "maxLength": 24
    },
    "storageSKU": {
      "type": "string",
      "defaultValue": "Standard_LRS",
      "allowedValues": [
        "Standard_LRS",
        "Standard_GRS",
        "Standard_RAGRS",
        "Standard_ZRS",
        "Premium_LRS",
        "Premium_ZRS",
        "Standard_GZRS",
        "Standard_RAGZRS"
      ]
    }
  },
  "functions": [],
  "variables": {},
  "resources": [
    {
      "name": "[parameters('storageName')]",
      "type": "Microsoft.Storage/storageAccounts",
      "apiVersion": "2025-01-01",
      "tags": {
        "displayName": "[parameters('storageName')]"
      },
      "location": "[resourceGroup().location]",
      "kind": "StorageV2",
      "sku": {
        "name": "[parameters('storageSKU')]"
      }
    }
  ],
  "outputs": {}
}
If you didn't complete the previous module, take a moment to review this file. Note the
storageNameparameter is used to pass in a unique name for the storage account.
Create an expression to set a unique storage account name
Instead of passing in the name of the storage account, change the parameter to take a prefix for the storage account name. This parameter is passed to the concat function in your expression.
In the
parameterssection, changestorageNameto storagePrefix.Change value of the
maxLength:attribute of thestoragePrefixparameter to 11. The maximum length for a storage account name is 24 characters, so you want to be sure the added hash from the function you create doesn't cause the name to be longer than 24.Create the expression to set the unique storage account name. In the
resourcessection, change the values of thename:anddisplayName:attributes from"[parameters('storageName')]"to "[toLower(concat(parameters('storagePrefix'),uniqueString(resourceGroup().id)))]". You learned about this expression in the previous unit. The file should now look like this file:{ "$schema": "https://schema.management.azure.com/schemas/2019-04-01/deploymentTemplate.json#", "contentVersion": "1.0.0.0", "parameters": { "storagePrefix": { "type": "string", "minLength": 3, "maxLength": 11 }, "storageSKU": { "type": "string", "defaultValue": "Standard_LRS", "allowedValues": [ "Standard_LRS", "Standard_GRS", "Standard_RAGRS", "Standard_ZRS", "Premium_LRS", "Premium_ZRS", "Standard_GZRS", "Standard_RAGZRS" ] } }, "functions": [], "variables": {}, "resources": [ { "name": "[toLower(concat(parameters('storagePrefix'),uniqueString(resourceGroup().id)))]", "type": "Microsoft.Storage/storageAccounts", "apiVersion": "2025-01-01", "tags": { "displayName": "[toLower(concat(parameters('storagePrefix'),uniqueString(resourceGroup().id)))]" }, "location": "[resourceGroup().location]", "kind": "StorageV2", "sku": { "name": "[parameters('storageSKU')]" } } ], "outputs": {} }
Deploy the ARM template to Azure
To deploy this template to Azure, you need to sign in to your Azure account from the Visual Studio Code terminal. Be sure you have the Azure CLI tools installed.
From the Terminal menu, select New Terminal.
If the drop-down menu on the right side of the terminal window says bash, you have the right shell to work from. You can skip to the next section.

If you don't have the right shell, select the downarrow, and then select Git Bash.

Change directory to the folder containing your ARM template file.
Sign in to Azure
From the terminal in Visual Studio Code, run the following command to sign in to Azure. Running this command opens a browser that allows you to sign in to your account:
az login
In the browser window that opens, sign in to your account. After you sign in, a list of the subscriptions associated with this account displays in the terminal. The default subscription is marked with an asterisk (*). If you have multiple subscriptions, select the subscription you want to use for this exercise.
Create and set the default resource group
You need to use a resource group to complete the steps in this exercise. You can use a resource group that you already created, or you can create a new resource group specifically for this exercise. If you choose to create a new resource group, that will make it easier to clean up any resources that you create as you complete the exercise. If you have an existing resource group and set it as the default resource group, you can skip this session.
az group create --name <resource-group-name> --location <location>
Replace <resource-group-name> with a unique name for your resource group. Replace <location> with the Azure region closest to you. For example, use eastus for East US.
By setting the default resource group, you can omit that parameter from the Azure CLI commands in this exercise. To set the resource group, run the following command.
az configure --defaults group="<resource-group-name>"
Replace <resource-group-name> with the resource group name.
Deploy the template to Azure
You learned about the deployment commands in the previous module. Here, we're using the Azure CLI az deployment group create command.
Deploy the template by using Azure CLI commands in the Visual Studio Code terminal. Remember to replace
{your-prefix}with a different string. For example, you could use storage.templateFile="azuredeploy.json" today=$(date +"%d-%b-%Y") DeploymentName="addfunction-"$today az deployment group create \ --name $DeploymentName \ --template-file $templateFile \ --parameters storagePrefix={your-prefix}In the first section of this code, you set Azure CLI variables for the path to the template file that you want to deploy and the name of the deployment. You then used the
az deployment group createcommand to deploy the template to Azure.You should see the message
Running...in the terminal.
To deploy this template to Azure, you need to sign in to your Azure account from the Visual Studio Code terminal. Be sure you have the Azure PowerShell tools installed.
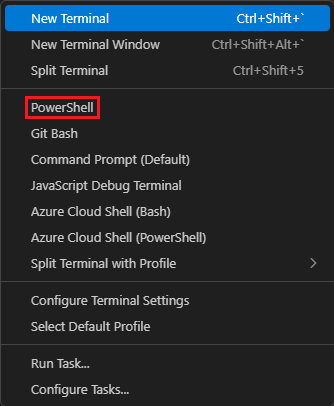
From the Terminal menu, select New Terminal.
If the drop-down menu on the right side of the terminal window says pwsh, you have the right shell to work from. You can skip to the next section.

If you don't have the right shell, select the down arrow and then select PowerShell in the drop-down menu.
Change directory to the folder containing your ARM template file.
Sign in to Azure
From the terminal in Visual Studio Code, run the following command to sign in to Azure.
Connect-AzAccount
In the browser window that opens (the browser window could be opened behind the current window, minimize the current window to see it), sign in to your account. After you sign in, a list of the subscriptions associated with this account displays in the terminal. The default subscription is marked with an asterisk (*). If you have multiple subscriptions, select the subscription you want to use for this exercise.
Create and set the default resource group
You need to use a resource group to complete the steps in this exercise. You can use a resource group that you already created, or you can create a new resource group specifically for this exercise. If you choose to create a new resource group, that will make it easier to clean up any resources that you create as you complete the exercise. If you have an existing resource group and set it as the default resource group, you can skip this session.
New-AzResourceGroup -Name <ResourceGroupName> -Location <Location>
Replace with a unique name for your resource group. Replace with the Azure region closest to you. For example, use eastus for East US.
By setting the default resource group, you can omit that parameter from the Azure CLI commands in this exercise. To set the resource group, run the following command.
Set-AzDefault -ResourceGroupName <ResourceGroupName>
replace <ResourceGroupName> with your resource group name.
Deploy the template to Azure
Deploy the template by using Azure PowerShell commands in the Visual Studio Code terminal. Remember to replace {your-prefix} with a different string. For example, you could use storage.
$templateFile = "azuredeploy.json"
$today=Get-Date -Format "MM-dd-yyyy"
$deploymentName="addfunction-"+"$today"
New-AzResourceGroupDeployment `
  -Name $deploymentName `
  -TemplateFile $templateFile `
  -storagePrefix {your-prefix}
In the first section of this code, you set Azure PowerShell variables for the path to the template file that you want to deploy and the name of the deployment. You then used the New-AzResourceGroupDeployment command to deploy the template to Azure.
Check your deployment
When the deployment finishes, go to the Azure portal and make sure you're in the correct subscription. To check the subscription, select your avatar in the upper-right corner of the page. Select Switch directory. In the list, select the appropriate directory.
In the left pane, select Resource groups.
Select your resource group name.
In the Overview section, you see that one deployment succeeded:
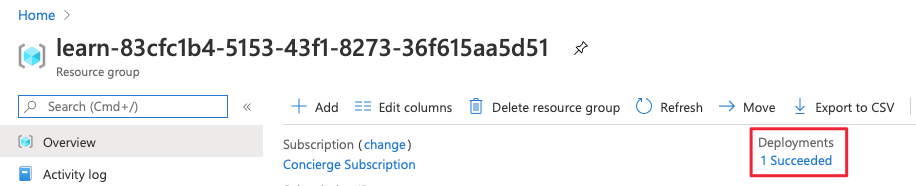
Select 1 Succeeded to see the details of the deployment:

Select addfunction to see what resources were deployed:

Leave the page open in your browser so you can check on deployments again later in the module.