Note
Access to this page requires authorization. You can try signing in or changing directories.
Access to this page requires authorization. You can try changing directories.
Important
Windows Admin Center Virtualization Mode is currently in PREVIEW. This information relates to a prerelease product that may be substantially modified before it's released. Microsoft makes no warranties, expressed or implied, with respect to the information provided here.
Windows Admin Center Virtualization Mode lets you group virtualization assets for consistent management. This article explains how to create resource groups, add Hyper-V hosts or clusters with a compute profile, monitor deployment status, and remove resources safely.
Virtualization Mode focuses on virtualization infrastructure and presents resources through a navigation hierarchy. Before managing virtual machines (VMs), ensure you install Virtualization Mode and add at least one Hyper-V host as a compute resource in a resource group. For more information about Windows Admin Center Virtualization Mode concepts, see What is Windows Admin Center Virtualization Mode?.
Prerequisites
Before you can add resources in Windows Admin Center Virtualization Mode, ensure the following prerequisites are met:
Windows Admin Center Virtualization Mode is installed and available. For more information about installing Windows Admin Center Virtualization Mode, see Install Windows Admin Center Virtualization Mode.
You're accessing the Virtualization Mode gateway site using an account that has the Gateway Administrator role or equivalent permissions.
You have at least one host ready to add with the following prerequisites:
A minimum of 4 virtual CPUs (or equivalent physical cores), at least 8GB of RAM, and 10GB of free disk space.
Windows Server 2025 or later, Datacenter edition only.
Your server is domain-joined and has DNS resolution by using Fully Qualified Domain Name (FQDN). Hyper-V hosts you plan to manage are also on the same domain as the Virtualization Mode gateway.
Each host has the following Windows Server features installed:
Network ATC. For deployment guidance, see Deploy host networking with Network ATC.
Data Center Bridging. Included in the Network ATC guidance.
Hyper-V. For deployment guidance, see Install Hyper-V.
Failover Clustering. For more information about creating a cluster, see Create a failover cluster.
The signed-in user is a local Administrator on each Hyper-V host you plan to add.
Create a resource group
To create a resource group, follow these steps:
From a web browser, open the Windows Admin Center Virtualization Mode gateway site and sign in.
In the resource pane, select the ellipsis (...) next to the Virtualization Mode host, then choose Add Resource Group. If you haven't added any resource groups yet, you can also select the Create your first Resource Group tile in the resource pane.

Enter a unique name for the resource group and a descriptive environment or service name. Select Create to confirm.
The new resource group appears in the navigation hierarchy with no resources. You can also select the notification bell icon to access recent actions and confirm creation.

Enable host Windows Firewall rules
Before you can add a resource, you need to enable the following firewall inbound rules:
- File and Printer Sharing (SMB-In): only required for the agent installation and can be disabled after the resource is added.
- Windows Remote Management: used by the Virtualization Mode gateway to communicate with the host after the agent is installed.
You can enable the rules by using your preferred method of managing the Windows Firewall. For example, centrally using Group Policy, or locally on each node by using the Windows Firewall with Advanced Security console or PowerShell. For more information about managing the Windows Firewall and how-to guides, see Windows Firewall tools.
Add resources
To add a resource to a resource group, follow these steps:
In the resource pane, select the ellipsis (...) next to the resource group, then choose Add Host.
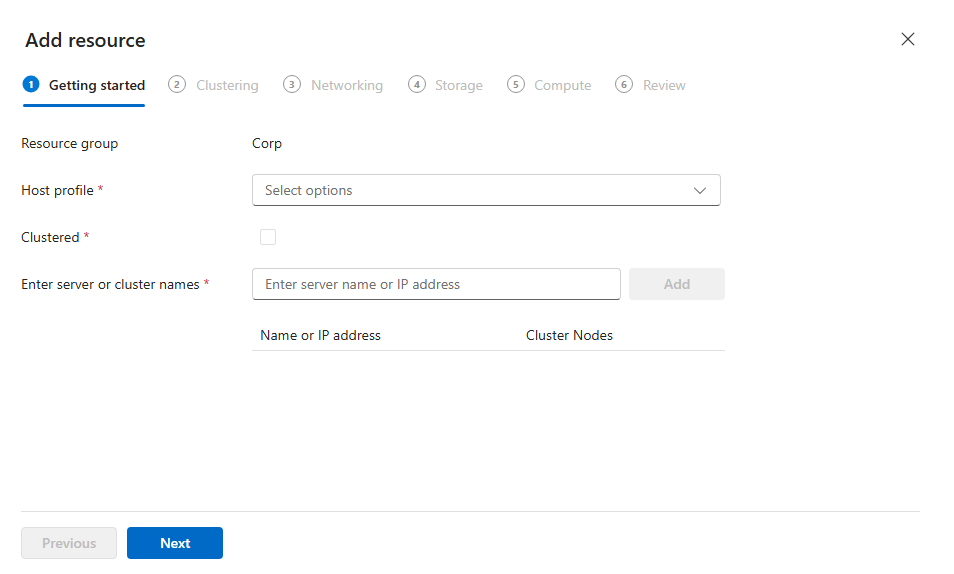
For the Getting started tab, complete the following information, then select Next to continue:
Host Profile: Select Compute for Hyper-V hosts.
Enter server or cluster names: Enter the fully qualified domain name of the Hyper-V cluster you want to add (for example:
hv01.contoso.com). Select Add to continue.
For the Networking tab, complete one of the following steps, then select Next to continue. If you already have Network ATC intents configured on the host, they appear in the list.
- To create a Network ATC intent, select a template from the network intent template dropdown and select a network interface on the host to bind the intent to. Once you have at least one management, one compute, and one storage intent configured, select Add to continue.
Or
To create a new network intent template, follow these steps. To learn more about network intent templates, see Network intent templates.
- Select Network intent template.
- From the Add new network intent template window, enter a Network intent name, then select the Network intent type from the dropdown.
- Change the advanced configuration to align with your network design as needed, then select Create network intent to add the new template.
- Select the newly created template from the network intent template dropdown and select a network interface on the host to bind the intent to. Once you have at least one management, one compute, and one storage intent configured, select Add to continue.
For the Clustering tab, leave the default settings and select Next to continue.
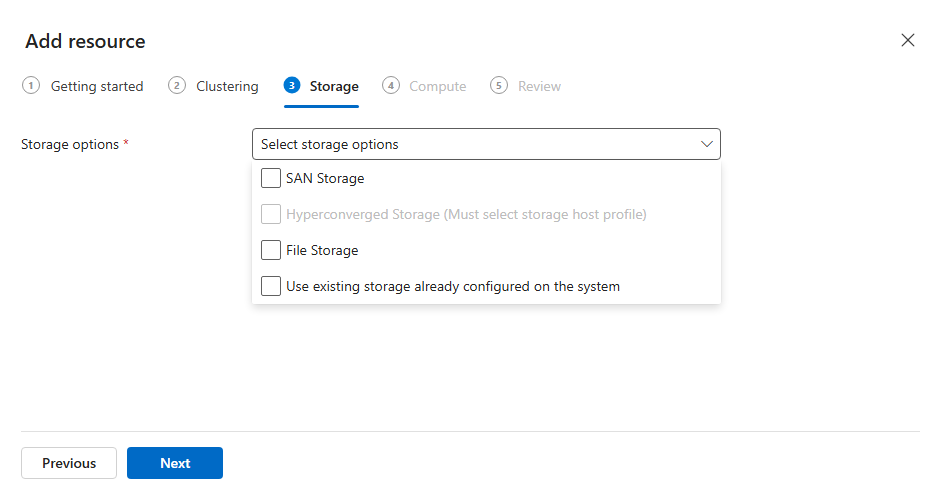
For the Storage tab, select Use existing storage already configured on the system, then select Next to continue.
For the Compute tab, leave the default settings and select Next to continue.
When adding a resource, you can monitor its deployment status by using the Workflow status icon at the top right of the Virtualization Mode site. The workflow status provides real-time updates on deployment progress, including agent installation and configuration steps.

Remove a resource
To remove a resource from a resource group, follow these steps:
From the resource pane, select the ellipsis (...) next to the resource, then choose Remove Host.
When prompted to confirm the removal, select Remove.
Monitor the progress from the Workflow status icon.
Remove a resource group
Before deleting a resource group, ensure it contains no hosts. To remove an empty resource group, follow these steps:
From the resource pane, select the ellipsis (...) next to the resource group, then choose Delete Resource Group.
When prompted to confirm deletion, select Delete resource group.
You receive a notification confirming the resource group removal.