Nota:
El acceso a esta página requiere autorización. Puede intentar iniciar sesión o cambiar directorios.
El acceso a esta página requiere autorización. Puede intentar cambiar los directorios.
![]()
Aprenda a crear una solución en Visual Studio 2012 para leer el nuevo paquete de formato de archivo en Visio 2013, seleccionar partes del paquete, cambiar los datos de un elemento y agregar nuevos elementos al paquete.
Conceptos básicos de la manipulación del formato de archivo de Visio
Versiones anteriores de archivos guardados de Visio en un formato de archivo binario propietario (.vsd) o un único documento en formato de archivo de dibujo XML de Visio (.vdx). Visio 2013 presenta un nuevo formato de archivo (.vsdx), que está basado en las tecnologías de archivo XML y ZIP. Al igual que en versiones anteriores de Visio, los archivos se guardan en un único contenedor. Sin embargo, a diferencia de los archivos heredados, el nuevo formato de archivo se puede abrir, leer, actualizar, cambiar y construir sin necesidad de automatizar la aplicación de Visio 2013. Los programadores que estén familiarizados con la manipulación de XML o con el espacio de nombres System.IO.Packaging pueden comenzar rápidamente a trabajar con el nuevo formato de archivo mediante programación. Los desarrolladores que han trabajado con los formato de dibujo XML de Visio de versiones anteriores comprobarán que muchas de las estructuras de ese formato se han conservado en el nuevo formato de archivo.
En este artículo, examinaremos cómo se trabaja con el formato de archivo de Visio 2013 mediante programación a través de Microsoft .NET Framework 4.5, C# o Visual Basic y Visual Studio 2012. Aprenderá a abrir un archivo de Visio 2013, seleccionar elementos de documento dentro del archivo, cambiar los datos de los elementos y crear un nuevo elemento de documento.
Nota:
Los ejemplos de código de este artículo dan por supuesto que tiene un conocimiento rudimentario de las clases de los espacios de nombres System.Xml.Linq y System.IO.Packaging. En este artículo también se da por supuesto que entiende los conceptos y la terminología de las Convenciones de empaquetado abierto. Debe estar algo familiarizado con los conceptos paquetes, elementos de documento o elementos de paquete y relaciones. Para obtener más información, vea OPC: Nuevo estándar para empaquetar sus datos. El código muestra cómo crear consultas LINQ (Language Integrated Query) para seleccionar código XML. La mayoría de los ejemplos de código usan la sintaxis de consulta para compilar consultas LINQ. Puede volver a escribir las consultas LINQ que se proporcionan en el código usando la sintaxis de método de LINQ, si es necesario. Para obtener más información sobre la sintaxis de consulta LINQ y la sintaxis de métodos, vea Sintaxis de consulta LINQ frente a sintaxis de método (C#). La Tabla 1 muestra los temas esenciales con los que debería estar familiarizado antes de trabajar en este artículo.
Tabla 1. Conceptos básicos de la manipulación del formato de archivo de Visio 2013
| Título del artículo | Description |
|---|---|
|
Introducción al formato de archivo de Visio (.vsdx) |
Esta información general de alto nivel describe algunas de las características principales del formato de archivo de Visio 2013. Trata sobre las Convenciones de empaquetado abierto (OPC) que se han aplicado al formato de archivo de Visio 2013. También indica algunas diferencias entre el formato de archivo de Visio 2013 y el formato de archivo anterior de dibujo XML (.vdx) de Visio. |
|
OPC: Nuevo estándar para empaquetar sus datos |
En este artículo de MSDN Magazine se describen las Convenciones de empaquetado abierto como concepto. |
|
Aspectos fundamentales de las convenciones de empaquetado abierto Introducción a los formato de archivo Office (2007) Open XML |
En estos dos artículos se explica cómo se han aplicado las Convenciones de empaquetado abierto a los archivos de Microsoft Office. Contienen descripciones de cómo funcionan las relaciones en un paquete e incluyen algunos ejemplos de código. |
Crear un archivo .vsdx y una nueva solución de Visual Studio
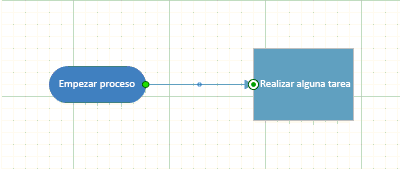
Antes de empezar a trabajar con los procedimientos descritos en este artículo, debe crear un archivo de Visio 2013 para abrirlo y manipularlo. El dibujo que se usa en los ejemplos de código de este artículo contiene una sola página con dos formas conectadas, una de las cuales es una forma de inicio o finalización de la plantilla "Diagrama de flujo básico".
Use el procedimiento siguiente para crear un nuevo archivo de Visio 2013 que se usará en los demás procedimientos de este artículo.
Para crear un nuevo archivo en Visio 2013
Abra Visio 2013.
Cree un nuevo documento basado en la plantilla de diagrama de flujo básico. Para ello, elija CATEGORÍAS, Diagrama de flujo, Diagrama de flujo básico, Crear.
Desde la ventana Formas, arrastre una forma de Inicio o finalización hasta el lienzo.
Seleccione la nueva forma de inicio o finalización en el lienzo de dibujo y escriba "Begin Process" (Empezar proceso).
Desde la ventana Formas, arrastre una forma de Proceso hasta el lienzo.
Seleccione la nueva forma de proceso en el lienzo de dibujo y escriba "Perform some task" (Realizar alguna tarea).
En el menú contextual de la forma de inicio o finalización, seleccione Agregar un conector a la página y después dibuje un conector entre las formas de inicio o finalización y de proceso en el lienzo, como se muestra en la figura 1.
Figura 1. Dibujo simple de Visio 2013
Guarde el archivo en el escritorio como un archivo .vsdx. Para ello, elija Archivos, Guardar como, Equipo, Escritorio.
En el cuadro de diálogo Guardar como , escriba Paquete de Visio en el cuadro Nombre de archivo "", seleccione Dibujo de Visio (*.vsdx) en la lista Guardar como tipo y, a continuación, elija el botón Guardar .
Cierre el archivo y después cierre Visio 2013.
Sugerencia
A veces Visio abre un archivo correctamente incluso si dicho archivo tiene algún problema. Para asegurarse de que Visio le informe de cualquier problema en el archivo, debe habilitar las advertencias al abrir archivos cuando pruebe soluciones que manipulen archivos de Visio en el nivel de paquete de archivo. > Para habilitar las advertencias de apertura de archivos, en Visio 2013, elija Archivo, Opciones, Opciones avanzadas. En Guardar o abrir, seleccione Mostrar advertencias antes de abrir archivos.
Estos procedimientos usan una aplicación de consola de Windows para manipular el archivo "Visio Package.vsdx". Use el procedimiento siguiente para crear y configurar una nueva aplicación de consola de Windows en Visual Studio 2012.
Para crear una nueva solución en Visual Studio 2012
En el menú Archivo, elija Nuevo, Proyecto.
En el cuadro de diálogo Nuevo proyecto, expanda Visual C# o Visual Basic y después elija Windows, Aplicación de consola.
En el cuadro Nombre, escriba "VisioFileAccessor", seleccione una ubicación para el proyecto y elija el botón Aceptar.
En el menú Proyecto, elija Agregar referencia.
En el cuadro de diálogo Administrador de referencias, en Ensamblados, elija Marco y después agregue una referencia a los componentes System.Xml y WindowsBase.
En el archivo Program.cs o Module1.vb del proyecto, agregue las siguientes directivas using (instrucciones Imports en Visual Basic):
using System.Xml;
using System.Xml.Linq;
using System.IO;
using System.IO.Packaging;
using System.Text;
Imports System.Xml Imports System.Xml.Linq Imports System.IO Imports System.IO.Packaging Imports System.TextTambién en el archivo Program.cs o Module1.vb, antes del final del método Main de la clase Program (Module1 en Visual Basic), agregue el código siguiente que detiene la ejecución de la aplicación de consola hasta que el usuario presione una tecla.
// This code stops the execution of the console application
// so you can read the output.
Console.WriteLine("Press any key to continue ...");
Console.ReadKey();
' This code stops the execution of the console application ' so you can read the output. Console.WriteLine("Press any key to continue ...") Console.ReadKey()
Abrir un archivo de Visio 2013 como un paquete
Para poder manipular los datos del archivo, debe abrir el archivo dentro de un objeto Package, que está contenido en el espacio de nombres System.IO.Packaging. El objeto Package representa el archivo de Visio como un todo. Expone los miembros que permiten seleccionar elementos individuales del documento dentro del paquete de archivos. En particular, la clase Package expone el método Open(String, FileMode, FileAccess) estático que se usa para abrir un archivo como un paquete. También expone un método Close() para cerrar el paquete una vez que se haya terminado con él.
Sugerencia
Recomendamos que use un bloque using para abrir el archivo de Visio en el objeto Package para que no tenga que cerrar explícitamente el paquete de archivos cuando haya terminado con él. También puede llamar explícitamente al método Package.Close del bloque finally de una construcción try/catch/finally.
Use el código siguiente para obtener la ruta de acceso completa para el archivo "Visio Package.vsdx" mediante un objeto FileInfo, pase la ruta de acceso como un argumento al método Package.Open y después devuelva un objeto Package al código de llamada.
Para abrir un archivo .vsdx como un paquete
Después del método Main de la clase Program (o Module1 en Visual Basic), agregue el código siguiente.
private static Package OpenPackage(string fileName,
    Environment.SpecialFolder folder)
{
    Package visioPackage = null;
    // Get a reference to the location
    // where the Visio file is stored.
    string directoryPath = System.Environment.GetFolderPath(
        folder);
    DirectoryInfo dirInfo = new DirectoryInfo(directoryPath);
    // Get the Visio file from the location.
    FileInfo[] fileInfos = dirInfo.GetFiles(fileName);
    if (fileInfos.Count() > 0)
    {
        FileInfo fileInfo = fileInfos[0];
        string filePathName = fileInfo.FullName;
        // Open the Visio file as a package with
        // read/write file access.
        visioPackage = Package.Open(
            filePathName,
            FileMode.Open,
            FileAccess.ReadWrite);
        }
        // Return the Visio file as a package.
        return visioPackage;
}
Private Function OpenPackage(fileName As String, _ folder As Environment.SpecialFolder) As Package Dim visioPackage As Package = Nothing ' Get a reference to the location ' where the Visio file is stored. Dim directoryPath As String = System.Environment.GetFolderPath( _ folder) Dim dirInfo As DirectoryInfo = New DirectoryInfo(directoryPath) ' Get the Visio file from the location. Dim fileInfos As FileInfo() = dirInfo.GetFiles(fileName) If (fileInfos.Count() > 0) Then Dim fileInfo As FileInfo = fileInfos(0) Dim filePathName As String = fileInfo.FullName ' Open the Visio file as a package ' with read/write access. visioPackage = Package.Open( _ filePathName, FileMode.Open, FileAccess.ReadWrite) End If ' Return the Visio file as a package. Return visioPackage End FunctionEn el método Main de la clase Program (o Module1 en Visual Basic), agregue el código siguiente.
// Open the Visio file in a Package object.
using (Package visioPackage = OpenPackage("Visio Package.vsdx",
    Environment.SpecialFolder.Desktop))
{
}
' Open the Visio file in a Package object. Using visioPackage As Package = OpenPackage("Visio Package.vsdx", _ Environment.SpecialFolder.Desktop) End Using
Seleccionar y leer elementos de un paquete
Una vez que tenga el archivo de Visio 2013 abierto como un paquete, puede tener acceso a sus elementos de documento mediante la clase PackagePart incluida en el espacio de nombres System.IO.Packaging. Se pueden crear instancias de objetos PackagePart individualmente o como un conjunto La clase Package expone un método GetParts() y un método GetPart(Uri) para obtener objetos PackagePart de Package. El método Package.GetParts devuelve una instancia de la clase PackagePartCollection, con la que después puede interactuar de la misma manera que cualquier otra colección que implemente la interfaz IEnumerator<T>.
Use el código del procedimiento siguiente para obtener un objeto PackagePartCollection de la clase Package como una colección, iterar en los objetos PackagePart de la colección y escribir el URI y el tipo de contenido de cada objeto PackagePart en la consola.
Para iterar en los elementos de un paquete
Después del método
OpenPackagede la clase Program (o Module1 en Visual Basic), agregue el código siguiente.private static void IteratePackageParts(Package filePackage) { // Get all of the package parts contained in the package // and then write the URI and content type of each one to the console. PackagePartCollection packageParts = filePackage.GetParts(); foreach (PackagePart part in packageParts) { Console.WriteLine("Package part URI: {0}", part.Uri); Console.WriteLine("Content type: {0}", part.ContentType.ToString()); } }Private Sub IteratePackageParts(filePackage As Package) ' Get all of the package parts contained in the package ' and then write the URI and content type of each one to the console. Dim packageParts As PackagePartCollection = filePackage.GetParts() For Each part In packageParts Console.WriteLine("Package part: {0}", part.Uri) Console.WriteLine("Content type: {0}", part.ContentType.ToString()) Next End SubAgregue el código siguiente dentro del bloque using del método Main de la clase Program (bloque Using del método Main en Module1 en Visual Basic):
// Write the URI and content type of each package part to the console.
IteratePackageParts(visioPackage);
' Write the URI and content type of each package part to the console. IteratePackageParts(visioPackage)Elija la tecla F5 para depurar la solución. Cuando el programa haya completado su ejecución, elija cualquier tecla para salir.
La aplicación de consola produce una salida similar a la siguiente (se ha omitido parte de la salida por razones de brevedad):
Package part URI: /docProps/app.xml
Content type: application/vnd.openxmlformats-officedocument.extended-properties+xml
Package part URI: /docProps/core.xml
Content type: application/vnd.openxmlformats-officedocument.core-properties+xml
Package part URI: /docProps/custom.xml
Content type: application/vnd.openxmlformats-officedocument.custom-properties+xml
Package part URI: /docProps/thumbnail.emv
Content type: image/x-emf
Package part URI: /visio/document.xml
Content type: application/vnd.ms-visio.drawing.main+xml
Package part URI: /visio/_rels/document.xml.rels
Content type: application/vnd.openxmlformats-package.relationships+xml
Package part URI: /_rels/.rels
Content type: application/vnd.openxmlformats-package.relationships+xml
Press any key to continue …
La mayoría de las veces tendrá que seleccionar un objeto PackagePart sin necesidad de iterar en todos ellos. Puede obtener un objeto PackagePart de Package mediante su relación con Package u otro objeto PackagePart. Una relación en el formato de archivo de Visio 2013 es una entidad discreta que describe la manera en que un elemento del documento se relaciona con el paquete de archivos o la manera en que dos elementos del documento se relacionan entre sí. Por ejemplo, el propio paquete de archivos de Visio 2013 tiene una relación con su elemento de documento de Visio, y el elemento de documento de Visio tiene una relación con el elemento de Windows. Estas relaciones se representan como instancias de las clases PackageRelationship o PackageRelationshipCollection.
La clase Package expone varios métodos para obtener las relaciones que contiene como objetos PackageRelationship o PackageRelationshipCollection. Puede usar el método GetRelationshipsByType(String) para instanciar un objeto PackageRelationshipCollection que contenga objetos PackageRelationship de un único tipo específico. Evidentemente, para usar el método Package.GetRelationshipsByType debe conocer el tipo de relación que necesita. Los tipos de relación son cadenas en el formato del espacio de nombres XML. Por ejemplo, el tipo de relación del elemento Documento de Visio es <https://schemas.microsoft.com/visio/2010/relationships/document>.
Una vez que conozca la relación de un objeto PackagePart con la clase Package o con otro objeto PackagePart (es decir, tiene un objeto PackageRelationship que hace referencia al objeto PackagePart que quiere), puede usar esa relación para obtener el identificador URI de dicho objeto PackagePart. Después, pase el identificador URI al método Package.GetPart para devolver el objeto PackagePart.
Nota:
También puede obtener una referencia a un objeto PackagePart determinado si usa solo el método Package.GetPart y el URI del objeto PackagePart, omitiendo el paso en el que obtiene las relaciones de los elementos del paquete. Sin embargo, algunos elementos del paquete de archivos de Visio se pueden guardar en ubicaciones distintas de sus ubicaciones predeterminadas en un paquete. No dé por supuesto que un elemento de paquete siempre se encuentra en el mismo URI para cada archivo. > En su lugar, es un procedimiento recomendado usar relaciones para acceder a objetos PackagePart individuales.
Use el procedimiento siguiente para obtener un objeto PackagePart (el elemento de documento de Visio) mediante un objeto PackageRelationship de la clase Package que hace referencia al elemento.
Para seleccionar un elemento específico del paquete mediante una relación
Después del método
IteratePackagePartsde la clase Program (o Module1 en Visual Basic), agregue el método siguiente.private static PackagePart GetPackagePart(Package filePackage, string relationship) { // Use the namespace that describes the relationship // to get the relationship. PackageRelationship packageRel = filePackage.GetRelationshipsByType(relationship).FirstOrDefault(); PackagePart part = null; // If the Visio file package contains this type of relationship with // one of its parts, return that part. if (packageRel != null) { // Clean up the URI using a helper class and then get the part. Uri docUri = PackUriHelper.ResolvePartUri( new Uri("/", UriKind.Relative), packageRel.TargetUri); part = filePackage.GetPart(docUri); } return part; }Private Function GetPackagePart(filePackage As Package, relationship As String) _ As PackagePart ' Use the namespace that describes the relationship ' to get the relationship. Dim packageRel As PackageRelationship = filePackage.GetRelationshipsByType(relationship).FirstOrDefault() Dim part As PackagePart = Nothing ' If the Visio file package contains this type of relationship with ' one of its parts, return that part. If Not IsNothing(packageRel) Then ' Clean up the URI using a helper class and then get the part. Dim docUri = PackUriHelper.ResolvePartUri( _ New Uri("/", UriKind.Relative), packageRel.TargetUri) part = filePackage.GetPart(docUri) End If Return part End FunctionReemplace el código del bloque using del método Main de la clase Program (bloque Using del método Main en Module1 en Visual Basic) por el código siguiente.
// Get a reference to the Visio Document part contained in the file package.
PackagePart documentPart = GetPackagePart(visioPackage,
    "http://schemas.microsoft.com/visio/2010/relationships/document");
' Get a reference to the Visio Document part contained in the file package. Dim documentPart As PackagePart = GetPackagePart(visioPackage, _ "http://schemas.microsoft.com/visio/2010/relationships/document")
Como se mencionó anteriormente, también puede obtener objetos PackagePart mediante su relación con otros objetos PackagePart. Esto es importante porque, para un documento de Visio de cierta complejidad, la mayoría de los objetos PackagePart no tienen una relación con la clase Package. Por ejemplo, un elemento de contenido de página individual del paquete de archivo (es decir, /visio/pages/page1.xml) tiene una relación con el elemento de índice de página (es decir, /visio/pages/pages.xml), pero no con el propio paquete de archivos. Si no tiene el identificador URI exacto de la página individual del paquete, puede usar su relación con el elemento de índice de página para obtener una referencia a él.
La clase PackagePart expone un método GetRelationshipsByType(String) que puede usar para devolver un objeto PackageRelationshipCollection que contenga solo un tipo de objeto PackageRelationship. Cuando tenga PackageRelationshipCollection, podrá seleccionar el elemento PackageRelationship que necesite de la colección y después hacer referencia al objeto PackagePart.
Use el código siguiente para obtener PackagePart de Package mediante su relación con (obteniendo un objeto PackageRelationship de) otro objeto PackagePart.
Para seleccionar un elemento de paquete específico a partir de su relación con otro elemento de paquete
Después del método
GetPackagePartde la clase Program (o Module1 en Visual Basic), agregue el método de sobrecarga siguiente.private static PackagePart GetPackagePart(Package filePackage, PackagePart sourcePart, string relationship) { // This gets only the first PackagePart that shares the relationship // with the PackagePart passed in as an argument. You can modify the code // here to return a different PackageRelationship from the collection. PackageRelationship packageRel = sourcePart.GetRelationshipsByType(relationship).FirstOrDefault(); PackagePart relatedPart = null; if (packageRel != null) { // Use the PackUriHelper class to determine the URI of PackagePart // that has the specified relationship to the PackagePart passed in // as an argument. Uri partUri = PackUriHelper.ResolvePartUri( sourcePart.Uri, packageRel.TargetUri); relatedPart = filePackage.GetPart(partUri); } return relatedPart; }Private Function GetPackagePart(filePackage As Package, sourcePart As PackagePart, relationship As String) As PackagePart ' This gets only the first PackagePart that shares the relationship ' with the PackagePart passed in as an argument. You can modify the ' code to return a different PackageRelationship from the collection. Dim packageRel As PackageRelationship = sourcePart. _ GetRelationshipsByType(relationship).FirstOrDefault() Dim relatedPart As PackagePart = Nothing If Not IsNothing(packageRel) Then ' Use the PackUriHelper class to determine the URI of the ' PackagePart that has the specified relationship to the ' PackagePart passed in as an argument. Dim partUri As Uri = PackUriHelper.ResolvePartUri( _ sourcePart.Uri, packageRel.TargetUri) relatedPart = filePackage.GetPart(partUri) End If Return relatedPart End FunctionAgregue el código siguiente en el bloque using del método Main de la clase Program (bloque Using del método Main en Module1 en Visual Basic), debajo del código del procedimiento anterior. (No elimine el código que agregó en el procedimiento anterior).
// Get a reference to the collection of pages in the document,
// and then to the first page in the document.
PackagePart pagesPart = GetPackagePart(visioPackage, documentPart,
    "http://schemas.microsoft.com/visio/2010/relationships/pages");
PackagePart pagePart = GetPackagePart(visioPackage, pagesPart,
    "http://schemas.microsoft.com/visio/2010/relationships/page");
' Get a reference to the collection of pages in the document, ' and then to the first page in the document. Dim pagesPart As PackagePart = GetPackagePart(visioPackage, documentPart, _ "http://schemas.microsoft.com/visio/2010/relationships/pages") Dim pagePart As PackagePart = GetPackagePart(visioPackage, pagesPart, _ "http://schemas.microsoft.com/visio/2010/relationships/page")
Para poder realizar cambios en el código XML incluido en un elemento de documento, debe cargar el documento XML en un objeto que permita leer el código XML, mediante la clase XDocument o la clase XmlDocument. Ambas clases exponen métodos para tareas como seleccionar elementos XML contenidos en los documentos XML; crear, leer y escribir atributos; e insertar nuevos elementos XML en un documento.
De estas dos, la clase XDocument permite consultar el código XML mediante LINQ. Con LINQ, puede seleccionar fácilmente los elementos individuales de un documento XML creando consultas, en lugar de iterar en todos los elementos de una colección y probar los elementos que necesita. Por estas razones, los siguientes procedimientos de este artículo usan la clase XDocument y otras clases del espacio de nombres System.Xml.Linq para trabajar con código XML.
Use el procedimiento siguiente para abrir un objeto PackagePart como un documento XML en un objeto XDocument.
Para leer el código XML de un elemento de paquete
Después de la última sobrecarga del método
GetPackagePartde la clase Program (o Module1 en Visual Basic), agregue el método siguiente.private static XDocument GetXMLFromPart(PackagePart packagePart) { XDocument partXml = null; // Open the packagePart as a stream and then // open the stream in an XDocument object. Stream partStream = packagePart.GetStream(); partXml = XDocument.Load(partStream); return partXml; }Private Function GetXMLFromPart(packagePart As PackagePart) As XDocument Dim partXml As XDocument = Nothing ' Open the packagePart as a stream and then ' open the stream in an an XDocument object. Dim partStream As Stream = packagePart.GetStream() partXml = XDocument.Load(partStream) Return partXml End FunctionAgregue el código siguiente en el bloque using del método Main de la clase Program (bloque Using del método Main en Module1 en Visual Basic), debajo del código del procedimiento anterior.
// Open the XML from the Page Contents part.
XDocument pageXML = GetXMLFromPart(pagePart);
' Open the XML from the Page Contents part. Dim pageXML As XDocument = GetXMLFromPart(pagePart)
Seleccionar y cambiar los datos XML de un elemento de un paquete
Una vez que haya cargado un elemento de documento en un objeto XDocument, puede usar LINQ para seleccionar elementos XML y realizar cambios en el documento XML. Puede cambiar datos XML, agregar o quitar datos y volver a guardar el documento XML en el elemento de documento.
La tarea más común para manipular el formato de archivo de Visio consiste en seleccionar elementos XML específicos o colecciones de elementos del documento. El espacio de nombres System.Xml.Linq incluye la clase XElement, que representa un elemento XML. La clase XElement proporciona acceso a los datos contenidos en el archivo de Visio en un nivel pormenorizado, desde elementos Shape individuales hasta elementos ValidationRule (como ejemplos).
Use el código siguiente para seleccionar los elementos Shape de un objeto XDocument (que contenga un elemento de contenido de página) y después seleccionar un elemento Shape determinado.
Para seleccionar un elemento específico de un elemento de paquete
Después del método
GetXMLFromPartde la clase Program (o Module1 en Visual Basic), agregue el método siguiente.private static IEnumerable<XElement> GetXElementsByName( XDocument packagePart, string elementType) { // Construct a LINQ query that selects elements by their element type. IEnumerable<XElement> elements = from element in packagePart.Descendants() where element.Name.LocalName == elementType select element; // Return the selected elements to the calling code. return elements.DefaultIfEmpty(null); }Private Function GetXElementsByName(partXML As XDocument, _ elementType As String) As IEnumerable(Of XElement) ' Construct a LINQ query that selects elements by their element type. Dim elements As IEnumerable(Of XElement) = From element In partXML.Descendants() Where element.Name.LocalName = elementType Select element ' If there aren't any elements of the specified type ' in the document, return Nothing to the calling code. Return elements.DefaultIfEmpty(Nothing) End FunctionDespués del método
GetXElementsByNamede la clase Program (o Module1 en Visual Basic) del paso anterior, agregue el método siguiente.private static XElement GetXElementByAttribute(IEnumerable<XElement> elements, string attributeName, string attributeValue) { // Construct a LINQ query that selects elements from a group // of elements by the value of a specific attribute. IEnumerable<XElement> selectedElements = from el in elements where el.Attribute(attributeName).Value == attributeValue select el; // If there aren't any elements of the specified type // with the specified attribute value in the document, // return null to the calling code. return selectedElements.DefaultIfEmpty(null).FirstOrDefault(); }Private Function GetXElementByAttribute(elements As IEnumerable(Of XElement), _ attributeName As String, attributeValue As String) As XElement ' Construct a LINQ query that selects elements from a group ' of elements by the value of a specific attribute. Dim selectedElements As IEnumerable(Of XElement) = From el In elements Where el.Attribute(attributeName).Value = attributeValue Select el ' If there aren't any elements of the specified type ' with the specified attribute value in the document, ' return Nothing to the calling code. Return selectedElements.DefaultIfEmpty(Nothing).FirstOrDefault() End FunctionAgregue el código siguiente en el bloque using del método Main de la clase Program (bloque Using del método Main en Module1 en Visual Basic), debajo del código del procedimiento anterior.
// Get all of the shapes from the page by getting
// all of the Shape elements from the pageXML document.
IEnumerable<XElement> shapesXML = GetXElementsByName(pageXML, "Shape");
// Select a Shape element from the shapes on the page by
// its name. You can modify this code to select elements
// by other attributes and their values.
XElement startEndShapeXML =
    GetXElementByAttribute(shapesXML, "NameU", "Start/End");
' Get all of the shapes from the page by getting ' all of the Shape elements from the pageXML document. Dim shapesXML As IEnumerable(Of XElement) = GetXElementsByName( _ pageXML, "Shape") ' Select a Shape element from the shapes on the page by ' its name. You can modify this code to select elements ' by other attributes and their values. Dim startEndShapeXML As XElement = GetXElementByAttribute( _ shapesXML, "NameU", "Start/End")
Una vez que haya obtenido una referencia a un objeto XElement contenido en un objeto XDocument, puede manipularlo como cualquier otro dato XML y, por lo tanto, modificar los datos contenidos en el archivo de Visio. Por ejemplo, si una forma tiene texto cuando se abre en Visio, el elemento Shape correspondiente contendrá al menos un elemento Text. Si cambia el valor de ese elemento Text, el texto de la forma cambia cuando el archivo se visualiza en Visio.
Agregue el código siguiente al bloque using del método Main de la clase Program (bloque Using del método Main en Module1 en Visual Basic) para cambiar el texto de la forma de inicio o finalización de "Begin process" (Empezar proceso) a "Start process" (Iniciar proceso).
// Query the XML for the shape to get the Text element, and
// return the first Text element node.
IEnumerable<XElement> textElements = from element in startEndShapeXML.Elements()
                               where element.Name.LocalName == "Text"
                               select element;
XElement textElement = textElements.ElementAt(0);
// Change the shape text, leaving the <cp> element alone.
textElement.LastNode.ReplaceWith("Start process");
' Query the XML for the shape to get the Text element, and
' return the first Text element node.
Dim textElements As IEnumerable(Of XElement) =
    From element In startEndShapeXML.Elements()
    Where element.Name.LocalName == "Text"
    Select element
Dim textElement As XElement = textElements.ElementAt(0)
' Change the shape text, leaving the <cp> element alone.
textElement.LastNode.ReplaceWith("Start process")
Precaución
En el ejemplo de código anterior, el texto de la forma existente y la cadena usada para reemplazarlo tienen el mismo número de caracteres. Tenga en cuenta también que la consulta LINQ cambia el valor del último nodo secundario del elemento devuelto (que, en este caso, es un nodo de texto). Esto se hace para evitar cambiar la configuración del elemento cp, que es un elemento secundario del elemento Text. > Es posible provocar inestabilidad en el archivo si modifica el texto de forma mediante programación sobrescribiendo todos los elementos secundarios del elemento Text . Como en el ejemplo anterior, el formato de texto se representa mediante elementos cp bajo el elemento Text del archivo. La definición del formato se almacena en el elemento primario Section. Si estos dos fragmentos de información son incoherentes, es posible que el archivo no se comporte de la manera esperada. Visio resuelve muchas incoherencias, pero es mejor asegurarse de que cualquier cambio introducido mediante programación sea coherente para controlar el comportamiento final del archivo.
Cuando se realizan cambios en el código XML de un elemento de documento, dichos cambios solo existen en la memoria. Para conservar los cambios en el archivo, debe guardar el XML en el elemento de documento.
El código siguiente usa la clase XmlWriter y la clase XmlWriterSettings para volver a escribir el código XML en el elemento de paquete. Aunque puede usar el método Save() para guardar el código XML en el elemento, las clases XmlWriter y XmlWriterSettings permiten un mayor control sobre la salida, incluida la especificación del tipo de codificación. La clase XDocument expone un método WriteTo(XmlWriter) que toma un objeto XmlWriter y escribe XML de nuevo en una secuencia.
Use el procedimiento siguiente para guardar el código XML de la página de Visio en el elemento de contenido de página.
Para guardar el código XML cambiado en el paquete
Después del método
GetXElementByAttributede la clase Program (o Module1 en Visual Basic) del paso anterior, agregue el método siguiente.private static void SaveXDocumentToPart(PackagePart packagePart, XDocument partXML) { // Create a new XmlWriterSettings object to // define the characteristics for the XmlWriter XmlWriterSettings partWriterSettings = new XmlWriterSettings(); partWriterSettings.Encoding = Encoding.UTF8; // Create a new XmlWriter and then write the XML // back to the document part. XmlWriter partWriter = XmlWriter.Create(packagePart.GetStream(), partWriterSettings); partXML.WriteTo(partWriter); // Flush and close the XmlWriter. partWriter.Flush(); partWriter.Close(); }Private Sub SaveXDocumentToPart(packagePart As PackagePart, _ partXML As XDocument) ' Create a new XmlWriterSettings object to ' define the characteristics for the XmlWriter. Dim partWriterSettings As XmlWriterSettings = New XmlWriterSettings() partWriterSettings.Encoding = Encoding.UTF8 ' Create a new XmlWriter and then write the XML ' back to the document part. Dim partWriter As XmlWriter = XmlWriter.Create(packagePart.GetStream()) partXML.WriteTo(partWriter) ' Flush and close the XmlWriter. partWriter.Flush() partWriter.Close() End SubAgregue el código siguiente en el bloque using del método Main de la clase Program (bloque Using del método Main en Module1 en Visual Basic), debajo del código del procedimiento anterior.
// Save the XML back to the Page Contents part.
SaveXDocumentToPart(pagePart, pageXML);
' Save the XML back to the Page Contents part. SaveXDocumentToPart(pagePart, pageXML)Elija la tecla F5 para depurar la solución. Cuando el programa haya completado su ejecución, elija cualquier tecla para salir.
Abra el archivo Package.vsdx de Visio en Visio 2013.
La forma de inicio o finalización ahora debería contener el texto "Start process" (Iniciar proceso).
Recalcular los datos del archivo
Algunos de los cambios a los datos de un archivo pueden requerir que Visio vuelva a calcular el documento al abrir el archivo. Visio ofrece mucha lógica para un diagrama, especialmente para relaciones de forma (es decir, cuando una forma depende de otra) y para la conexión de formas. Si se cambia alguno de los datos en los que se basa la lógica personalizada, Visio debe propagar los cambios en todos los datos calculados del archivo que se vean afectados.
El formato de archivo de Visio 2013 incluye un par de técnicas que puede usar para recalcular los datos del archivo. Hay tres tipos de escenarios que debe tener en cuenta cuando decida si necesita recalcular el archivo de Visio y cómo hacerlo:
Los cambios en los datos no afectan a otros valores del formato de archivo. No es necesario agregar instrucciones adicionales en Visio para recalcular el documento. Tal como se mostró anteriormente, a veces se puede cambiar el texto de una forma sin necesidad de recalcular el documento.
Los cambios en los datos están limitados a cambios en los valores de las celdas de ShapeSheet en XML, y hay otros valores de ShapeSheet que dependen de estos datos. En este caso, debe agregar una instrucción de procesamiento XML (mediante la clase XProcessingInstruction) al elemento Cell que haya cambiado. Por ejemplo, la celda ThemeIndex de una forma afecta a los valores de otras celdas de ShapeSheet contenidas en la forma. Si cambia la celda ThemeIndex dentro del propio archivo (por ejemplo, el elemento Cell con un valor N de "ThemeIndex"), deberá agregar una instrucción de procesamiento al elemento Cell para que los valores dependientes se actualicen.
Los cambios en los datos afectan a la ubicación de un conector o de puntos de conexión. Otra posible situación es que haya muchos cambios en los datos de ShapeSheet y quiera recalcular todo el documento con una sola instrucción (en lugar de agregar instrucciones de procesamiento individuales para cada cambio). En este caso, puede indicar a Visio que recalcule todo el documento al abrirlo. Para ello, agregue una propiedad RecalcDocument al elemento de propiedades de archivo personalizadas (/docProps/custom.xml) del paquete de Visio. Un ejemplo de este tipo de escenario es el proceso de ajustar la posición o el tamaño de las formas de un diagrama conectado.
Tenga en cuenta que esta es la opción más costosa desde el punto de vista del rendimiento.
Use el procedimiento siguiente para insertar un elemento Cell en un elemento Shape, donde otros elementos Cell del mismo elemento Shape necesitan recalcularse debido al nuevo valor. El nuevo elemento Cell incluye una instrucción de procesamiento como un elemento secundario, para informar a Visio de que debe realizar algún cálculo local.
Para recalcular los valores de una sola forma
Reemplace el código de los dos ejemplos anteriores (cambiando el texto de la forma y la llamada a
SaveXDocumentToPart) del bloque using del método Main de la clase Program (bloque Using del método Main de Module1 en Visual Basic) por el código siguiente.// Insert a new Cell element in the Start/End shape that adds an arbitrary // local ThemeIndex value. This code assumes that the shape does not // already have a local ThemeIndex cell. startEndShapeXML.Add(new XElement("Cell", new XAttribute("N", "ThemeIndex"), new XAttribute("V", "25"), new XProcessingInstruction("NewValue", "V"))); // Save the XML back to the Page Contents part. SaveXDocumentToPart(pagePart, pageXML);' Insert a new Cell element in the shape that adds an arbitrary local ' ThemeIndex value. This code assumes that the shape does not ' already have a local ThemeIndex cell. startEndShapeXML.Add(New XElement("Cell", _ New XAttribute("N", "ThemeIndex"), New XAttribute("V", "25"), New XProcessingInstruction("NewValue", "V"))) ' Save the XML back to the Page Contents part. SaveXDocumentToPart(pagePart, pageXML)Elija la tecla F5 para depurar la solución. Cuando el programa haya completado su ejecución, elija cualquier tecla para salir.
Abra el archivo Package.vsdx de Visio en Visio 2013. La forma de inicio o finalización ahora debería tener un color de relleno diferente.
El color de la forma se basa en el valor de la celda ThemeIndex, que determina de qué tema activo hereda la forma. En el ejemplo anterior, se establece que la forma hereda de un tema diferente (la celda ThemeIndex está establecida en un valor de "25"). Si no usa una instrucción de procesamiento, el color del texto de la forma (que también se ve afectado por la celda ThemeIndex) no se recalcula. El color de relleno de la forma cambiaría a blanco, pero el texto seguiría siendo blanco y, por tanto, ilegible. Además, sin la instrucción de procesamiento, es posible que Visio actualice la forma en una fecha posterior, por lo que el archivo permanecería en un estado inestable y los valores de formato de la forma podrían actualizarse de una manera impredecible.
Si cambia los datos del archivo de modo que Visio tenga que recalcular el documento (por ejemplo, cambia la posición de una forma conectada y, por lo tanto, obliga a los conectores a volver a enrutarse), debe agregar una instrucción de actualización en el archivo de Visio. La instrucción se crea agregando un elemento property con un valor de atributo name de "RecalcDocument" al código XML del elemento de propiedades de archivo personalizadas del paquete de archivos de Visio. Recomendamos que compruebe el elemento de propiedades de archivo personalizadas para asegurarse de que todavía no se ha registrado ninguna instrucción "RecalcDocument" en el archivo.
Use el código siguiente para cambiar el valor de la celda PinY de la forma de inicio o finalización de los ejemplos anteriores. El código selecciona el elemento Cell que contiene los datos de la celda PinY como un objeto XElement mediante el valor de su atributo N. Después, el código agrega una instrucción de actualización al elemento de propiedades de archivo personalizadas del archivo de Visio.
Nota:
Este código se basa en los métodos GetPackagePart y SaveXDocumentToPart creados anteriormente.
Para recalcular todo el documento al abrirlo
Después del método
SaveXDocumentToPartde la clase Program (o Module1 en Visual Basic) del paso anterior, agregue el método siguiente.private static void RecalcDocument(Package filePackage) { // Get the Custom File Properties part from the package and // and then extract the XML from it. PackagePart customPart = GetPackagePart(filePackage, "http://schemas.openxmlformats.org/officeDocument/2006/relationships/" + "custom-properties"); XDocument customPartXML = GetXMLFromPart(customPart); // Check to see whether document recalculation has already been // set for this document. If it hasn't, use the integer // value returned by CheckForRecalc as the property ID. int pidValue = CheckForRecalc(customPartXML); if (pidValue > -1) { XElement customPartRoot = customPartXML.Elements().ElementAt(0); // Two XML namespaces are needed to add XML data to this // document. Here, we're using the GetNamespaceOfPrefix and // GetDefaultNamespace methods to get the namespaces that // we need. You can specify the exact strings for the // namespaces, but that is not recommended. XNamespace customVTypesNS = customPartRoot.GetNamespaceOfPrefix("vt"); XNamespace customPropsSchemaNS = customPartRoot.GetDefaultNamespace(); // Construct the XML for the new property in the XDocument.Add method. // This ensures that the XNamespace objects will resolve properly, // apply the correct prefix, and will not default to an empty namespace. customPartRoot.Add( new XElement(customPropsSchemaNS + "property", new XAttribute("pid", pidValue.ToString()), new XAttribute("name", "RecalcDocument"), new XAttribute("fmtid", "{D5CDD505-2E9C-101B-9397-08002B2CF9AE}"), new XElement(customVTypesNS + "bool", "true") )); } // Save the Custom Properties package part back to the package. SaveXDocumentToPart(customPart, customPartXML); }Private Sub RecalcDocument(filePackage As Package) ' Get the Custom File Properties part from the package and ' then extract the XML from it. Dim customPart As PackagePart = GetPackagePart(filePackage, _ "http://schemas.openxmlformats.org/officeDocument/2006/" + _ "relationships/custom-properties") Dim customPartXML As XDocument = GetXMLFromPart(customPart) ' Check to see whether document recalculation has already been ' set for this document. If it hasn't, use the integer ' value returned by CheckForRecalc as the property ID. Dim pidValue As Integer = CheckForRecalc(customPartXML) If (pidValue > 1) Then Dim customPartRoot As XElement = _ customPartXML.Elements().ElementAt(0) ' Two XML namespaces are needed to add XML data to this ' document. Here, we're using the GetNamespaceOfPrefix and ' GetDefaultNamespace methods to get the namespaces that ' we need. You can specify the exact strings for the ' namespaces, but that is not recommended. Dim customVTypesNS As XNamespace = _ customPartRoot.GetNamespaceOfPrefix("vt") Dim customPropsSchemaNS As XNamespace = _ customPartRoot.GetDefaultNamespace() ' Contruct the XML for the new property in the XDocument.Add ' method. This ensures that the XML namespaces resolve ' properly, apply the correct prefix, and do not default to ' an empty namespace. customPartRoot.Add( _ New XElement(customPropsSchemaNS + "property", _ New XAttribute("pid", pidValue.ToString()), _ New XAttribute("name", "RecalcDocument"), _ New XAttribute("fmtid", _ "{D5CDD505-2E9C-101B-9397-08002B2CF9AE}"), _ New XElement(customVTypesNS + "bool", "true") _ )) ' Save the Custom Properties package part back to the package. SaveXDocumentToPart(customPart, customPartXML) End If End SubDespués del método
RecalcDocumentde la clase Program (o Module1 en Visual Basic) del paso anterior, agregue el método siguiente.private static int CheckForRecalc(XDocument customPropsXDoc) { // Set the inital pidValue to -1, which is not an allowed value. // The calling code tests to see whether the pidValue is // greater than -1. int pidValue = -1; // Get all of the property elements from the document. IEnumerable<XElement> props = GetXElementsByName( customPropsXDoc, "property"); // Get the RecalcDocument property from the document if it exists already. XElement recalcProp = GetXElementByAttribute(props, "name", "RecalcDocument"); // If there is already a RecalcDocument instruction in the // Custom File Properties part, then we don't need to add another one. // Otherwise, we need to create a unique pid value. if (recalcProp != null) { return pidValue; } else { // Get all of the pid values of the property elements and then // convert the IEnumerable object into an array. IEnumerable<string> propIDs = from prop in props where prop.Name.LocalName == "property" select prop.Attribute("pid").Value; string[] propIDArray = propIDs.ToArray(); // Increment this id value until a unique value is found. // This starts at 2, because 0 and 1 are not valid pid values. int id = 2; while (pidValue == -1) { if (propIDArray.Contains(id.ToString())) { id++; } else { pidValue = id; } } } return pidValue; }Private Function CheckForRecalc(customPropsXDoc As XDocument) As Integer ' Set the initial pidValue to -1, which is not an allowed value. ' The calling code test to see whether the pidValue is ' greater than -1. Dim pidValue As Integer = -1 ' Get all of the property elements from the document. Dim props As IEnumerable(Of XElement) = GetXElementsByName( _ customPropsXDoc, "property") ' Get the RecalcDocument property from the document if ' it exists already. Dim recalcProp As XElement = GetXElementByAttribute(props, _ "name", "RecalcDocument") ' If there is already a RecalcDocument instruction in the ' Custom File Properties part, then we don't need another one. ' Otherwise, we need to create a unique pid value. If Not IsNothing(recalcProp) Then Return pidValue Else ' Get all of the pid values of the proeprty elements and then ' convert the IEnumerable object into an array. Dim propIDs As IEnumerable(Of String) = _ From prop In props Where prop.Name.LocalName = "property" Select prop.Attribute("pid").Value Dim propIDArray As String() = propIDs.ToArray() ' Increment this id value until a unique value is found. ' This starts at 2, because 0 and 1 are not valid pid values. Dim id As Integer = 2 While (pidValue = -1) If (propIDArray.Contains(id.ToString())) Then id = id + 1 Else pidValue = id End If End While End If Return pidValue End FunctionReemplace el código del ejemplo anterior del bloque using del método Main de la clase Program (bloque Using del método Main en Module1 en Visual Basic) por el código siguiente.
// Change the shape's horizontal position on the page
// by getting a reference to the Cell element for the PinY
// ShapeSheet cell and changing the value of its V attribute.
XElement pinYCellXML = GetXElementByAttribute(
    startEndShapeXML.Elements(), "N", "PinY");
pinYCellXML.SetAttributeValue("V", "2");
// Add instructions to Visio to recalculate the entire document
// when it is next opened.
RecalcDocument(visioPackage);
// Save the XML back to the Page Contents part.
SaveXDocumentToPart(pagePart, pageXML);
' Change the shape's horizontal position on the page ' by getting a reference to the Cell element for the PinY ' ShapeSheet cell and changing the value of its V attribute. Dim pinYCellXML As XElement = GetXElementByAttribute( startEndShapeXML.Elements(), "N", "PinY") pinYCellXML.SetAttributeValue("V", "2") ' Add instructions to Visio to recalculate the entire document ' when it is next opened. RecalcDocument(visioPackage) ' Save the XML back to the Page Contents part. SaveXDocumentToPart(pagePart, pageXML)Elija la tecla F5 para depurar la solución. Cuando el programa haya completado su ejecución, elija cualquier tecla para salir.
Abra el archivo Package.vsdx de Visio en Visio 2013.
La forma Inicio/Fin ahora debe estar a 2 pulgadas del borde inferior del dibujo. El conector entre la forma Start/End y la forma Process debe haberse enrutado para adaptarse al cambio de diseño. Si la propiedad RecalcDocument no se hubiera agregado al archivo, se habría cambiado la posición de la forma, pero el conector no se habría enrutado a la nueva ubicación de la forma.
Agregar un nuevo elemento a un paquete
Uno de los escenarios más comunes para modificar un paquete de archivos consiste en agregar un nuevo elemento de documento al paquete. Por ejemplo, si quiere agregar una página al dibujo de Visio mediante la adición de contenido al paquete, debe agregar un elemento de contenido de página al paquete.
El proceso para agregar un nuevo elemento al paquete es sencillo:
El documento XML se crea con los datos de PackagePart. Debe prestar especial atención a los espacios de nombres XML que rigen el esquema para el tipo específico de documento XML que cree.
Cree un nuevo archivo que contenga el código XML y guárdelo en una ubicación en el objeto Package.
Cree las relaciones necesarias entre el nuevo objeto PackagePart y la clase Package u otro objeto PackagePart.
Puede actualizar los elementos existentes que necesiten hacer referencia a la nueva parte. Por ejemplo, si agrega un nuevo elemento Contenido de página (una nueva página) al archivo, también debe actualizar el elemento Índice de página (/visio/pages/pages.xml archivo) para incluir la información correcta sobre la nueva página.
Use el procedimiento siguiente para crear un nuevo elemento de extensibilidad de la cinta de opciones en el archivo de Visio. El nuevo elemento de extensibilidad de la cinta de opciones agrega a la cinta una nueva pestaña con un solo grupo que contiene un solo botón.
Para crear un nuevo elemento de paquete
Después del método
CheckForRecalcde la clase Program (o Module1 en Visual Basic) del procedimiento anterior, agregue el método siguiente.private static XDocument CreateCustomUI() { // Add a new Custom User Interface document part to the package. // This code adds a new CUSTOM tab to the ribbon for this // document. The tab has one group that contains one button. XNamespace customUINS = "http://schemas.microsoft.com/office/2006/01/customui"; XDocument customUIXDoc = new XDocument( new XDeclaration("1.0", "utf-8", "true"), new XElement(customUINS + "customUI", new XElement(customUINS + "ribbon", new XElement(customUINS + "tabs", new XElement(customUINS + "tab", new XAttribute("id", "customTab"), new XAttribute("label", "CUSTOM"), new XElement(customUINS + "group", new XAttribute("id", "customGroup"), new XAttribute("label", "Custom Group"), new XElement(customUINS + "button", new XAttribute("id", "customButton"), new XAttribute("label", "Custom Button"), new XAttribute("size", "large"), new XAttribute("imageMso", "HappyFace") ) ) ) ) ) ) ); return customUIXDoc; }Private Function CreateCustomUI() As XDocument ' Add a new Custom User Interface document part to the package. ' This code adds a new CUSTOM tab to the ribbon for this ' document. The tab has one group that contains one button. Dim customUINS As XNamespace = _ "http://schemas.microsoft.com/office/2006/01/customui" Dim customUIXML = New XDocument( _ New XDeclaration("1.0", "utf-8", "true"), _ New XElement(customUINS + "customUI", _ New XElement(customUINS + "ribbon", New XElement(customUINS + "tabs", New XElement(customUINS + "tab", New XAttribute("id", "customTab"), New XAttribute("label", "CUSTOM"), New XElement(customUINS + "group", New XAttribute("id", "customGroup"), New XAttribute("label", "Custom Group"), New XElement(customUINS + "button", New XAttribute("id", "customButton"), New XAttribute("label", "Custom Button"), New XAttribute("size", "large"), New XAttribute("imageMso", "HappyFace") ) ) ) ) ) ) ) Return customUIXML End FunctionDespués del método
CreateCustomUIde la clase Program (o Module1 en Visual Basic) del paso anterior, agregue el método siguiente.private static void CreateNewPackagePart(Package filePackage, XDocument partXML, Uri packageLocation, string contentType, string relationship) { // Need to check first to see whether the part exists already. if (!filePackage.PartExists(packageLocation)) { // Create a new blank package part at the specified URI // of the specified content type. PackagePart newPackagePart = filePackage.CreatePart(packageLocation, contentType); // Create a stream from the package part and save the // XML document to the package part. using (Stream partStream = newPackagePart.GetStream(FileMode.Create, FileAccess.ReadWrite)) { partXML.Save(partStream); } } // Add a relationship from the file package to this // package part. You can also create relationships // between an existing package part and a new part. filePackage.CreateRelationship(packageLocation, TargetMode.Internal, relationship); }Private Sub CreateNewPackagePart(filePackage As Package, _ partXML As XDocument, packageLocation As Uri, contentType As String, _ relationship As String) ' Need to check first to see whether the part exists already. If Not (filePackage.PartExists(packageLocation)) Then ' Create a new blank package part at the specified URI ' of the specified content type. Dim newPart As PackagePart = filePackage.CreatePart(packageLocation, _ contentType) ' Create a stream from the package part and save the ' XML document to the package part. Using partStream As Stream = newPart.GetStream(FileMode.Create, _ FileAccess.ReadWrite) partXML.Save(partStream) End Using ' Add a relationship from the file package to this ' package part. You can also create relationships ' between an existing package part and a new part. filePackage.CreateRelationship(packageLocation, _ TargetMode.Internal, relationship) End If End SubReemplace todo el código del bloque using del método Main de la clase Program (bloque Using del método Main en Module1 en Visual Basic) por el código siguiente.
// Create a new Ribbon Extensibility part and add it to the file.
XDocument customUIXML = CreateCustomUI();
CreateNewPackagePart(visioPackage, customUIXML,
    new Uri("/customUI/customUI1.xml", UriKind.Relative),
    "application/xml",
    "http://schemas.microsoft.com/office/2006/relationships/ui/extensibility");
' Create a new Ribbon Extensibility part and add it to the file. Dim customUIXML As XDocument = CreateCustomUI() CreateNewPackagePart(visioPackage, customUIXML, _ New Uri("/customUI/customUI1.xml", UriKind.Relative), _ "application/xml", _ "http://schemas.microsoft.com/office/2006/relationships/ui/extensibility")Elija la tecla F5 para depurar la solución. Cuando el programa haya completado su ejecución, elija cualquier tecla para salir.
Abra el archivo Package.vsdx de Visio en Visio 2013 y elija la pestaña PERSONALIZADO.
La cinta de opciones personalizada es similar a la figura 2 cuando el archivo se abre en Visio 2013.
Figura 2. Pestaña Personalizada en la cinta de opciones de Visio 2013

El código XML creado por el método CreateCustomUI se parece al ejemplo siguiente.
<?xml version="1.0" encoding="utf-8"?>
<customUI xmlns="http://schemas.microsoft.com/office/2006/01/customui">
  <ribbon>
    <tabs>
      <tab id="customTab" label="CUSTOM">
        <group id="customGroup" label="Custom Group">
          <button id="customButton" label="Custom Button" size="large"
              imageMso="HappyFace" />
        </group>
      </tab>
    </tabs>
  </ribbon>
</customUI>
Reconocimientos
Nos gustaría agradecer la contribución y los comentarios de Al Edlund, MVP de Visio, en la creación de los ejemplos de código contenidos en este artículo técnico. Al es un experto en la manipulación del formato de archivo de Visio, incluido el formato de dibujo XML de Visio (.vdx) y el nuevo formato de archivo de Visio (.vsdx). Al ha creado proyectos que exploran los formatos de archivo de Visio mediante programación y exponen las estructuras internas.
Para obtener más información sobre el trabajo de Al con el formato de archivo de Visio, vea a continuación los vínculos de la sección Recursos adicionales.
Vea también
De Al Edlund:
pkgVisio: proyecto (
https://pkgvisio.codeplex.com/documentation) manipulación de Visio 2013 XML en CodePlex.Vídeo pkgVisio_pt1 de YouTube.
Vídeo pkgVisio_pt2 de YouTube.
Manipulate Office Open XML Formats Documents (Manipular documentos con formato de archivo Open XML de Office)
Create a Document with Namespaces (C#) (LINQ to XML) [Creación de un documento con espacios de nombres (C#) (LINQ a XML)]
Add Custom XML Parts to Documents Without Starting Microsoft Office (Adición de elementos XML personalizados a documentos sin iniciar Microsoft Office)