Microsoft Security DevOps は、静的分析ツールを開発ライフサイクルに統合するコマンド ライン アプリケーションです。 Security DevOps は、SDL、セキュリティ、コンプライアンス ツールなどの最新バージョンの静的分析ツールをインストール、構成、実行します。 Security DevOps は、複数の環境で確定的な実行を可能にする移植可能な構成を備えたデータ ドリブンです。
Microsoft Security DevOps では、次のオープン ソース ツールを使用します。
| 名前 | Language | ライセンス |
|---|---|---|
| マルウェア対策 | マルウェアをスキャンし、マルウェアが見つかった場合にビルドを中断する、Microsoft Defender for Endpoint からの Windows のマルウェア対策保護。 このツールは、Windows 最新のエージェントで既定でスキャンします。 | オープンソースではない |
| Bandit | Python | Apache License 2.0 |
| BinSkim | Binary--Windows、ELF | MIT ライセンス |
| Checkov | Terraform、Terraform プラン、CloudFormation、AWS SAM、Kubernetes、Helm chart、Kustomize、Dockerfile、Serverless、Bicep、OpenAPI、ARM | Apache License 2.0 |
| ESlint | JavaScript | MIT ライセンス |
| Template Analyzer | ARM テンプレート、Bicep | MIT ライセンス |
| Terrascan | Terraform (HCL2)、Kubernetes (JSON/YAML)、Helm v3、Kustomize、Dockerfiles、CloudFormation | Apache License 2.0 |
| Trivy | コンテナー イメージ, コードとしてのインフラストラクチャ (IaC) | Apache License 2.0 |
[前提条件]
Azure サブスクリプション Azure サブスクリプションをお持ちでない場合は、開始する前に 無料アカウント を作成してください。
新しいウィンドウで Microsoft Security DevOps GitHub アクション を開きます。
ワークフローのアクセス許可が GitHub リポジトリの読み取りと書き込みに設定されていることを確認します。 これには、Defender for Cloud とのフェデレーションのための GitHub ワークフローでの "id-token: write" アクセス許可の設定が含まれます。
Microsoft Security DevOps GitHub アクションを構成する
GitHub アクションを設定するには:
GitHub にサインインします。
GitHub アクションを構成するリポジトリを選択します。
[アクション] を選択します。
![[アクション] ボタンが配置されている場所を示すスクリーンショット。](media/msdo-github-action/actions.png)
[New workflow]\(新しいワークフロー\) を選択します。
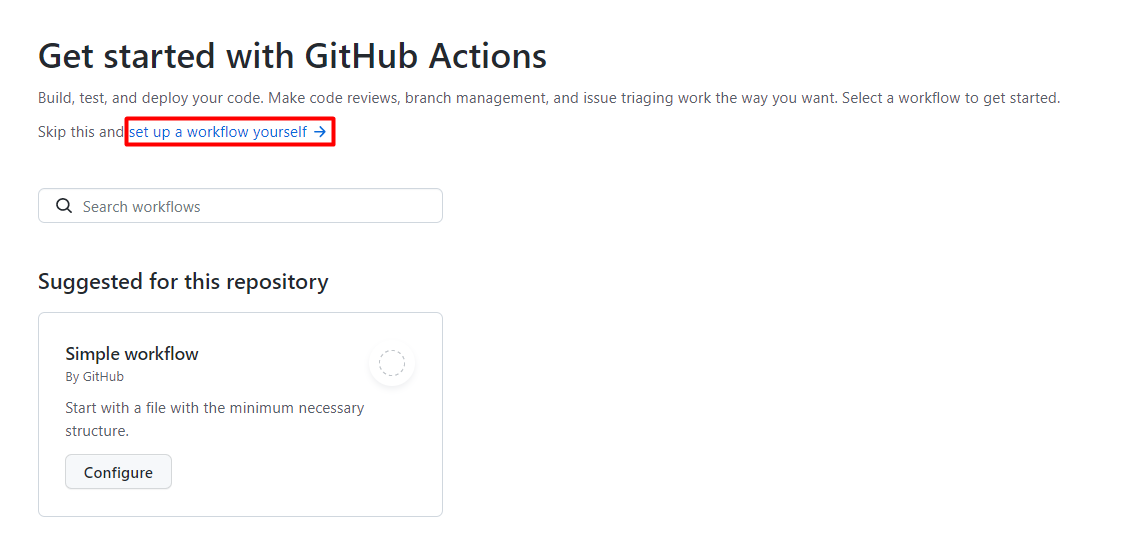
[GitHub Actions の概要] ページで、[自分でワークフローを設定する] を選択します
テキスト ボックスに、ワークフロー ファイルの名前を入力します。 たとえば、「
msdevopssec.yml」のように入力します。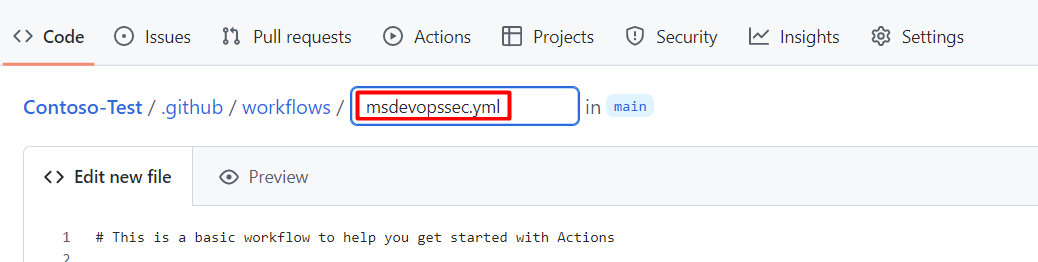
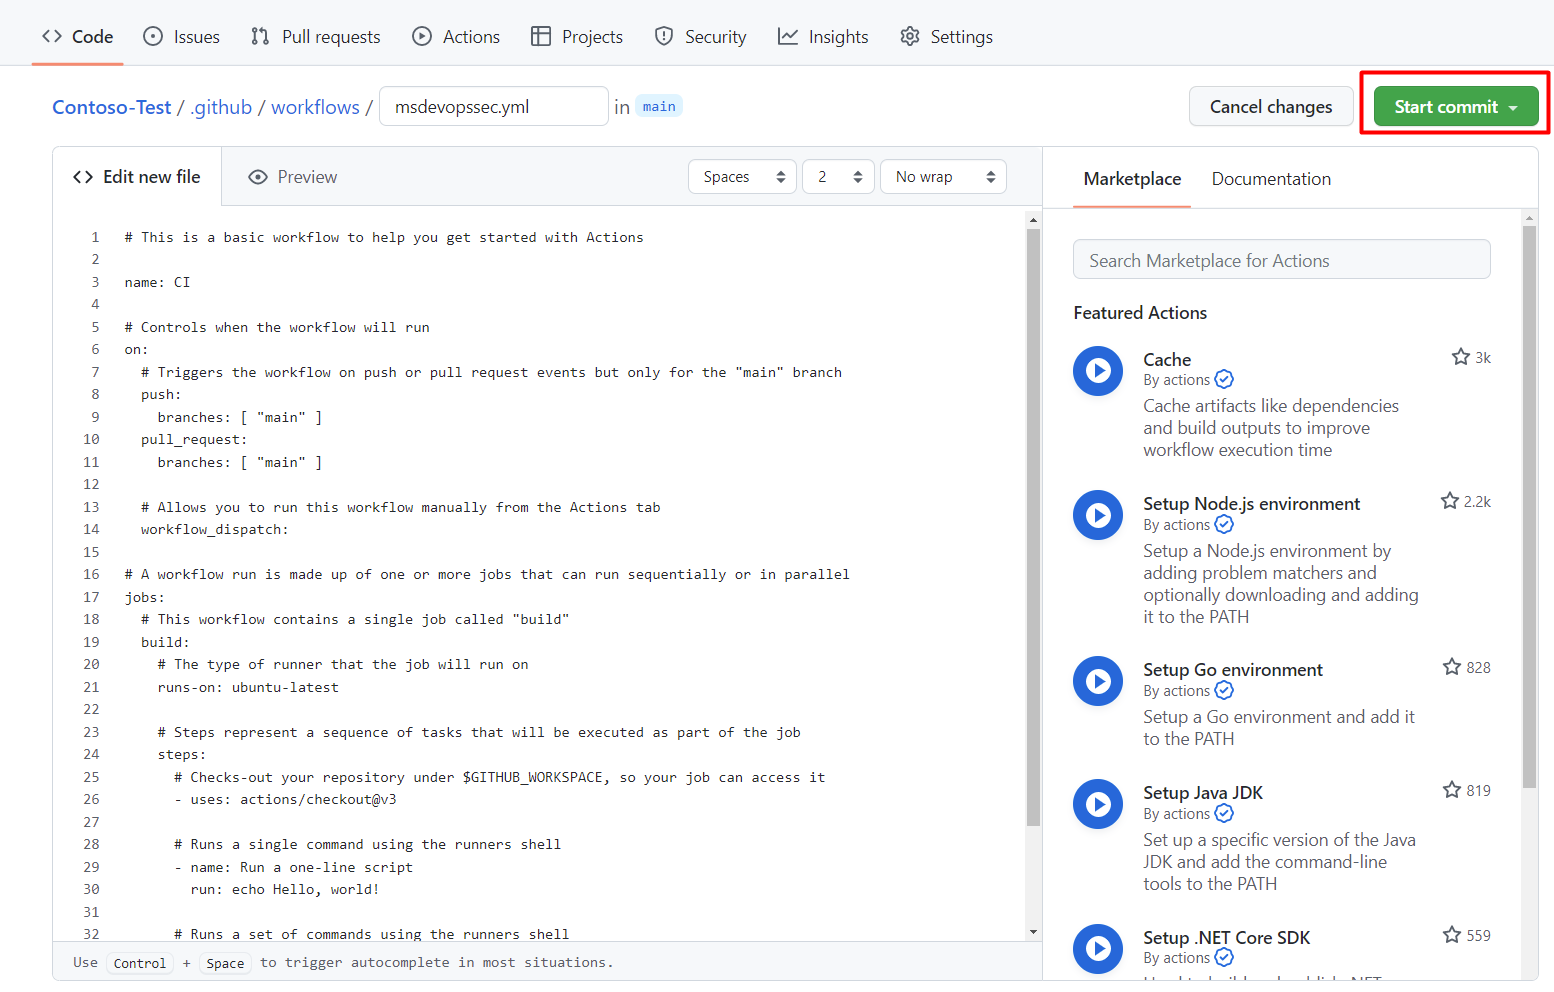
次の サンプル アクション ワークフロー をコピーし、[新しいファイルの編集] タブに貼り付けます。
name: MSDO
on:
  push:
    branches:
      - main

jobs:
  sample:
    name: Microsoft Security DevOps

    # Windows and Linux agents are supported
    runs-on: windows-latest

    permissions:
      contents: read
      id-token: write
      actions: read
      # Write access for security-events is only required for customers looking for MSDO results to appear in the codeQL security alerts tab on GitHub (Requires GHAS)
      security-events: write

    steps:

      # Checkout your code repository to scan
    - uses: actions/checkout@v3

      # Run analyzers
    - name: Run Microsoft Security DevOps
      uses: microsoft/security-devops-action@latest
      id: msdo
    # with:
      # config: string. Optional. A file path to an MSDO configuration file ('*.gdnconfig').
      # policy: 'GitHub' | 'microsoft' | 'none'. Optional. The name of a well-known Microsoft policy. If no configuration file or list of tools is provided, the policy may instruct MSDO which tools to run. Default: GitHub.
      # categories: string. Optional. A comma-separated list of analyzer categories to run. Values: 'code', 'artifacts', 'IaC', 'containers'. Example: 'IaC, containers'. Defaults to all.
      # languages: string. Optional. A comma-separated list of languages to analyze. Example: 'javascript,typescript'. Defaults to all.
      # tools: string. Optional. A comma-separated list of analyzer tools to run. Values: 'bandit', 'binskim', 'checkov', 'eslint', 'templateanalyzer', 'terrascan', 'trivy'.

      # Upload alerts to the Security tab - required for MSDO results to appear in the codeQL security alerts tab on GitHub (Requires GHAS)
    # - name: Upload alerts to Security tab
    #  uses: github/codeql-action/upload-sarif@v3
    #  with:
    #    sarif_file: ${{ steps.msdo.outputs.sarifFile }}

      # Upload alerts file as a workflow artifact - required for MSDO results to appear in the codeQL security alerts tab on GitHub (Requires GHAS)
    # - name: Upload alerts file as a workflow artifact
    #  uses: actions/upload-artifact@v3
    #  with:
    #    name: alerts
    #    path: ${{ steps.msdo.outputs.sarifFile }}
注
その他のツール構成オプションと手順については、Microsoft Security DevOps Wiki を参照してください。
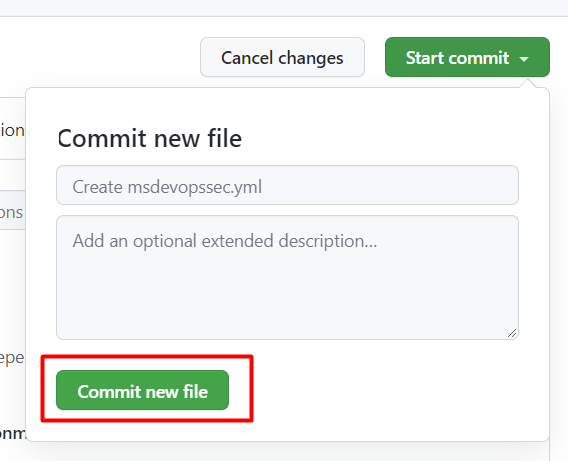
[ コミットの開始] を選択する
[ 新しいファイルのコミット] を選択します。 プロセスが完了するまでに最大 1 分かかる場合があることに注意してください。
[ アクション] を 選択し、新しいアクションが実行されていることを確認します。


スキャン結果の表示
スキャン結果を表示するには:
Azure にサインインします。
Defender for Cloud > DevOps Security に移動します。
DevOps セキュリティ ブレードから、関連付けられているリポジトリについて、開発者が CI ログに表示するのと同じ MSDO セキュリティ結果が数分で表示されます。 GitHub Advanced Security を使用しているお客様には、これらのツールから取り込まれた結果も表示されます。
詳細情報
Azure の GitHub アクションについて説明します。
GitHub から Azure にアプリをデプロイする方法について説明します。
次のステップ
Defender for Cloud での DevOps セキュリティの詳細を確認する。
GitHub 組織を Defender for Cloud に接続する方法について説明します。