このクイック スタートでは、Windows App SDK を使用してプッシュ通知を送受信するデスクトップ Windows アプリケーションを作成します。
Prerequisites
- Windows アプリ の開発を開始する
- Windows アプリ SDK を使う新しいプロジェクトを作成するか、既存のプロジェクトで Windows アプリ SDK を使います
- Windows App SDK プッシュ通知を使用するには、 Azure アカウント が必要です。
- プッシュ通知の概要を読む
サンプル アプリ
このクイック スタートでは、Windows App SDK 1.7 でアプリにプッシュ通知のサポートを追加する手順について説明します。 GitHub にあるサンプル アプリで、このクイック スタートと同様のコードを参照してください。 プロジェクトに最適なサンプルについては、お 好みのバージョンの Windows App SDK でブランチ を確認してください。
サンプル リポジトリでバージョン ブランチを選択することで、Windows App SDK の各 バージョンのサンプルを見つけることもできます。
API リファレンス
プッシュ通知の API リファレンス ドキュメントについては、 Microsoft.Windows.PushNotifications 名前空間を参照してください。
Azure Active Directory (AAD) でアプリの ID を構成する
Windows App SDK のプッシュ通知では、Azure Active Directory (AAD) の ID が使用されます。 WNS チャネル URI を要求するとき、およびプッシュ通知を送信するためにアクセス トークンを要求する場合は、Azure 資格情報が必要です。 注: Microsoft パートナー センターでの Windows App SDK プッシュ通知の使用はサポートしていません。
手順 1: AAD アプリの登録を作成する
Azure アカウントにログインして、新しい AAD アプリ登録 リソース を作成します。 [新規登録] を選択します。
手順 2: 名前を指定し、マルチテナント オプションを選択する
アプリケーションの名前を指定します。
プッシュ通知にはマルチテナント オプションが必要なので、これを選択します。
- テナントの詳細については、「 アプリにサインインできるユーザー」を参照してください。
[登録] を選択します
アプリケーション (クライアント) ID に注意してください。これは、アクティブ化の登録とアクセス トークンの要求時に使用する Azure AppId です。
アクセス トークンを要求するときに使用する Azure TenantId であるため、ディレクトリ (テナント) ID を書き留めます。
Important
 アプリケーション (クライアント) ID とディレクトリ (テナント) ID を書き留めます。
オブジェクト IDを書き留めてください。これは、チャネルリクエストを送信するときに使用する、Azure オブジェクト ID です。 これは、[ 要点 ] ページに一覧表示されているオブジェクト ID ではないことに注意してください。 代わりに、正しいオブジェクト ID を見つけるには、[要点] ページの [ローカル ディレクトリのマネージド アプリケーション] フィールドでアプリ名をクリックします。
![[要点] ページの [ローカル ディレクトリ内のマネージド アプリケーション] オプションを示すスクリーンショット](images/push-notification-essentials-ui.png)
![[オブジェクト ID] フィールドを示すスクリーンショット](images/push-notification-object-id-field.png)
Note
オブジェクト ID を取得するには 、サービス プリンシパル が必要です。アプリに関連付けられていない場合は、次のいずれかの記事の手順に従って、Azure portal またはコマンド ラインで作成します。
手順 3: アプリ登録用のシークレットを作成する
プッシュ通知を送信するアクセス トークンを要求するときに、シークレットが Azure AppId/ClientId と共に使用されます。

認証と秘密の質問 に移動し、 新しいクライアントの秘密の質問を選択します。
Important
作成したシークレットをコピーし、Azure Key Vault などの安全な場所に保存してください。 作成直後に表示できるのは 1 回だけです。
手順 4: アプリのパッケージ ファミリ名を Azure AppId にマップする
アプリがパッケージ化されている場合 (外部の場所でパッケージ化されている場合を含む)、このフローを使用して、アプリのパッケージ ファミリ名 (PFN) とその Azure AppId をマップできます。
アプリがパッケージ化された Win32 アプリの場合は、件名に "Windows App SDK プッシュ通知マッピング要求" と本文 "PFN: [your PFN]"、AppId: [your APPId]、ObjectId: [your ObjectId]を含む Win_App_SDK_Push@microsoft.com を電子メールで送信して、パッケージ ファミリ名 (PFN) マッピング要求を作成します。 マッピング要求は週単位で完了します。 マッピング要求が完了すると、通知が表示されます。
Azure AppId、ObjectId、シークレットを取得したら、これらの資格情報を以下のサンプル コードに追加できます。
プッシュ通知を受信するようにアプリを構成する
手順 1: Windows アプリ SDK と必要な NuGet パッケージを追加する
次に、ソリューション エクスプローラーでソリューションを右クリックし、[ NuGet パッケージの管理] を選択します。
パッケージ マネージャーで、次のパッケージを追加します。
- Microsoft.WindowsAppSDK (最小バージョン 1.1.0)
- Microsoft.Windows.SDK.BuildTools (最小バージョン 10.0.22000.194)
- Microsoft.Windows.CppWinRT、(最小バージョン 2.0.210930.14)
- Microsoft.Windows.ImplementationLibrary、(最小バージョン 1.0.210930.1)
プロジェクトで Windows App SDK を初めて使用し、外部の場所でパッケージ化されている場合、またはパッケージ化されていない場合は、プロジェクト ファイルに次のプロパティを追加して Windows App SDK を初期化します。
<!-- your .vcxproj or .proj file -->
<PropertyGroup Label="Globals">
    <!-- Other properties -->
    <WindowsPackageType>None</WindowsPackageType>
</PropertyGroup>
またはブートストラップ API を使用します。 詳細については、「 外部の場所でパッケージ化されたアプリまたはパッケージ化されていないアプリに Windows App SDK ランタイムを使用 する」を参照してください。
Note
SDK が初期化されていない場合、アプリは System.Runtime.InteropServices.COMException (0x80040154): Class not registered (0x80040154 (REGDB_E_CLASSNOTREG)) をスローし、実行されません。
手順 2: 名前空間を追加する
次に、Windows App SDK プッシュ通知の名前空間を Microsoft.Windows.PushNotifications追加します。
#include <winrt/Microsoft.Windows.PushNotifications.h>

using namespace winrt::Microsoft::Windows::PushNotifications;
"Microsoft.Windows.PushNotifications が見つかりません" というエラーが発生した場合は、ヘッダー ファイルが生成されていないことを意味している可能性があります。 解決するには、上記のパッケージがインストールされていることを確認し、インクルードステートメントと using ステートメントをコメントアウトしてエラーの原因と、アプリケーションをリビルドしてヘッダー ファイルを生成します。 ビルドが成功したら、include ステートメントと using ステートメントのコメントを解除し、プロジェクトをリビルドします。 これにより、エラーが解決されます。
手順 3: COM アクティベーターをアプリのマニフェストに追加する
Important
アプリがパッケージ化されていない (つまり、実行時にパッケージ ID がない) 場合は、「 手順 4: アプリの起動時にプッシュ通知に登録して応答する」に進みます。
アプリがパッケージ化されている場合 (外部の場所でパッケージ化を含む): Package.appxmanifest を開きます。
<Application>要素内に次のコードを追加します。
Id、Executable、およびDisplayNameの値を、アプリに固有の値に置き換えます。
<!--Packaged apps only-->
<!--package.appxmanifest-->

<Package
  ...
  xmlns:com="http://schemas.microsoft.com/appx/manifest/com/windows10"
  ...
  <Applications>
    <Application>
      ...
      <Extensions>

        <!--Register COM activator-->
        <com:Extension Category="windows.comServer">
          <com:ComServer>
              <com:ExeServer Executable="SampleApp\SampleApp.exe" DisplayName="SampleApp" Arguments="----WindowsAppRuntimePushServer:">
                <com:Class Id="[Your app's Azure AppId]" DisplayName="Windows App SDK Push" />
            </com:ExeServer>
          </com:ComServer>
        </com:Extension>

      </Extensions>
    </Application>
  </Applications>
 </Package>
Note
この例の完成した C++ クラスの例は、 手順 5. の後にあります。 手順 4 と 5 では、最後の例で各部分を追加するための詳細なガイダンスを提供します。
手順 4: アプリの起動時にプッシュ通知に登録して応答する
アプリの main() メソッドを更新して、次のコードを追加します。
- PushNotificationManager::D efault() を呼び出して、プッシュ通知を受信するようにアプリを登録します。Register().
- AppInstance::GetCurrent() を呼び出して、アクティブ化要求のソースを確認します。GetActivatedEventArgs(). プッシュ通知からアクティブ化がトリガーされた場合は、通知のペイロードに基づいて応答します。
Important
PushNotificationManager::Default().Register を呼び出す必要があります。これは、AppInstance.GetCurrent.GetActivatedEventArgsを呼び出す前に行ってください。
フォアグラウンド イベント ハンドラーの追加
フォアグラウンドでイベントを処理するには、 PushNotificationManager.PushReceived のハンドラーを登録します。
Important
PushNotificationManager.Register() を呼び出す前に、 PushNotificationManager.PushReceived イベント ハンドラーを登録する必要もあります。 それ以外の場合は、次のランタイム例外がスローされます。
System.Runtime.InteropServices.COMException: Element not found. Must register event handlers before calling Register().
PushNotificationManager::IsSupported() チェックを追加する
次に、 PushNotificationManager.IsSupported() で PushNotification API がサポートされているかどうかを確認します。 そうでない場合は、ポーリングまたは独自のカスタム ソケット実装を使用することをお勧めします。
プッシュ通知のサポートが確認されたので、 PushNotificationReceivedEventArgs に基づいて動作を追加します。
手順 5: WNS チャネル URI を要求し、WNS サーバーに登録する
WNS チャネル URI は、プッシュ通知を送信するための HTTP エンドポイントです。 各クライアントはチャネル URI を要求し、それを WNS サーバーに登録してプッシュ通知を受信する必要があります。
Note
WNS チャネル URI の有効期限は 30 日後です。
auto channelOperation{ PushNotificationManager::Default().CreateChannelAsync(winrt::guid("[Your app's Azure ObjectID]")) };
チュートリアル コードに従っている場合は、ここで Azure オブジェクト ID を追加します。
// To obtain an AAD RemoteIdentifier for your app,
// follow the instructions on https://learn.microsoft.com/azure/active-directory/develop/quickstart-register-app
winrt::guid remoteId{ "00000000-0000-0000-0000-000000000000" }; // Replace this with your own Azure ObjectId
PushNotificationManager はチャネル URI の作成を試み、15 分以内に自動的に再試行します。 呼び出しが完了するまで待機するイベント ハンドラーを作成します。 呼び出しが完了したら、成功した場合は、WNS サーバーに URI を登録します。
コード例
#include <iostream>
#include <winrt/Microsoft.Windows.PushNotifications.h>
#include <winrt/Windows.Foundation.h>
#include <winrt/Microsoft.Windows.AppLifecycle.h>
#include <winrt/Windows.ApplicationModel.Background.h>
#include <wil/cppwinrt.h>
#include <wil/result.h>

using namespace winrt::Microsoft::Windows::PushNotifications;
using namespace winrt::Windows::Foundation;
using namespace winrt::Microsoft::Windows::AppLifecycle;

// To obtain an AAD RemoteIdentifier for your app,
// follow the instructions on https://learn.microsoft.com/azure/active-directory/develop/quickstart-register-app
winrt::guid remoteId{ "00000000-0000-0000-0000-000000000000" }; // Replace this with your own Azure ObjectId

winrt::Windows::Foundation::IAsyncOperation<PushNotificationChannel> RequestChannelAsync()
{
    auto channelOperation = PushNotificationManager::Default().CreateChannelAsync(remoteId);

    // Set up the in-progress event handler
    channelOperation.Progress(
        [](auto&& sender, auto&& args)
        {
            if (args.status == PushNotificationChannelStatus::InProgress)
            {
                // This is basically a noop since it isn't really an error state
                std::cout << "Channel request is in progress." << std::endl << std::endl;
            }
            else if (args.status == PushNotificationChannelStatus::InProgressRetry)
            {
                LOG_HR_MSG(
                    args.extendedError,
                    "The channel request is in back-off retry mode because of a retryable error! Expect delays in acquiring it. RetryCount = %d",
                    args.retryCount);
            }
        });

    auto result = co_await channelOperation;

    if (result.Status() == PushNotificationChannelStatus::CompletedSuccess)
    {
        auto channelUri = result.Channel().Uri();

        std::cout << "channelUri: " << winrt::to_string(channelUri.ToString()) << std::endl << std::endl;

        auto channelExpiry = result.Channel().ExpirationTime();

        // Caller's responsibility to keep the channel alive
        co_return result.Channel();
    }
    else if (result.Status() == PushNotificationChannelStatus::CompletedFailure)
    {
        LOG_HR_MSG(result.ExtendedError(), "We hit a critical non-retryable error with channel request!");
        co_return nullptr;
    }
    else
    {
        LOG_HR_MSG(result.ExtendedError(), "Some other failure occurred.");
        co_return nullptr;
    }

};

PushNotificationChannel RequestChannel()
{
    auto task = RequestChannelAsync();
    if (task.wait_for(std::chrono::seconds(300)) != AsyncStatus::Completed)
    {
        task.Cancel();
        return nullptr;
    }

    auto result = task.GetResults();
    return result;
}

void SubscribeForegroundEventHandler()
{
    winrt::event_token token{ PushNotificationManager::Default().PushReceived([](auto const&, PushNotificationReceivedEventArgs const& args)
    {
        auto payload{ args.Payload() };

        std::string payloadString(payload.begin(), payload.end());
        std::cout << "\nPush notification content received in the FOREGROUND: " << payloadString << std::endl;
    }) };

    std::cout << "Push notification foreground event handler registered." << std::endl;
}

int main()
{
    // Set up an event handler, so we can receive notifications in the foreground while the app is running.
    // You must register notification event handlers before calling Register(). Otherwise, the following runtime
    // exception will be thrown: System.Runtime.InteropServices.COMException: 'Element not found. Must register
    // event handlers before calling Register().'
    SubscribeForegroundEventHandler();

    // Register the app for push notifications.
    PushNotificationManager::Default().Register();

    auto args{ AppInstance::GetCurrent().GetActivatedEventArgs() };
    switch (args.Kind())
    {
        case ExtendedActivationKind::Launch:
        {
            std::cout << "App launched by user or from the debugger." << std::endl;
            if (PushNotificationManager::IsSupported())
            {
                std::cout << "Push notifications are supported on this device." << std::endl;

                // Request a WNS Channel URI which can be passed off to an external app to send notifications to.
                // The WNS Channel URI uniquely identifies this app for this user and device.
                PushNotificationChannel channel{ RequestChannel() };
                if (!channel)
                {
                    std::cout << "\nThere was an error obtaining the WNS Channel URI" << std::endl;

                    if (remoteId == winrt::guid{ "00000000-0000-0000-0000-000000000000" })
                    {
                        std::cout << "\nThe ObjectID has not been set. Refer to the readme file accompanying this sample\nfor the instructions on how to obtain and setup an ObjectID" << std::endl;
                    }
                }

                std::cout << "\nPress 'Enter' at any time to exit App." << std::endl;
                std::cin.ignore();
            }
            else
            {
                std::cout << "Push notifications are NOT supported on this device." << std::endl;
                std::cout << "App implements its own custom socket here to receive messages from the cloud since Push APIs are unsupported." << std::endl;
                std::cin.ignore();
            }
        }
        break;

        case ExtendedActivationKind::Push:
        {
            std::cout << "App activated via push notification." << std::endl;
            PushNotificationReceivedEventArgs pushArgs{ args.Data().as<PushNotificationReceivedEventArgs>() };

            // Call GetDeferral to ensure that code runs in low power
            auto deferral{ pushArgs.GetDeferral() };

            auto payload{ pushArgs.Payload() };

            // Do stuff to process the raw notification payload
            std::string payloadString(payload.begin(), payload.end());
            std::cout << "\nPush notification content received in the BACKGROUND: " << payloadString.c_str() << std::endl;
            std::cout << "\nPress 'Enter' to exit the App." << std::endl;

            // Call Complete on the deferral when finished processing the payload.
            // This removes the override that kept the app running even when the system was in a low power mode.

            deferral.Complete();
            std::cin.ignore();
        }
        break;

        default:
            std::cout << "\nUnexpected activation type" << std::endl;
            std::cout << "\nPress 'Enter' to exit the App." << std::endl;
            std::cin.ignore();
            break;
    }
}
手順 6: アプリをビルドしてインストールする
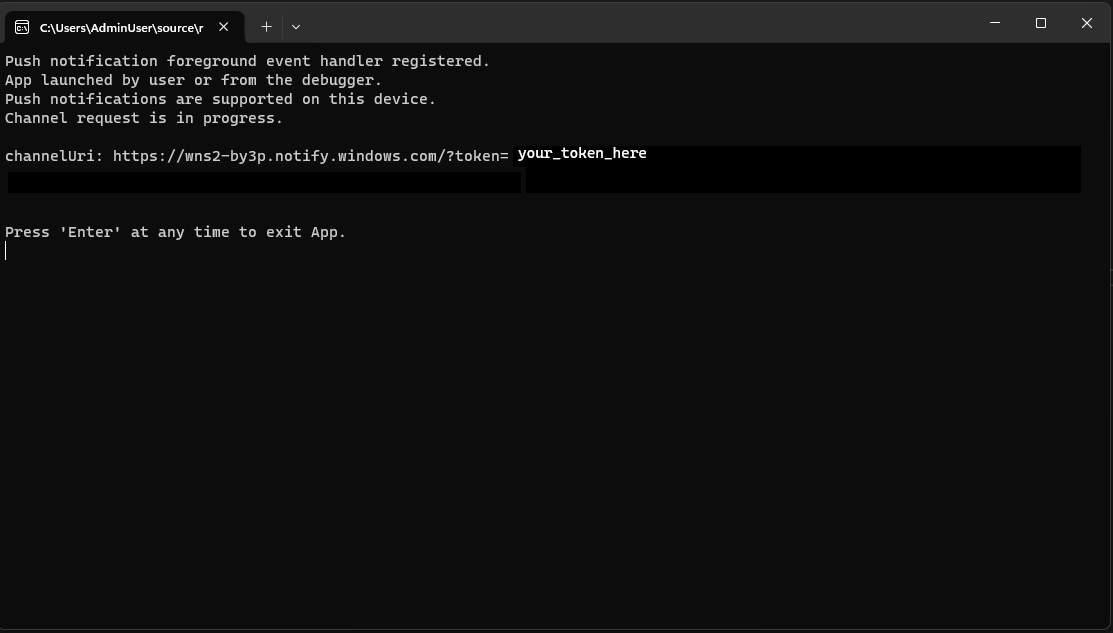
Visual Studio を使用してアプリをビルドしてインストールします。 ソリューション エクスプローラーでソリューション ファイルを右クリックし、[配置] を選択 します。 Visual Studio によってアプリがビルドされ、コンピューターにインストールされます。 アプリを実行するには、スタート メニューまたは Visual Studio デバッガーを使用してアプリを起動します。
チュートリアル コードのコンソールは次のようになります。
アプリにプッシュ通知を送信する
この時点で、すべての構成が完了し、WNS サーバーはクライアント アプリにプッシュ通知を送信できます。 次の手順では、 プッシュ通知サーバーの要求ヘッダーと応答ヘッダー を参照して詳細を確認します。
手順 1: アクセス トークンを要求する
プッシュ通知を送信するには、まず WNS サーバーがアクセス トークンを要求する必要があります。 Azure TenantId、Azure AppId、シークレットを使用して HTTP POST 要求を送信します。 Azure TenantId と Azure AppId の取得の詳細については、 サインインのテナントとアプリ ID の値の取得に関するページを参照してください。
HTTP サンプル要求:
POST /{tenantID}/oauth2/v2.0/token Http/1.1
Host: login.microsoftonline.com
Content-Type: application/x-www-form-urlencoded
Content-Length: 160

grant_type=client_credentials&client_id=<Azure_App_Registration_AppId_Here>&client_secret=<Azure_App_Registration_Secret_Here>&scope=https://wns.windows.com/.default/
C# サンプル要求:
//Sample C# Access token request
var client = new RestClient("https://login.microsoftonline.com/{tenantID}/oauth2/v2.0");
var request = new RestRequest("/token", Method.Post);
request.AddHeader("Content-Type", "application/x-www-form-urlencoded");
request.AddParameter("grant_type", "client_credentials");
request.AddParameter("client_id", "[Your app's Azure AppId]");
request.AddParameter("client_secret", "[Your app's secret]");
request.AddParameter("scope", "https://wns.windows.com/.default");
RestResponse response = await client.ExecutePostAsync(request);
Console.WriteLine(response.Content);
要求が成功すると、 access_token フィールドにトークンを含む応答が返されます。
{
    "token_type":"Bearer",
    "expires_in":"86399",
    "ext_expires_in":"86399",
    "expires_on":"1653771789",
    "not_before":"1653685089",
    "access_token":"[your access token]"
}
手順 2. 未加工の通知を送信する
前の手順で取得したアクセス トークンと送信するプッシュ通知の内容を含む HTTP POST 要求を作成します。 プッシュ通知の内容がアプリに配信されます。
POST /?token=[The token query string parameter from your channel URL. E.g. AwYAAABa5cJ3...] HTTP/1.1
Host: dm3p.notify.windows.com
Content-Type: application/octet-stream
X-WNS-Type: wns/raw
Authorization: Bearer [your access token]
Content-Length: 46

{ Sync: "Hello from the Contoso App Service" }
var client = new RestClient("[Your channel URL. E.g. https://wns2-by3p.notify.windows.com/?token=AwYAAABa5cJ3...]");
var request = new RestRequest();
request.Method = Method.Post;
request.AddHeader("Content-Type", "application/octet-stream");
request.AddHeader("X-WNS-Type", "wns/raw");
request.AddHeader("Authorization", "Bearer [your access token]");
request.AddBody("Notification body");
RestResponse response = await client.ExecutePostAsync(request);");
手順 3: クラウドソースのアプリ通知を送信する
未加工の通知のみを送信する場合は、この手順を無視してください。 クラウドソースのアプリ通知 (プッシュ トースト通知とも呼ばれます) を送信するには、まず クイック スタート: Windows App SDK のアプリ通知に従います。 アプリ通知は、プッシュ (クラウドから送信) することも、ローカルに送信することもできます。 クラウドソースのアプリ通知の送信は 、手順 2 で生の通知を送信するのと似ていますが、 X-WNS-Type ヘッダーが toast、 Content-Type が text/xmlされ、コンテンツにアプリ通知 XML ペイロードが含まれている点が異なります。 XML ペイロードを構築する方法の詳細については、 Notifications XML スキーマ を参照してください。
アクセス トークンと、送信するクラウドソースのアプリ通知の内容を含む HTTP POST 要求を作成します。 プッシュ通知の内容がアプリに配信されます。
POST /?token=AwYAAAB%2fQAhYEiAESPobjHzQcwGCTjHu%2f%2fP3CCNDcyfyvgbK5xD3kztniW%2bjba1b3aSSun58SA326GMxuzZooJYwtpgzL9AusPDES2alyQ8CHvW94cO5VuxxLDVzrSzdO1ZVgm%2bNSB9BAzOASvHqkMHQhsDy HTTP/1.1
Host: dm3p.notify.windows.com
Content-Type: text/xml
X-WNS-Type: wns/toast
Authorization: Bearer [your access token]
Content-Length: 180

<toast><visual><binding template="ToastGeneric"><text>Example cloud toast notification</text><text>This is an example cloud notification using XML</text></binding></visual></toast>
var client = new RestClient("https://dm3p.notify.windows.com/?token=AwYAAAB%2fQAhYEiAESPobjHzQcwGCTjHu%2f%2fP3CCNDcyfyvgbK5xD3kztniW%2bjba1b3aSSun58SA326GMxuzZooJYwtpgzL9AusPDES2alyQ8CHvW94cO5VuxxLDVzrSzdO1ZVgm%2bNSB9BAzOASvHqkMHQhsDy");
client.Timeout = -1;

var request = new RestRequest(Method.POST);
request.AddHeader("Content-Type", "text/xml");
request.AddHeader("X-WNS-Type", "wns/toast");
request.AddHeader("Authorization", "Bearer <AccessToken>");
request.AddParameter("text/xml", "<toast><visual><binding template=\"ToastGeneric\"><text>Example cloud toast notification</text><text>This is an example cloud notification using XML</text></binding></visual></toast>",  ParameterType.RequestBody);
Console.WriteLine(response.Content);
Resources
- Windows プッシュ通知サービス (WNS)
- GitHubでのプッシュ通知のサンプルコード
- Microsoft.Windows.PushNotifications API の詳細
- GitHub でプッシュ通知仕様を
する - トースト コンテンツ
- Notifications XML スキーマ
GitHub で Microsoft と共同作業する
このコンテンツのソースは GitHub にあります。そこで、issue や pull request を作成および確認することもできます。 詳細については、共同作成者ガイドを参照してください。

Windows developer