Observação
O acesso a essa página exige autorização. Você pode tentar entrar ou alterar diretórios.
O acesso a essa página exige autorização. Você pode tentar alterar os diretórios.
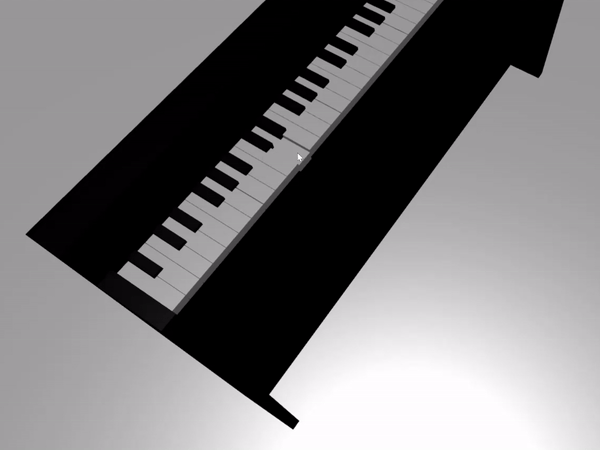
No tutorial anterior, criamos o modelo de um teclado de piano completo com 88 teclas. Agora, vamos fazer com que ele possa ser tocado no espaço do XR.
Neste tutorial, você aprenderá a:
- Adicionar recursos interativos de piano usando eventos de ponteiro
- Escalar as malhas para um tamanho diferente
- Habilitar o teletransporte e o suporte para vários ponteiros no XR
Antes de começar
Verifique se você passou pelo tutorial anterior da série e já pode continuar adicionando ao código.
index.html
<html>
    <head>
        <title>Piano in BabylonJS</title>
        <script src="https://cdn.babylonjs.com/babylon.js"></script>
        <script src="scene.js"></script>
        <style>
            body,#renderCanvas { width: 100%; height: 100%;}
        </style>
    </head>
    <body>
        <canvas id="renderCanvas"></canvas>
        <script type="text/javascript">
            const canvas = document.getElementById("renderCanvas");
            const engine = new BABYLON.Engine(canvas, true);

            createScene(engine).then(sceneToRender => {
                engine.runRenderLoop(() => sceneToRender.render());
            });

            // Watch for browser/canvas resize events
            window.addEventListener("resize", function () {
                engine.resize();
            });
        </script>
    </body>
</html>
scene.js
const buildKey = function (scene, parent, props) {
    if (props.type === "white") {
        /*
        Props for building a white key should contain:
        note, topWidth, bottomWidth, topPositionX, wholePositionX, register, referencePositionX

        As an example, the props for building the middle C white key would be
        {type: "white", note: "C", topWidth: 1.4, bottomWidth: 2.3, topPositionX: -0.45, wholePositionX: -14.4, register: 4, referencePositionX: 0}
        */

        // Create bottom part
        const bottom = BABYLON.MeshBuilder.CreateBox("whiteKeyBottom", {width: props.bottomWidth, height: 1.5, depth: 4.5}, scene);

        // Create top part
        const top = BABYLON.MeshBuilder.CreateBox("whiteKeyTop", {width: props.topWidth, height: 1.5, depth: 5}, scene);
        top.position.z =  4.75;
        top.position.x += props.topPositionX;

        // Merge bottom and top parts
        // Parameters of BABYLON.Mesh.MergeMeshes: (arrayOfMeshes, disposeSource, allow32BitsIndices, meshSubclass, subdivideWithSubMeshes, multiMultiMaterials)
        const key = BABYLON.Mesh.MergeMeshes([bottom, top], true, false, null, false, false);
        key.position.x = props.referencePositionX + props.wholePositionX;
        key.name = props.note + props.register;
        key.parent = parent;

        return key;
    }
    else if (props.type === "black") {
        /*
        Props for building a black key should contain:
        note, wholePositionX, register, referencePositionX

        As an example, the props for building the C#4 black key would be
        {type: "black", note: "C#", wholePositionX: -13.45, register: 4, referencePositionX: 0}
        */

        // Create black color material
        const blackMat = new BABYLON.StandardMaterial("black");
        blackMat.diffuseColor = new BABYLON.Color3(0, 0, 0);

        // Create black key
        const key = BABYLON.MeshBuilder.CreateBox(props.note + props.register, {width: 1.4, height: 2, depth: 5}, scene);
        key.position.z += 4.75;
        key.position.y += 0.25;
        key.position.x = props.referencePositionX + props.wholePositionX;
        key.material = blackMat;
        key.parent = parent;

        return key;
    }
}

const createScene = async function(engine) {
    const scene = new BABYLON.Scene(engine);

    const alpha =  3*Math.PI/2;
    const beta = Math.PI/50;
    const radius = 220;
    const target = new BABYLON.Vector3(0, 0, 0);

    const camera = new BABYLON.ArcRotateCamera("Camera", alpha, beta, radius, target, scene);
    camera.attachControl(canvas, true);

    const light = new BABYLON.HemisphericLight("light", new BABYLON.Vector3(0, 1, 0), scene);
    light.intensity = 0.6;

    const keyParams = [
        {type: "white", note: "C", topWidth: 1.4, bottomWidth: 2.3, topPositionX: -0.45, wholePositionX: -14.4},
        {type: "black", note: "C#", wholePositionX: -13.45},
        {type: "white", note: "D", topWidth: 1.4, bottomWidth: 2.4, topPositionX: 0, wholePositionX: -12},
        {type: "black", note: "D#", wholePositionX: -10.6},
        {type: "white", note: "E", topWidth: 1.4, bottomWidth: 2.3, topPositionX: 0.45, wholePositionX: -9.6},
        {type: "white", note: "F", topWidth: 1.3, bottomWidth: 2.4, topPositionX: -0.55, wholePositionX: -7.2},
        {type: "black", note: "F#", wholePositionX: -6.35},
        {type: "white", note: "G", topWidth: 1.3, bottomWidth: 2.3, topPositionX: -0.2, wholePositionX: -4.8},
        {type: "black", note: "G#", wholePositionX: -3.6},
        {type: "white", note: "A", topWidth: 1.3, bottomWidth: 2.3, topPositionX: 0.2, wholePositionX: -2.4},
        {type: "black", note: "A#", wholePositionX: -0.85},
        {type: "white", note: "B", topWidth: 1.3, bottomWidth: 2.4, topPositionX: 0.55, wholePositionX: 0},
    ]

    // Transform Node that acts as the parent of all piano keys
    const keyboard = new BABYLON.TransformNode("keyboard");

    // Register 1 through 7
    var referencePositionX = -2.4*14;
    for (let register = 1; register <= 7; register++) {
        keyParams.forEach(key => {
            buildKey(scene, keyboard, Object.assign({register: register, referencePositionX: referencePositionX}, key));
        })
        referencePositionX += 2.4*7;
    }

    // Register 0
    buildKey(scene, keyboard, {type: "white", note: "A", topWidth: 1.9, bottomWidth: 2.3, topPositionX: -0.20, wholePositionX: -2.4, register: 0, referencePositionX: -2.4*21});
    keyParams.slice(10, 12).forEach(key => {
        buildKey(scene, keyboard, Object.assign({register: 0, referencePositionX: -2.4*21}, key));
    })

    // Register 8
    buildKey(scene, keyboard, {type: "white", note: "C", topWidth: 2.3, bottomWidth: 2.3, topPositionX: 0, wholePositionX: -2.4*6, register: 8, referencePositionX: 84});

    // Transform node that acts as the parent of all piano components
    const piano = new BABYLON.TransformNode("piano");
    keyboard.parent = piano;

    // Import and scale piano frame
    BABYLON.SceneLoader.ImportMesh("frame", "https://raw.githubusercontent.com/MicrosoftDocs/mixed-reality/docs/mixed-reality-docs/mr-dev-docs/develop/javascript/tutorials/babylonjs-webxr-piano/files/", "pianoFrame.babylon", scene, function(meshes) {
        const frame = meshes[0];
        frame.parent = piano;
    });

    // Lift the piano keyboard
    keyboard.position.y += 80;

    const xrHelper = await scene.createDefaultXRExperienceAsync();

    return scene;
}
Fazendo com que o teclado de piano possa ser tocado
No momento, o teclado de piano que criamos é um modelo estático que não responde a interações do usuário. Nesta seção, programaremos as teclas para que se movam para baixo e reproduzam um som quando alguém pressioná-las.
O Babylon.js fornece diferentes tipos de eventos, ou observáveis, com que podemos interagir. Em nosso caso, trabalharemos com o
onPointerObservable, pois desejamos programar as teclas para que executem ações quando alguém pressioná-las usando um ponteiro, que pode ser um clique do mouse, toque, clique no botão do controlador do XR etc.Esta é a estrutura básica de como podemos adicionar qualquer comportamento a um
onPointerObservable:scene.onPointerObservable.add((pointerInfo) => { // do something });Embora o Babylon.js forneça muitos tipos diferentes de eventos de ponteiro, usaremos apenas os eventos
POINTERDOWNePOINTERUPpara programar o comportamento das teclas do piano, usando a estrutura abaixo:scene.onPointerObservable.add((pointerInfo) => { switch (pointerInfo.type) { case BABYLON.PointerEventTypes.POINTERDOWN: // When the pointer is down on a piano key, // move the piano key downward (to show that it is pressed) // and play the sound of the note break; case BABYLON.PointerEventTypes.POINTERUP: // When the pointer is released, // move the piano key upward to its original position // and stop the sound of the note of the key that is released break; } });Primeiro, vamos trabalhar para mover a tecla do piano para baixo e para cima quando a pressionarmos e liberarmos.
No evento de ponteiro para baixo, precisamos detectar a malha que está sendo acionada, verificar se ela é uma tecla de piano e alterar a coordenada y da malha negativamente com um valor pequeno para que pareça que a tecla foi pressionada.
O evento de ponteiro para cima é um pouco mais complicado, pois o ponteiro que pressionou a tecla pode não ser liberado nela. Por exemplo, alguém pode clicar na tecla C4, arrastar o mouse para a E4 e liberar o clique. Nesse caso, ainda queremos liberar a tecla que foi pressionada (C4) em vez daquela onde o evento
pointerUpocorreu (E4).Vejamos como o seguinte código faz o que queremos:
const pointerToKey = new Map();
scene.onPointerObservable.add((pointerInfo) => {
    switch (pointerInfo.type) {
        case BABYLON.PointerEventTypes.POINTERDOWN:
            if(pointerInfo.pickInfo.hit) {
                const pickedMesh = pointerInfo.pickInfo.pickedMesh;
                const pointerId = pointerInfo.event.pointerId;
                if (pickedMesh.parent === keyboard) {
                    pickedMesh.position.y -= 0.5;
                    // play the sound of the note
                    pointerToKey.set(pointerId, {
                        mesh: pickedMesh
                    });
                }
            }
            break;
        case BABYLON.PointerEventTypes.POINTERUP:
            const pointerId = pointerInfo.event.pointerId;
            if (pointerToKey.has(pointerId)) {
                pointerToKey.get(pointerId).mesh.position.y += 0.5;
                // stop the sound of the note of the key that is released
                pointerToKey.delete(pointerId);
            }
            break;
    }
});
A
pointerIdé exclusiva de cada ponteiro e pode nos ajudar a identificar um ponteiro quando temos vários controladores ou estamos usando uma tela touch. Aqui, inicializamos um objetoMapchamadopointerToKeypara armazenar a relação de qual ponteiro pressionou qual tecla, para que saibamos qual tecla deverá ser liberada quando o ponteiro for liberado, independentemente de onde a liberação acontecer.Com o código acima, a interação ficaria assim:
Agora, vamos trabalhar para reproduzir e parar um som quando uma tecla for pressionada e liberada. Para isso, usaremos uma biblioteca JavaScript chamada soundfont-player, que nos permite reproduzir facilmente sons MIDI de um instrumento escolhido.
Baixe o código minificado da biblioteca, salve-o na mesma pasta que index.html e inclua-o na marca
<header>em index.html:<head> <title>Babylon Template</title> <script src="https://cdn.babylonjs.com/babylon.js"></script> <script src="scene.js"></script> <script src="soundfont-player.min.js"></script> <style> body,#renderCanvas { width: 100%; height: 100%;} </style> </head>Após a biblioteca ser importada, podemos inicializar um instrumento e reproduzir/parar sons MIDI usando a biblioteca da seguinte maneira:
const pianoSound = await Soundfont.instrument(new AudioContext(), 'acoustic_grand_piano'); const C4 = piano.play("C4"); // Play note C4 C4.stop(); // Stop note C4Agora, vamos incorporar isso aos eventos de ponteiro e finalizar o código desta seção:
const pointerToKey = new Map() const piano = await Soundfont.instrument(new AudioContext(), 'acoustic_grand_piano'); scene.onPointerObservable.add((pointerInfo) => { switch (pointerInfo.type) { case BABYLON.PointerEventTypes.POINTERDOWN: if(pointerInfo.pickInfo.hit) { let pickedMesh = pointerInfo.pickInfo.pickedMesh; let pointerId = pointerInfo.event.pointerId; if (keys.has(pickedMesh)) { pickedMesh.position.y -= 0.5; // Move the key downward pointerToKey.set(pointerId, { mesh: pickedMesh, note: pianoSound.play(pointerInfo.pickInfo.pickedMesh.name) // Play the sound of the note }); } } break; case BABYLON.PointerEventTypes.POINTERUP: let pointerId = pointerInfo.event.pointerId; if (pointerToKey.has(pointerId)) { pointerToKey.get(pointerId).mesh.position.y += 0.5; // Move the key upward pointerToKey.get(pointerId).note.stop(); // Stop the sound of the note pointerToKey.delete(pointerId); } break; } });Como nomeamos a malha de cada tecla segundo a nota que ela representa, podemos indicar facilmente qual nota deve ser reproduzida passando o nome da malha para a função
pianoSound.play(). Observe também que estamos armazenando o som no mapapointerToKeypara sabermos qual som deverá ser parado quando uma tecla for liberada.
Escalando o piano para o modo de VR imersiva
Neste ponto, você já deve ter tocado o piano com o mouse (ou até mesmo com uma tela touch) conforme adicionava as funcionalidades interativas. Nesta seção, vamos passar para o espaço de VR imersiva.
Para abrir a página em seu headset de VR imersiva, primeiro você precisa conectá-lo ao seu computador de desenvolvedor e verificar se ele está configurado para uso no aplicativo Windows Mixed Reality. Se você estiver usando o simulador do Windows Mixed Reality, verifique se ele está habilitado.
Agora, você verá um botão VR Imersiva no canto inferior direito da página da Web. Clique nele e você verá o piano no dispositivo de XR ao qual está conectado.

Quando estiver no espaço virtual, talvez você perceba que o piano que criamos é enorme. No mundo da VR, podemos ficar apenas na parte inferior dele tocá-lo direcionando o ponteiro para as teclas à distância.

Vamos reduzir o piano para que seu tamanho seja mais semelhante ao de um piano vertical normal na vida real. Para isso, precisaremos usar uma função de utilitário que permita escalar uma malha em relação a um ponto no espaço. Adicione esta função a scene.js (fora de
createScene()):const scaleFromPivot = function(transformNode, pivotPoint, scale) { const _sx = scale / transformNode.scaling.x; const _sy = scale / transformNode.scaling.y; const _sz = scale / transformNode.scaling.z; transformNode.scaling = new BABYLON.Vector3(_sx, _sy, _sz); transformNode.position = new BABYLON.Vector3(pivotPoint.x + _sx * (transformNode.position.x - pivotPoint.x), pivotPoint.y + _sy * (transformNode.position.y - pivotPoint.y), pivotPoint.z + _sz * (transformNode.position.z - pivotPoint.z)); }A função usa 3 parâmetros:
-
transformNode: o
TransformNodea ser escalado -
pivotPoint: um objeto
Vector3que indica o ponto ao qual a escala é relativa - scale: o fator de escala
-
transformNode: o
Usaremos essa função para escalar a estrutura e as teclas do piano em um fator de 0,015 com um ponto dinâmico na origem. Acrescente a chamada de função a função
createScene()colocando-a apóskeyboard.position.y += 80;:// Put this line at the beginning of createScene() const scale = 0.015;// Put this function call after keyboard.position.y += 80; // Scale the entire piano scaleFromPivot(piano, new BABYLON.Vector3(0, 0, 0), scale);Não se esqueça de escalar também a posição da câmera:
const alpha = 3*Math.PI/2; const beta = Math.PI/50; const radius = 220*scale; // scale the radius const target = new BABYLON.Vector3(0, 0, 0); const camera = new BABYLON.ArcRotateCamera("Camera", alpha, beta, radius, target, scene); camera.attachControl(canvas, true);Agora, quando entramos no espaço de VR novamente, o piano tem o tamanho de um piano vertical comum.

Habilitando recursos do WebXR
Agora que escalamos o piano para o tamanho certo no espaço de VR, vamos habilitar alguns recursos interessantes do WebXR para aprimorar nossa experiência de tocar piano no espaço.
Se você estiver tocando o piano usando seus controladores de VR imersiva, talvez tenha notado que só pode usar um controlador por vez. Vamos habilitar o suporte para vários ponteiros no espaço do XR usando o gerenciador de recursos do WebXR do Babylon.js.
Adicione o seguinte código à função
createScene()após a linha de inicializaçãoxrHelper:const featuresManager = xrHelper.baseExperience.featuresManager; const pointerSelection = featuresManager.enableFeature(BABYLON.WebXRFeatureName.POINTER_SELECTION, "stable", { xrInput: xrHelper.input, enablePointerSelectionOnAllControllers: true });Além disso, dependendo de onde está o ponto inicial, você pode achar um pouco difícil se posicionar na frente do piano. Se tiver familiaridade com o ambiente de VR imersiva, talvez você conheça o teletransporte, que é um recurso que permite que você vá instantaneamente para outro ponto no espaço apontando para ele.
Para usar o recurso de teletransporte do Babylon.js, primeiro precisamos ter uma malha de solo na qual possamos "ficar em pé" no espaço de VR. Adicione o seguinte código à função
createScene()para criar um solo:const ground = BABYLON.MeshBuilder.CreateGround("ground", {width: 400, height: 400});O suporte para teletransporte também tem um recurso muito útil chamado posições de ajuste. De maneira resumida, as posições de ajuste são posições específicas às quais desejamos que os usuários cheguem.
Por exemplo, podemos definir uma posição de ajuste na frente do piano para que os usuários possam se teletransportar facilmente para esse local quando apontarem os ponteiros para perto do piano.
Acrescente o código abaixo para habilitar o recurso de teletransporte e especificar um ponto de ajuste:
const teleportation = featuresManager.enableFeature(BABYLON.WebXRFeatureName.TELEPORTATION, "stable", { xrInput: xrHelper.input, floorMeshes: [ground], snapPositions: [new BABYLON.Vector3(2.4*3.5*scale, 0, -10*scale)], });Agora, você deve conseguir se posicionar facilmente na frente do piano se teletransportando para o ponto de ajuste na frente dele e deve conseguir tocar duas teclas por vez usando os dois controladores.


Resumo
Parabéns! Você concluiu nossa série de tutoriais para criação de um piano com o Babylon.js e aprendeu a:
- Criar, posicionar e mesclar malhas para criar o modelo de um teclado de piano
- Importar um modelo do Babylon.js de uma estrutura de piano vertical
- Adicionar interações de ponteiro a cada tecla do piano
- Escalar o tamanho das malhas com base em um ponto dinâmico
- Habilitar recursos importantes do WebXR, como o teletransporte e o suporte para vários ponteiros
Este é o código final de scene.js e index.html:
scene.js
const buildKey = function (scene, parent, props) {
if (props.type === "white") {
/*
Props for building a white key should contain:
note, topWidth, bottomWidth, topPositionX, wholePositionX, register, referencePositionX
As an example, the props for building the middle C white key would be
{type: "white", note: "C", topWidth: 1.4, bottomWidth: 2.3, topPositionX: -0.45, wholePositionX: -14.4, register: 4, referencePositionX: 0}
*/
// Create bottom part
const bottom = BABYLON.MeshBuilder.CreateBox("whiteKeyBottom", {width: props.bottomWidth, height: 1.5, depth: 4.5}, scene);
// Create top part
const top = BABYLON.MeshBuilder.CreateBox("whiteKeyTop", {width: props.topWidth, height: 1.5, depth: 5}, scene);
top.position.z = 4.75;
top.position.x += props.topPositionX;
// Merge bottom and top parts
// Parameters of BABYLON.Mesh.MergeMeshes: (arrayOfMeshes, disposeSource, allow32BitsIndices, meshSubclass, subdivideWithSubMeshes, multiMultiMaterials)
const key = BABYLON.Mesh.MergeMeshes([bottom, top], true, false, null, false, false);
key.position.x = props.referencePositionX + props.wholePositionX;
key.name = props.note + props.register;
key.parent = parent;
return key;
}
else if (props.type === "black") {
/*
Props for building a black key should contain:
note, wholePositionX, register, referencePositionX
As an example, the props for building the C#4 black key would be
{type: "black", note: "C#", wholePositionX: -13.45, register: 4, referencePositionX: 0}
*/
// Create black color material
const blackMat = new BABYLON.StandardMaterial("black");
blackMat.diffuseColor = new BABYLON.Color3(0, 0, 0);
// Create black key
const key = BABYLON.MeshBuilder.CreateBox(props.note + props.register, {width: 1.4, height: 2, depth: 5}, scene);
key.position.z += 4.75;
key.position.y += 0.25;
key.position.x = props.referencePositionX + props.wholePositionX;
key.material = blackMat;
key.parent = parent;
return key;
}
}
const scaleFromPivot = function(transformNode, pivotPoint, scale) {
const _sx = scale / transformNode.scaling.x;
const _sy = scale / transformNode.scaling.y;
const _sz = scale / transformNode.scaling.z;
transformNode.scaling = new BABYLON.Vector3(_sx, _sy, _sz);
transformNode.position = new BABYLON.Vector3(pivotPoint.x + _sx * (transformNode.position.x - pivotPoint.x), pivotPoint.y + _sy * (transformNode.position.y - pivotPoint.y), pivotPoint.z + _sz * (transformNode.position.z - pivotPoint.z));
}
const createScene = async function(engine) {
const scale = 0.015;
const scene = new BABYLON.Scene(engine);
const alpha = 3*Math.PI/2;
const beta = Math.PI/50;
const radius = 220*scale;
const target = new BABYLON.Vector3(0, 0, 0);
const camera = new BABYLON.ArcRotateCamera("Camera", alpha, beta, radius, target, scene);
camera.attachControl(canvas, true);
const light = new BABYLON.HemisphericLight("light", new BABYLON.Vector3(0, 1, 0), scene);
light.intensity = 0.6;
const keyParams = [
{type: "white", note: "C", topWidth: 1.4, bottomWidth: 2.3, topPositionX: -0.45, wholePositionX: -14.4},
{type: "black", note: "C#", wholePositionX: -13.45},
{type: "white", note: "D", topWidth: 1.4, bottomWidth: 2.4, topPositionX: 0, wholePositionX: -12},
{type: "black", note: "D#", wholePositionX: -10.6},
{type: "white", note: "E", topWidth: 1.4, bottomWidth: 2.3, topPositionX: 0.45, wholePositionX: -9.6},
{type: "white", note: "F", topWidth: 1.3, bottomWidth: 2.4, topPositionX: -0.55, wholePositionX: -7.2},
{type: "black", note: "F#", wholePositionX: -6.35},
{type: "white", note: "G", topWidth: 1.3, bottomWidth: 2.3, topPositionX: -0.2, wholePositionX: -4.8},
{type: "black", note: "G#", wholePositionX: -3.6},
{type: "white", note: "A", topWidth: 1.3, bottomWidth: 2.3, topPositionX: 0.2, wholePositionX: -2.4},
{type: "black", note: "A#", wholePositionX: -0.85},
{type: "white", note: "B", topWidth: 1.3, bottomWidth: 2.4, topPositionX: 0.55, wholePositionX: 0},
]
// Transform Node that acts as the parent of all piano keys
const keyboard = new BABYLON.TransformNode("keyboard");
// Register 1 through 7
var referencePositionX = -2.4*14;
for (let register = 1; register <= 7; register++) {
keyParams.forEach(key => {
buildKey(scene, keyboard, Object.assign({register: register, referencePositionX: referencePositionX}, key));
})
referencePositionX += 2.4*7;
}
// Register 0
buildKey(scene, keyboard, {type: "white", note: "A", topWidth: 1.9, bottomWidth: 2.3, topPositionX: -0.20, wholePositionX: -2.4, register: 0, referencePositionX: -2.4*21});
keyParams.slice(10, 12).forEach(key => {
buildKey(scene, keyboard, Object.assign({register: 0, referencePositionX: -2.4*21}, key));
})
// Register 8
buildKey(scene, keyboard, {type: "white", note: "C", topWidth: 2.3, bottomWidth: 2.3, topPositionX: 0, wholePositionX: -2.4*6, register: 8, referencePositionX: 84});
// Transform node that acts as the parent of all piano components
const piano = new BABYLON.TransformNode("piano");
keyboard.parent = piano;
// Import and scale piano frame
BABYLON.SceneLoader.ImportMesh("frame", "https://raw.githubusercontent.com/MicrosoftDocs/mixed-reality/docs/mixed-reality-docs/mr-dev-docs/develop/javascript/tutorials/babylonjs-webxr-piano/files/", "pianoFrame.babylon", scene, function(meshes) {
const frame = meshes[0];
frame.parent = piano;
});
// Lift the piano keyboard
keyboard.position.y += 80;
// Scale the entire piano
scaleFromPivot(piano, new BABYLON.Vector3(0, 0, 0), scale);
const pointerToKey = new Map()
const pianoSound = await Soundfont.instrument(new AudioContext(), 'acoustic_grand_piano');
scene.onPointerObservable.add((pointerInfo) => {
switch (pointerInfo.type) {
case BABYLON.PointerEventTypes.POINTERDOWN:
// Only take action if the pointer is down on a mesh
if(pointerInfo.pickInfo.hit) {
let pickedMesh = pointerInfo.pickInfo.pickedMesh;
let pointerId = pointerInfo.event.pointerId;
if (pickedMesh.parent === keyboard) {
pickedMesh.position.y -= 0.5; // Move the key downward
pointerToKey.set(pointerId, {
mesh: pickedMesh,
note: pianoSound.play(pointerInfo.pickInfo.pickedMesh.name) // Play the sound of the note
});
}
}
break;
case BABYLON.PointerEventTypes.POINTERUP:
let pointerId = pointerInfo.event.pointerId;
// Only take action if the released pointer was recorded in pointerToKey
if (pointerToKey.has(pointerId)) {
pointerToKey.get(pointerId).mesh.position.y += 0.5; // Move the key upward
pointerToKey.get(pointerId).note.stop(); // Stop the sound of the note
pointerToKey.delete(pointerId);
}
break;
}
});
const xrHelper = await scene.createDefaultXRExperienceAsync();
const featuresManager = xrHelper.baseExperience.featuresManager;
featuresManager.enableFeature(BABYLON.WebXRFeatureName.POINTER_SELECTION, "stable", {
xrInput: xrHelper.input,
enablePointerSelectionOnAllControllers: true
});
const ground = BABYLON.MeshBuilder.CreateGround("ground", {width: 400, height: 400});
featuresManager.enableFeature(BABYLON.WebXRFeatureName.TELEPORTATION, "stable", {
xrInput: xrHelper.input,
floorMeshes: [ground],
snapPositions: [new BABYLON.Vector3(2.4*3.5*scale, 0, -10*scale)],
});
return scene;
}
index.html
<html>
<head>
    <title>Babylon Template</title>
    <script src="https://cdn.babylonjs.com/babylon.js"></script>
    <script src="scene.js"></script>
    <script src="soundfont-player.min.js"></script>
    <style>
            body,#renderCanvas { width: 100%; height: 100%;}
    </style>
</head>
<body>
<canvas id="renderCanvas"></canvas>
<script>
const canvas = document.getElementById("renderCanvas"); // Get the canvas element
const engine = new BABYLON.Engine(canvas, true); // Generate the BABYLON 3D engine
// Register a render loop to repeatedly render the scene
createScene(engine).then(sceneToRender => {
engine.runRenderLoop(() => sceneToRender.render());
});
// Watch for browser/canvas resize events
window.addEventListener("resize", function () {
engine.resize();
});
</script>
</body>
</html>
Próximas etapas
Para obter mais informações sobre o desenvolvimento de JavaScript de Realidade Misturada, consulte Visão geral do desenvolvimento do JavaScript.