หมายเหตุ
การเข้าถึงหน้านี้ต้องได้รับการอนุญาต คุณสามารถลอง ลงชื่อเข้าใช้หรือเปลี่ยนไดเรกทอรีได้
การเข้าถึงหน้านี้ต้องได้รับการอนุญาต คุณสามารถลองเปลี่ยนไดเรกทอรีได้
Microsoft Defender for Cloud generates a CloudFormation template that includes the resources required to onboard your Amazon Web Services (AWS) account. Microsoft Defender for Cloud and Microsoft Sentinel can both ingest AWS CloudTrail events. By default, the Microsoft Sentinel connector receives CloudTrail notifications directly from Amazon S3 through an Amazon SQS queue. Because an Amazon SQS queue supports only one consumer, enabling CloudTrail ingestion for Defender for Cloud requires configuring an Amazon SNS fan-out pattern so both services can receive CloudTrail events in parallel.
This article explains how to enable CloudTrail ingestion for Defender for Cloud when your AWS account is already connected to Microsoft Sentinel.
Prerequisites
To complete the procedures in this article, you need:
A Microsoft Azure subscription. If you don't have an Azure subscription, you can sign up for a free one.
Microsoft Defender for Cloud set up on your Azure subscription.
Access to an AWS account.
Contributor level permission for the relevant Azure subscription.
SNS fan-out method only:
- AWS CloudTrail configured to deliver logs to an Amazon S3 bucket.
- An existing Microsoft Sentinel AWS connector that ingests CloudTrail logs from that bucket.
Enable CloudTrail ingestion using SNS fan-out
If your AWS CloudTrail logs already stream to Microsoft Sentinel, you can enable CloudTrail ingestion for Defender for Cloud by using Amazon SNS as a fan-out mechanism. This configuration allows both services to receive CloudTrail events in parallel.
Important
These steps configure AWS resources for shared CloudTrail ingestion. To finalize Defender for Cloud setup, integrate AWS CloudTrail logs with Microsoft Defender for Cloud.
Create an Amazon SNS topic for CloudTrail
In the AWS Management Console, open Amazon SNS.
Select Create topic and choose Standard.
Enter a descriptive name (for example,
CloudTrail-SNS) and select Create topic.Copy the Topic ARN for later use.
On the topic details page, select Edit, and then expand Access policy.
Add a policy statement that allows the CloudTrail S3 bucket to publish events to the topic.
Replace
<region>,<accountid>, and<S3_BUCKET_ARN>with your values:{ "Version": "2012-10-17", "Statement": [ { "Sid": "AllowS3ToPublish", "Effect": "Allow", "Principal": { "Service": "s3.amazonaws.com" }, "Action": "SNS:Publish", "Resource": "arn:aws:sns:<region>:<accountid>:CloudTrail-SNS", "Condition": { "StringEquals": { "aws:SourceArn": "<S3_BUCKET_ARN>" } } } ] }
Create an SQS queue for Defender for Cloud
In Amazon SQS, select Create queue and choose Standard.
Enter a name (for example,
DefenderForCloud-SQS) and create the queue.Update the SQS queue access policy to allow the SNS topic ARN to perform the
SQS:SendMessageaction for this queue.Apply this policy to each SQS queue that subscribes to the CloudTrail SNS topic. This typically includes:
- The SQS queue used by Microsoft Sentinel
- The SQS queue created for Defender for Cloud
{
  "Sid": "AllowCloudTrailSnsToSendMessage",
  "Effect": "Allow",
  "Principal": {
    "Service": "sns.amazonaws.com"
  },
  "Action": "SQS:SendMessage",
  "Resource": "arn:aws:sqs:<region>:<accountid>:<QUEUE_NAME>",
  "Condition": {
    "ArnLike": {
      "aws:SourceArn": "arn:aws:sns:<region>:<accountid>:CloudTrail-SNS"
    }
  }
}
Subscribe both SQS queues to the SNS topic
In Amazon SNS, open the topic you created.
Create subscriptions to the SNS topic for both:
Your existing Microsoft Sentinel SQS queue
The new Defender for Cloud SQS queue

When creating each subscription:
- Select Amazon SQS as the protocol.
- Paste the Queue ARN.
- Enable Raw message delivery.

Update the Microsoft Sentinel SQS queue access policy
If your AWS account was already connected to Microsoft Sentinel, you must also update the existing Sentinel SQS queue to allow the SNS topic to send messages.
In Amazon SQS, open the SQS queue used by Microsoft Sentinel.
Edit the Access policy.
Add the same
SQS:SendMessagestatement used for the Defender for Cloud queue, referencing the CloudTrail SNS topic ARN.Save the policy.
If this step is skipped, Microsoft Sentinel will stop receiving CloudTrail notifications after you switch to the SNS fan-out configuration.
Update S3 event notifications to publish CloudTrail logs to SNS
In Amazon S3, open your CloudTrail bucket and go to Event notifications.
Delete the existing S3 → SQS event notification used by Microsoft Sentinel.
Create a new event notification to publish to the SNS topic.
Set the event type to Object created (PUT).
Configure a prefix filter so that only CloudTrail log files generate notifications.
Use the full CloudTrail log path format:
AWSLogs/<AccountID>/CloudTrail/Save the configuration.
After these changes, both Microsoft Sentinel and Defender for Cloud receive CloudTrail event notifications using the SNS fan-out pattern.

Resolve OIDC identity provider conflicts
Follow the steps in the Connect AWS accounts to Microsoft Defender for Cloud until step 8 in the Connect your AWS Account section.
Select Copy.

Paste the template into a local text editing tool.
Search for the "ASCDefendersOIDCIdentityProvider": { section of the template, and make a separate copy of the entire ClientIdList.
Search for the ASCDefendersOIDCIdentityProvider section in the template and delete it.
Save the file locally.
In a separate browser window, sign in to your AWS account.
Navigate to Identity and Access Management (IAM) > Identity Providers.
Search for and select 33e01921-4d64-4f8c-a055-5bdaffd5e33d.
Select Actions > Add audience.
Paste the ClientIdList section you copied in step 4.
Navigate to the Configure access page in Defender for Cloud.
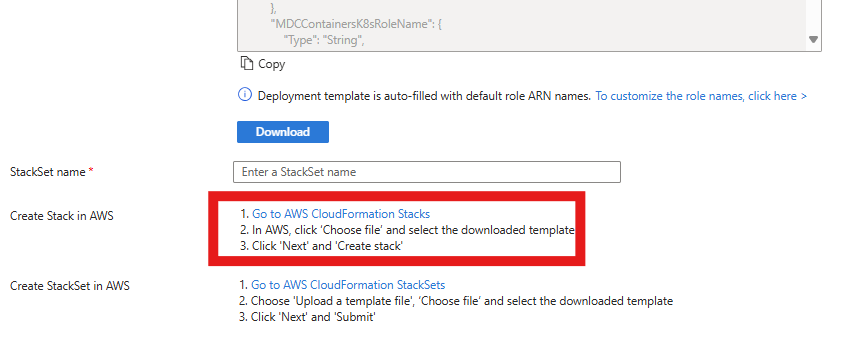
Follow the Create a Stack in AWS instructions, and use the template you saved locally.
Select Next.
Select Create.


Next steps
- Integrate AWS CloudTrail logs with Microsoft Defender for Cloud.
- Assign access to workload owners.
- Protect all of your resources with Defender for Cloud.
- Set up your on-premises machines and Google Cloud Platform (GCP) environments.
- Get answers to common questions about onboarding your AWS account.
- Troubleshoot your multicloud connectors.