หมายเหตุ
การเข้าถึงหน้านี้ต้องได้รับการอนุญาต คุณสามารถลอง ลงชื่อเข้าใช้หรือเปลี่ยนไดเรกทอรีได้
การเข้าถึงหน้านี้ต้องได้รับการอนุญาต คุณสามารถลองเปลี่ยนไดเรกทอรีได้
During local development, applications need to authenticate to Azure to access various Azure services. Two common approaches for local authentication are to use a service principal or to use a developer account. This article explains how to use a developer account. In the sections ahead, you learn:
- How to use Microsoft Entra groups to efficiently manage permissions for multiple developer accounts
- How to assign roles to developer accounts to scope permissions
- How to sign-in to supported local development tools
- How to authenticate using a developer account from your app code
For an app to authenticate to Azure during local development using the developer's Azure credentials, the developer must be signed-in to Azure from one of the following developer tools:
- Azure CLI
- Azure Developer CLI
- Azure PowerShell
- Visual Studio Code
The Azure Identity library can detect that the developer is signed-in from one of these tools. The library can then obtain the Microsoft Entra access token via the tool to authenticate the app to Azure as the signed-in user.
This approach takes advantage of the developer's existing Azure accounts to streamline the authentication process. However, a developer's account likely has more permissions than required by the app, therefore exceeding the permissions the app runs with in production. As an alternative, you can create application service principals to use during local development, which can be scoped to have only the access needed by the app.
Create a Microsoft Entra group for local development
Create a Microsoft Entra group to encapsulate the roles (permissions) the app needs in local development rather than assigning the roles to individual service principal objects. This approach offers the following advantages:
- Every developer has the same roles assigned at the group level.
- If a new role is needed for the app, it only needs to be added to the group for the app.
- If a new developer joins the team, a new application service principal is created for the developer and added to the group, ensuring the developer has the right permissions to work on the app.
Navigate to the Microsoft Entra ID overview page in the Azure portal.
Select All groups from the left-hand menu.
On the Groups page, select New group.
On the New group page, fill out the following form fields:
- Group type: Select Security.
- Group name: Enter a name for the group that includes a reference to the app or environment name.
- Group description: Enter a description that explains the purpose of the group.
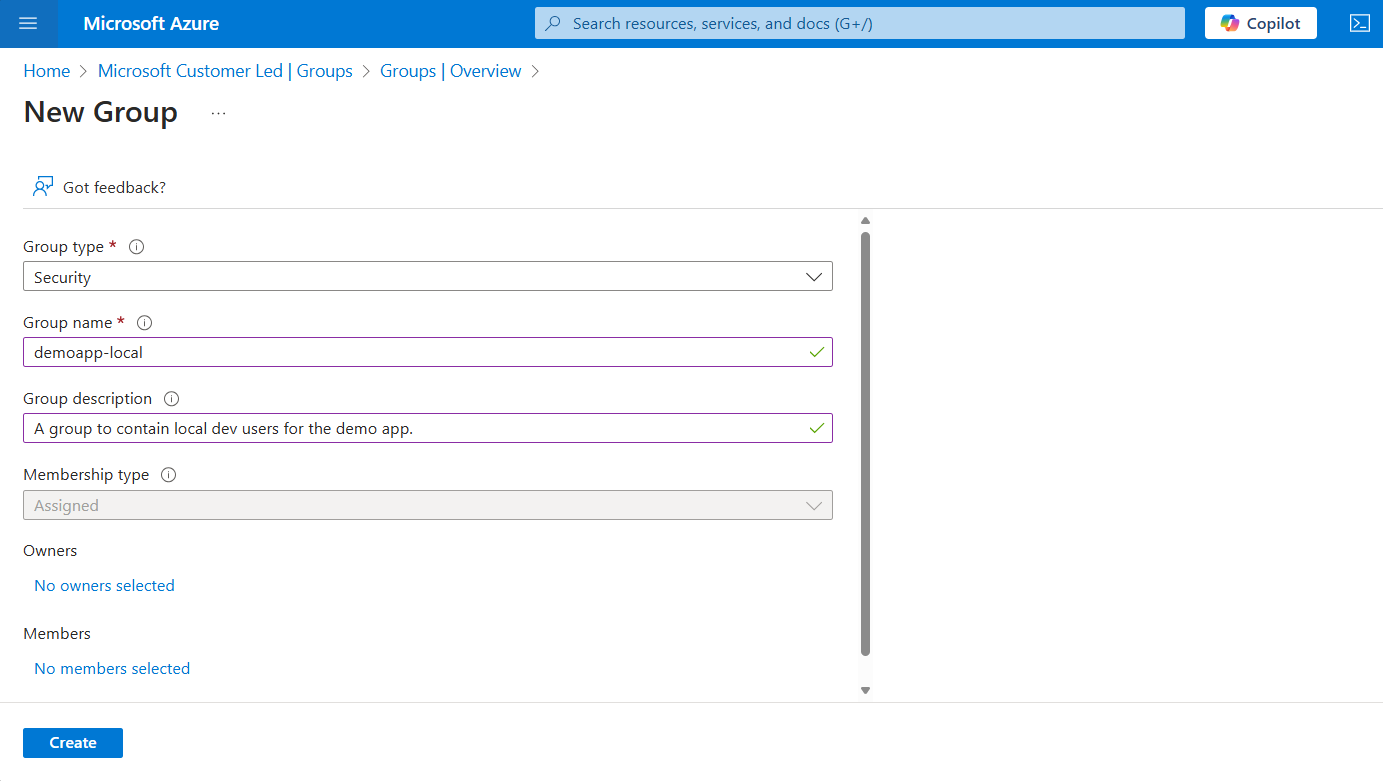
Select the No members selected link under Members to add members to the group.
In the flyout panel that opens, search for the service principal you created earlier and select it from the filtered results. Choose the Select button at the bottom of the panel to confirm your selection.
Select Create at the bottom of the New group page to create the group and return to the All groups page. If you don't see the new group listed, wait a moment and refresh the page.

Assign roles to the group
Next, determine what roles (permissions) your app needs on what resources and assign those roles to the Microsoft Entra group you created. Groups can be assigned a role at the resource, resource group, or subscription scope. This example shows how to assign roles at the resource group scope, since most apps group all their Azure resources into a single resource group.
In the Azure portal, navigate to the Overview page of the resource group that contains your app.
Select Access control (IAM) from the left navigation.
On the Access control (IAM) page, select + Add and then choose Add role assignment from the drop-down menu. The Add role assignment page provides several tabs to configure and assign roles.
On the Role tab, use the search box to locate the role you want to assign. Select the role, and then choose Next.
On the Members tab:
- For the Assign access to value, select User, group, or service principal .
- For the Members value, choose + Select members to open the Select members flyout panel.
- Search for the Microsoft Entra group you created earlier and select it from the filtered results. Choose Select to select the group and close the flyout panel.
- Select Review + assign at the bottom of the Members tab.

On the Review + assign tab, select Review + assign at the bottom of the page.

Sign-in to Azure using developer tooling
Next, sign-in to Azure using one of several developer tools that can be used to perform authentication in your development environment. The account you authenticate should also exist in the Microsoft Entra group you created and configured earlier.
Developers can use Azure CLI to authenticate to Microsoft Entra ID. Apps using DefaultAzureCredential or AzureCliCredential can then use this account to authenticate app requests when running locally.
To authenticate with the Azure CLI, run the az login command. On a system with a default web browser, the Azure CLI launches the browser to authenticate the user.
az login
For systems without a default web browser, the az login command uses the device code authentication flow. The user can also force the Azure CLI to use the device code flow rather than launching a browser by specifying the --use-device-code argument.
az login --use-device-code


Authenticate to Azure services from your app
The Azure Identity library provides implementations of TokenCredential that support various scenarios and Microsoft Entra authentication flows. The following steps demonstrate how to use DefaultAzureCredential or a specific development tool credential when working with user accounts locally.
Tip
When your team uses multiple development tools to authenticate with Azure, prefer a local development-optimized instance of DefaultAzureCredential over tool-specific credentials.
Implement the code
Add the @azure/identity package to your application.
npm install @azure/identityNote
If you want to use
VisualStudioCodeCredential, you must also install the @azure/identity-vscode plugin package. Then explicitly load the credential. For an example, see the @azure/identity-vscode README.Choose one of the credential implementations based on your scenario.
- Use a credential specific to your development tool: this option is best for single person or single tool scenarios.
- Use a credential available for use in any development tool: this option is best for open source projects and diverse tool teams.
Use a credential specific to your development tool
Pass a TokenCredential instance corresponding to a specific development tool to the Azure service client constructor, such as AzureCliCredential.
import { AzureCliCredential } from "@azure/identity";
import { BlobServiceClient } from "@azure/storage-blob";

const credential = new AzureCliCredential();

const client = new BlobServiceClient(
    "https://<storage-account-name>.blob.core.windows.net",
    credential
);
Use a credential available for use in any development tool
Use a DefaultAzureCredential instance optimized for all local development tools. This example requires the environment variable AZURE_TOKEN_CREDENTIALS set to dev. For more information, see Exclude a credential type category.
import { DefaultAzureCredential } from "@azure/identity";
import { BlobServiceClient } from "@azure/storage-blob";

// Set environment variable AZURE_TOKEN_CREDENTIALS to "dev"
const credential = new DefaultAzureCredential({
    requiredEnvVars: ["AZURE_TOKEN_CREDENTIALS"]
});

const client = new BlobServiceClient(
    "https://<storage-account-name>.blob.core.windows.net",
    credential
);