Surface Pen (可在 Microsoft Store 購買)。
概觀
優化你的 Windows 應用程式以支援筆輸入,同時提供標準 指標裝置 功能與最佳 Windows Ink 體驗。
備註
這個主題聚焦於 Windows Ink 平台。 關於一般指標輸入的處理(類似滑鼠、觸控和觸控板),請參見 「控制器指標輸入」。
在 Windows 應用程式中使用墨水
使用 Windows 筆與墨水來打造更具吸引力的企業應用程式
Windows Ink 平台結合筆裝置,提供了一種自然的方式來製作數位手寫筆記、繪圖和註解。 該平台支援將數位化器輸入擷取為墨水資料、產生墨水資料、管理墨水資料、在輸出裝置上以墨水筆劃方式呈現墨水資料,以及透過手寫辨識將墨水轉換為文字。
除了記錄使用者書寫或繪畫時筆的基本位置與移動外,應用程式還能追蹤並收集筆劃過程中所用的各種壓力。 這些資訊,加上筆尖形狀、大小與旋轉、墨水顏色與用途(純墨水、擦除、高光與選擇)設定,使使用者體驗與用筆、鉛筆或畫筆在紙上書寫或繪畫非常相似。
備註
你的應用程式也能支援其他指向裝置的手寫輸入,包括觸控數位板和滑鼠裝置。
墨水平台非常靈活。 它設計支援不同層級的功能,依照您的需求而定。
關於 Windows Ink 使用者體驗指引,請參見 描線控制。
Windows Ink 平台的組成部分
| 元件 | Description |
|---|---|
| 墨水畫布 | XAML UI 平台控制項預設會接收並顯示所有筆輸入,作為墨水筆劃或擦除筆劃。 欲了解更多如何使用 InkCanvas,請參閱 「辨識 Windows Ink 筆劃為文字 」及 「儲存與檢索 Windows Ink 筆劃資料」。 |
| InkPresenter | 一個程式碼背後的物件,與 InkCanvas 控制項一同實例化(透過 InkCanvas.InkPresenter 屬性暴露)。 此物件提供 InkCanvas 所顯示的所有預設墨線功能,並搭配完整的 API 套件,方便額外自訂與個人化。 欲了解更多如何使用 InkPresenter,請參閱 「辨識 Windows 墨水筆劃為文字 」及 「儲存與檢索 Windows 墨水筆劃資料」。 |
| InkToolbar | XAML 介面控制項包含可自訂且可擴充的按鈕集合,能在相關的 InkCanvas 中啟動與墨水相關的功能。 欲了解更多如何使用 InkToolbar 的資訊,請參見 「新增 InkToolbar 到 Windows 應用程式的墨水列印應用程式」。 |
| IInkD2DRenderer | 允許將墨線筆劃渲染到通用 Windows 應用程式指定的 Direct2D 裝置上下文,而非預設 的 InkCanvas 控制項。 這讓描線體驗能完全自訂。 欲了解更多資訊,請參閱 複雜墨水範例。 |
用 InkCanvas 進行基本描線
要新增基本的墨線功能,只要在應用程式的適當頁面放置 InkCanvas UWP 平台控制項即可。
預設情況下, InkCanvas 只支援筆的墨水輸入。 輸入會使用預設設定以墨水筆劃的方式呈現,顏色為黑色,厚度為 2 像素(黑色原子筆,厚度為 2 像素),或被視為筆劃橡皮擦功能(當輸入來自橡皮擦筆尖或筆尖上有橡皮擦按鈕的情況下)。
備註
如果沒有橡皮擦筆尖或按鈕,InkCanvas 可以被設定為將筆尖輸入視為橡皮擦筆劃。
在這個例子中, InkCanvas 會疊加背景影像。
備註
InkCanvas 的預設 Height 和 Width 屬性是零,除非它是像 StackPanel 或 Grid 控制項這樣會自動調整子元素大小的元素的子節點。
<Grid Background="{ThemeResource ApplicationPageBackgroundThemeBrush}">
    <Grid.RowDefinitions>
        <RowDefinition Height="Auto"/>
        <RowDefinition Height="*"/>
    </Grid.RowDefinitions>
    <StackPanel x:Name="HeaderPanel" Orientation="Horizontal" Grid.Row="0">
        <TextBlock x:Name="Header"
                   Text="Basic ink sample"
                   Style="{ThemeResource HeaderTextBlockStyle}"
                   Margin="10,0,0,0" />
    </StackPanel>
    <Grid Grid.Row="1">
        <Image Source="Assets\StoreLogo.png" />
        <InkCanvas x:Name="inkCanvas" />
    </Grid>
</Grid>
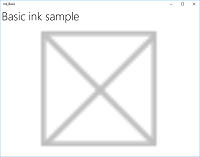
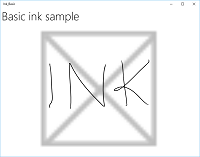
這一系列圖片展示了這個 InkCanvas 控制項如何渲染筆輸入。
|
|
|
|---|---|---|
| 空白的 InkCanvas 搭配背景圖片。 | 帶有墨水筆觸的 InkCanvas 。 | InkCanvas 擦掉了一整筆(注意,擦除會針對整個筆劃,而非僅部分)。 |
InkCanvas 控制項所支援的墨線功能是由一個名為 InkPresenter 的程式碼物件提供。
您在基本繪圖時,不需要擔心InkPresenter。 然而,要自訂和設定 InkCanvas 上的墨線行為,你必須存取其對應 的 InkPresenter 物件。
使用 InkPresenter 進行基本自訂
每個 InkCanvas 控制項都會實例化一個 InkPresenter 物件。
備註
InkPresenter 無法直接實例化。 取而代之的是透過 InkCanvas 的 InkPresenter 屬性存取。
除了提供對應 InkCanvas 控制項的所有預設描墨行為外, InkPresenter 還提供一套完整的 API,方便筆劃自訂及細緻管理筆輸入(標準與修改版)。 這包括筆劃屬性、支援的輸入裝置類型,以及輸入是否由物件處理或傳遞給應用程式處理。
備註
標準的墨水輸入(無論是筆尖還是橡皮擦筆尖/按鈕)不會因次要硬體機制而修改,例如筆桿按鈕、滑鼠右鍵按鈕或類似的機制。
預設情況下,墨水只支援筆輸入。 在這裡,我們設定 InkPresenter 將筆和滑鼠的輸入資料解讀為墨水筆劃。 我們也在 InkCanvas 中設定了一些用於渲染筆觸的初始筆觸屬性。
要啟用滑鼠和觸控描線,請將 InkPresenter 的 InputDeviceTypes 屬性設定為你想要的 CoreInputDeviceTypes 數值組合。
public MainPage()
{
    this.InitializeComponent();

    // Set supported inking device types.
    inkCanvas.InkPresenter.InputDeviceTypes =
        Windows.UI.Core.CoreInputDeviceTypes.Mouse |
        Windows.UI.Core.CoreInputDeviceTypes.Pen;

    // Set initial ink stroke attributes.
    InkDrawingAttributes drawingAttributes = new InkDrawingAttributes();
    drawingAttributes.Color = Windows.UI.Colors.Black;
    drawingAttributes.IgnorePressure = false;
    drawingAttributes.FitToCurve = true;
    inkCanvas.InkPresenter.UpdateDefaultDrawingAttributes(drawingAttributes);
}
墨線屬性可動態設定,以符合使用者偏好或應用程式需求。
在這裡,我們讓使用者從墨水顏色列表中選擇。
<Grid Background="{ThemeResource ApplicationPageBackgroundThemeBrush}">
    <Grid.RowDefinitions>
        <RowDefinition Height="Auto"/>
        <RowDefinition Height="*"/>
    </Grid.RowDefinitions>
    <StackPanel x:Name="HeaderPanel" Orientation="Horizontal" Grid.Row="0">
        <TextBlock x:Name="Header"
                   Text="Basic ink customization sample"
                   VerticalAlignment="Center"
                   Style="{ThemeResource HeaderTextBlockStyle}"
                   Margin="10,0,0,0" />
        <TextBlock Text="Color:"
                   Style="{StaticResource SubheaderTextBlockStyle}"
                   VerticalAlignment="Center"
                   Margin="50,0,10,0"/>
        <ComboBox x:Name="PenColor"
                  VerticalAlignment="Center"
                  SelectedIndex="0"
                  SelectionChanged="OnPenColorChanged">
            <ComboBoxItem Content="Black"/>
            <ComboBoxItem Content="Red"/>
        </ComboBox>
    </StackPanel>
    <Grid Grid.Row="1">
        <Image Source="Assets\StoreLogo.png" />
        <InkCanvas x:Name="inkCanvas" />
    </Grid>
</Grid>
接著我們會處理選取顏色的變更,並相應更新墨水筆劃屬性。
// Update ink stroke color for new strokes.
private void OnPenColorChanged(object sender, SelectionChangedEventArgs e)
{
    if (inkCanvas != null)
    {
        InkDrawingAttributes drawingAttributes =
            inkCanvas.InkPresenter.CopyDefaultDrawingAttributes();

        string value = ((ComboBoxItem)PenColor.SelectedItem).Content.ToString();

        switch (value)
        {
            case "Black":
                drawingAttributes.Color = Windows.UI.Colors.Black;
                break;
            case "Red":
                drawingAttributes.Color = Windows.UI.Colors.Red;
                break;
            default:
                drawingAttributes.Color = Windows.UI.Colors.Black;
                break;
        };

        inkCanvas.InkPresenter.UpdateDefaultDrawingAttributes(drawingAttributes);
    }
}
這些圖片展示了 InkPresenter 如何處理與自訂筆輸入。
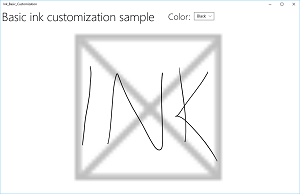
InkCanvas 顯示預設的黑色筆劃。
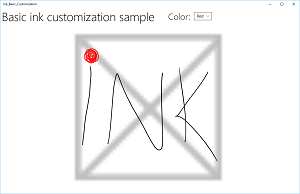
InkCanvas 裡有使用者選擇的紅色墨水筆劃。
為了提供除描線與擦除之外的功能,例如筆劃選擇,應用程式必須識別特定輸入,讓 InkPresenter 通過未處理的輸入,供應用程式處理。
直通輸入用於進階處理
預設情況下, InkPresenter 會將所有輸入視為墨筆筆劃或擦除筆劃,包括由次要硬體功能修改的輸入,如筆桿按鈕、右滑鼠按鈕等。 然而,使用者通常期望這些次要功能能帶來一些額外功能或行為的修改。
在某些情況下,您可能還需要為缺乏次要功能的筆、其他類型的輸入設備,或者根據使用者在應用程式界面上的選擇而導致的某些功能改變,開放額外的功能。
為了支援此點, InkPresenter 可以設定為保留特定輸入不處理。 這些未處理的輸入會被傳送到你的應用程式進行處理。
範例 - 使用未處理的輸入來實作筆劃選擇
Windows Ink 平台不提供對需要更改輸入的操作(例如筆劃選擇)的內建支援。 要支援這類功能,你必須在應用程式中提供自訂解決方案。
以下程式碼範例(所有程式碼皆在 MainPage.xaml 及 MainPage.xaml.cs 檔案中)說明如何在筆桿按鈕(或滑鼠右鍵)修改輸入時啟用筆劃選擇。
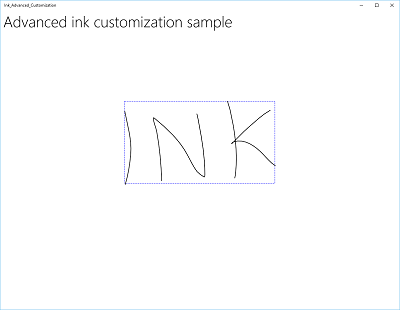
首先,我們在 MainPage.xaml 中設定了使用者介面。
這裡,我們會新增一個畫布(在 InkCanvas 下方)來繪製選取筆劃。 使用獨立圖層繪製選取筆劃,則 InkCanvas 及其內容不會被修改。
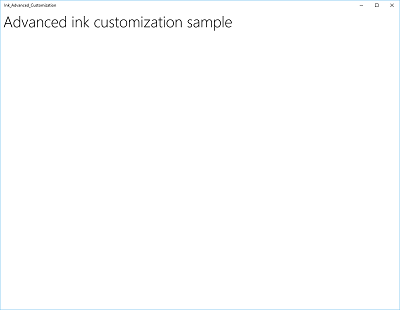
  <Grid Background="{ThemeResource ApplicationPageBackgroundThemeBrush}">
    <Grid.RowDefinitions>
      <RowDefinition Height="Auto"/>
      <RowDefinition Height="*"/>
    </Grid.RowDefinitions>
    <StackPanel x:Name="HeaderPanel" Orientation="Horizontal" Grid.Row="0">
      <TextBlock x:Name="Header"
        Text="Advanced ink customization sample"
        VerticalAlignment="Center"
        Style="{ThemeResource HeaderTextBlockStyle}"
        Margin="10,0,0,0" />
    </StackPanel>
    <Grid Grid.Row="1">
      <!-- Canvas for displaying selection UI. -->
      <Canvas x:Name="selectionCanvas"/>
      <!-- Inking area -->
      <InkCanvas x:Name="inkCanvas"/>
    </Grid>
  </Grid>
在 MainPage.xaml.cs 中,我們宣告了幾個全域變數,用來保留對選擇介面某些面向的參考。 具體來說,是選取套索筆劃和用來標示選取筆劃的邊界矩形。
  // Stroke selection tool.
  private Polyline lasso;
  // Stroke selection area.
  private Rect boundingRect;
接著,我們設定 InkPresenter 將筆和滑鼠的輸入資料解讀為墨水筆觸,並將用於渲染筆觸的初始筆觸屬性設定到 InkCanvas。
最重要的是,我們使用 InkPresenter 的 InputProcessingConfiguration 屬性來表示任何修改過的輸入都應該被應用程式處理。 修改後的輸入可透過指派 InputProcessingConfiguration.RightDragAction 的值為 InkInputRightDragAction.LeaveUnprocessed 來指定。 當這個值被設定時, InkPresenter 會傳遞給 InkUnprocessedInput 類別,這是一組指標事件,供你處理。
我們會為 InkPresenter 傳遞的未處理 PointerPressed、PointerMoved 和 PointerReleased 事件指派監聽器。 所有選擇功能皆實作於這些事件處理程序中。
最後,我們為 InkPresenter 的 StrokeStarted 和 StrokesErased 事件指派監聽者。 我們會使用這些事件的處理器來清理選取使用者介面,當新的筆劃開始或現有的筆劃被刪除時。
  public MainPage()
  {
    this.InitializeComponent();

    // Set supported inking device types.
    inkCanvas.InkPresenter.InputDeviceTypes =
      Windows.UI.Core.CoreInputDeviceTypes.Mouse |
      Windows.UI.Core.CoreInputDeviceTypes.Pen;

    // Set initial ink stroke attributes.
    InkDrawingAttributes drawingAttributes = new InkDrawingAttributes();
    drawingAttributes.Color = Windows.UI.Colors.Black;
    drawingAttributes.IgnorePressure = false;
    drawingAttributes.FitToCurve = true;
    inkCanvas.InkPresenter.UpdateDefaultDrawingAttributes(drawingAttributes);

    // By default, the InkPresenter processes input modified by
    // a secondary affordance (pen barrel button, right mouse
    // button, or similar) as ink.
    // To pass through modified input to the app for custom processing
    // on the app UI thread instead of the background ink thread, set
    // InputProcessingConfiguration.RightDragAction to LeaveUnprocessed.
    inkCanvas.InkPresenter.InputProcessingConfiguration.RightDragAction =
        InkInputRightDragAction.LeaveUnprocessed;

    // Listen for unprocessed pointer events from modified input.
    // The input is used to provide selection functionality.
    inkCanvas.InkPresenter.UnprocessedInput.PointerPressed +=
        UnprocessedInput_PointerPressed;
    inkCanvas.InkPresenter.UnprocessedInput.PointerMoved +=
        UnprocessedInput_PointerMoved;
    inkCanvas.InkPresenter.UnprocessedInput.PointerReleased +=
        UnprocessedInput_PointerReleased;

    // Listen for new ink or erase strokes to clean up selection UI.
    inkCanvas.InkPresenter.StrokeInput.StrokeStarted +=
        StrokeInput_StrokeStarted;
    inkCanvas.InkPresenter.StrokesErased +=
        InkPresenter_StrokesErased;
  }
之後,我們為 InkPresenter 傳遞的未處理 PointerPressed、PointerMoved 和 PointerReleased 事件定義處理器。
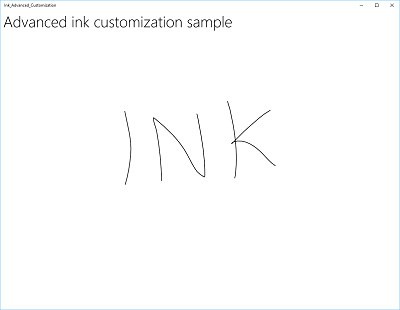
所有選取功能皆在這些處理程式中實作,包括套索筆劃與邊界矩形。

  // Handle unprocessed pointer events from modified input.
  // The input is used to provide selection functionality.
  // Selection UI is drawn on a canvas under the InkCanvas.
  private void UnprocessedInput_PointerPressed(
    InkUnprocessedInput sender, PointerEventArgs args)
  {
    // Initialize a selection lasso.
    lasso = new Polyline()
    {
        Stroke = new SolidColorBrush(Windows.UI.Colors.Blue),
        StrokeThickness = 1,
        StrokeDashArray = new DoubleCollection() { 5, 2 },
        };

        lasso.Points.Add(args.CurrentPoint.RawPosition);

        selectionCanvas.Children.Add(lasso);
    }

    private void UnprocessedInput_PointerMoved(
      InkUnprocessedInput sender, PointerEventArgs args)
    {
      // Add a point to the lasso Polyline object.
      lasso.Points.Add(args.CurrentPoint.RawPosition);
    }

    private void UnprocessedInput_PointerReleased(
      InkUnprocessedInput sender, PointerEventArgs args)
    {
      // Add the final point to the Polyline object and
      // select strokes within the lasso area.
      // Draw a bounding box on the selection canvas
      // around the selected ink strokes.
      lasso.Points.Add(args.CurrentPoint.RawPosition);

      boundingRect =
        inkCanvas.InkPresenter.StrokeContainer.SelectWithPolyLine(
          lasso.Points);

      DrawBoundingRect();
    }
為了結束 PointerReleased 事件處理程序,我們清除選取層中所有內容(套索筆劃),然後在套索區域所涵蓋的墨水筆劃周圍畫出一個包圍矩形。
  // Draw a bounding rectangle, on the selection canvas, encompassing
  // all ink strokes within the lasso area.
  private void DrawBoundingRect()
  {
    // Clear all existing content from the selection canvas.
    selectionCanvas.Children.Clear();

    // Draw a bounding rectangle only if there are ink strokes
    // within the lasso area.
    if (!((boundingRect.Width == 0) ||
      (boundingRect.Height == 0) ||
      boundingRect.IsEmpty))
      {
        var rectangle = new Rectangle()
        {
          Stroke = new SolidColorBrush(Windows.UI.Colors.Blue),
            StrokeThickness = 1,
            StrokeDashArray = new DoubleCollection() { 5, 2 },
            Width = boundingRect.Width,
            Height = boundingRect.Height
        };

        Canvas.SetLeft(rectangle, boundingRect.X);
        Canvas.SetTop(rectangle, boundingRect.Y);

        selectionCanvas.Children.Add(rectangle);
      }
    }
最後,我們定義了 StrokeStarted 與 StrokesErased InkPresenter 事件的處理器。
這兩者一旦偵測到新筆畫,就會呼叫同一個清理函數來清除當前的選取。
  // Handle new ink or erase strokes to clean up selection UI.
  private void StrokeInput_StrokeStarted(
    InkStrokeInput sender, Windows.UI.Core.PointerEventArgs args)
  {
    ClearSelection();
  }

  private void InkPresenter_StrokesErased(
    InkPresenter sender, InkStrokesErasedEventArgs args)
  {
    ClearSelection();
  }
這裡有個功能,可以當開始新筆劃或刪除現有筆劃時,從選取畫布中移除所有選取 UI。
  // Clean up selection UI.
  private void ClearSelection()
  {
    var strokes = inkCanvas.InkPresenter.StrokeContainer.GetStrokes();
    foreach (var stroke in strokes)
    {
      stroke.Selected = false;
    }
    ClearDrawnBoundingRect();
   }

  private void ClearDrawnBoundingRect()
  {
    if (selectionCanvas.Children.Any())
    {
      selectionCanvas.Children.Clear();
      boundingRect = Rect.Empty;
    }
  }
自訂墨水渲染
預設情況下,墨水輸入會在低延遲的背景執行緒上處理,並會在繪製時即時渲染,或稱「濕」渲染。 當筆劃完成(筆或手指抬起,或滑鼠按鍵放開),筆劃會在 UI 執行緒中處理,並以「乾」狀態呈現到 InkCanvas 圖層(位於應用程式內容上方,並替換濕墨水)。
你可以覆蓋此預設行為,並完全掌控書寫體驗,方法是「自訂化乾燥」濕墨書寫筆劃。 雖然預設行為通常足夠應付大多數應用,但有少數情況可能需要自訂乾燥,包括:
- 更有效率地管理大量或複雜的墨水筆劃集合
- 在大型墨水畫布上,提供更高效的平移和縮放支援
- 在保持 z 順序的同時,將墨水和其他物件(如形狀或文字)交錯排列
- 將墨水同步乾燥並轉換成 DirectX 形狀(例如,將直線或圖形點陣化並整合進應用程式內容,而非作為獨立 的 InkCanvas 圖層)。
自訂乾燥需要一個 IInkD2DRenderer 物件來管理墨水輸入,並將其渲染到你通用 Windows 應用程式的 Direct2D 裝置上下文,而不是預設 的 InkCanvas 控制項。
透過呼叫 ActivateCustomDrying(在 InkCanvas 載入前),應用程式會建立 InkSynchronizer 物件,以自訂如何將墨水筆劃的乾化效果渲染到 SurfaceImageSource 或 VirtualSurfaceImageSource。
SurfaceImageSource 和 VirtualSurfaceImageSource 都提供一個 DirectX 共享的表面,讓你的應用程式可以繪製並合成到應用程式內容中,雖然 VSIS 提供的虛擬表面比螢幕還大,方便效能良好的平移和縮放。 由於這些表面的視覺更新會與 XAML UI 執行緒同步,當墨水渲染到任一表面時,未乾的墨水可以同時從 InkCanvas 中移除。
你也可以自訂乾墨水到 SwapChainPanel,但不保證與 UI 執行緒同步,且墨水渲染到 SwapChainPanel 與墨水從 InkCanvas 移除之間可能會有延遲。
此功能的完整範例請參見 複雜墨水範例。
備註
自訂乾燥過程與 InkToolbar
如果你的應用程式用自訂乾燥實作覆蓋了 InkPresenter 的預設墨水渲染行為,渲染出來的墨水筆劃將不再被 InkToolbar 使用,且 InkToolbar 內建的擦除指令也無法如預期運作。 要提供擦除功能,你必須處理所有指針事件,對每一筆劃進行命中測試,並覆蓋預設的「清除所有墨跡」指令。
本節其他條目
| 主題 | Description |
|---|---|
| 辨識墨線 | 利用手寫辨識將墨線筆劃轉換為文字,或利用自訂辨識轉換為形狀。 |
| 儲存與取出墨水筆劃 | 使用嵌入的墨水序列化格式(ISF)元資料,將筆劃資料儲存在圖形交換格式(GIF)檔案中。 |
| 在 Windows 墨跡應用程式中新增 InkToolbar | 在 Windows 應用程式的墨線應用程式中加入預設的 InkToolbar,在 InkToolbar 上新增自訂筆按鈕,並將自訂筆按鈕綁定到自訂筆定義。 |
相關文章
應用程式介面(API)
Samples
- 入門教學:在你的 Windows 應用程式中支援墨水
- 簡單墨水範例(C#/C++)
- 複雜墨水樣本(C++)
- 墨水範例(JavaScript)
- 著色書範例
- 家庭筆記範例
- 基本輸入範例
- 低延遲輸入範例
- 使用者互動模式範例
- 焦點視覺效果範例
