Note
Access to this page requires authorization. You can try signing in or changing directories.
Access to this page requires authorization. You can try changing directories.
In this quickstart, you'll use Azure Migrate's new Arc-based discovery to evaluate migration readiness and identify potential migration savings of your Arc-enabled servers.
To view potential savings and readiness of your Arc-enabled servers, you must first create an Azure Migrate project.
An Azure Migrate project is used to store discovery, assessment, and migration metadata collected from the environment you're assessing or migrating. In a project, you can track discovered assets, create assessments, and orchestrate migrations to Azure.
Important
This feature is currently in preview. As a preview feature, the capabilities presented in this article are subject to Supplemental Terms of Use for Microsoft Azure Previews.
Prerequisites
- You must have the Azure Migrate Owner or Owner role on at least one resource group where you'll create the Migrate project.
- Ensure the
Microsoft.OffAzureandMicrosoft.Migrateresource providers are registered on the subscription. Learn how to register resource providers.
- Ensure the
- You must have the Migrate Arc Discovery Reader - Preview role or a custom role with equivalent permissions on the subscriptions with Arc resources.
- Ensure subscriptions with Arc resources that you want to include in the project also have
Microsoft.OffAzureresource provider registered.
- Ensure subscriptions with Arc resources that you want to include in the project also have
- Your Arc-enabled Server machines are running connected machine agents of version 1.46 (September 2024 release) or newer. Machines with older agent versions are excluded from the project as they don’t include all the necessary information for migration assessments.
Create a migrate project with your Arc resources
In the Azure portal, search for Azure Arc.
In Services, select Azure Arc.
Under Migration, select Savings and Readiness (Preview).

Select Create a migration project.
Provide a name for your migration project

Select Subscription, Resource group, and Region for your project. All migration related metadata is stored in this region.
Under Scope, select one or more Subscriptions with Arc resources that you want to include in this project.
Select a Target region. This region is where you plan to migrate these Arc resources. Target region determines Azure SKU availability and costs in assessment and business case calculations.
Select Create.


The project will now be created along with default business cases and assessment. Depending on the number of Arc resources, this could take up to an hour.
View default business cases
When you create a project with Arc resources, two default business cases are generated, each considering a different migration strategy:
- Modernize strategy (named default-modernize)
- Faster migration to Azure strategy (named default-faster-mgn-az-vm)
To view the business cases:
Navigate to Savings and Readiness (Preview) pane in Azure Arc Center as described in previous section. By default, you're taken to the Business case tab.
View potential savings at a glance on the cards in the Recently created section
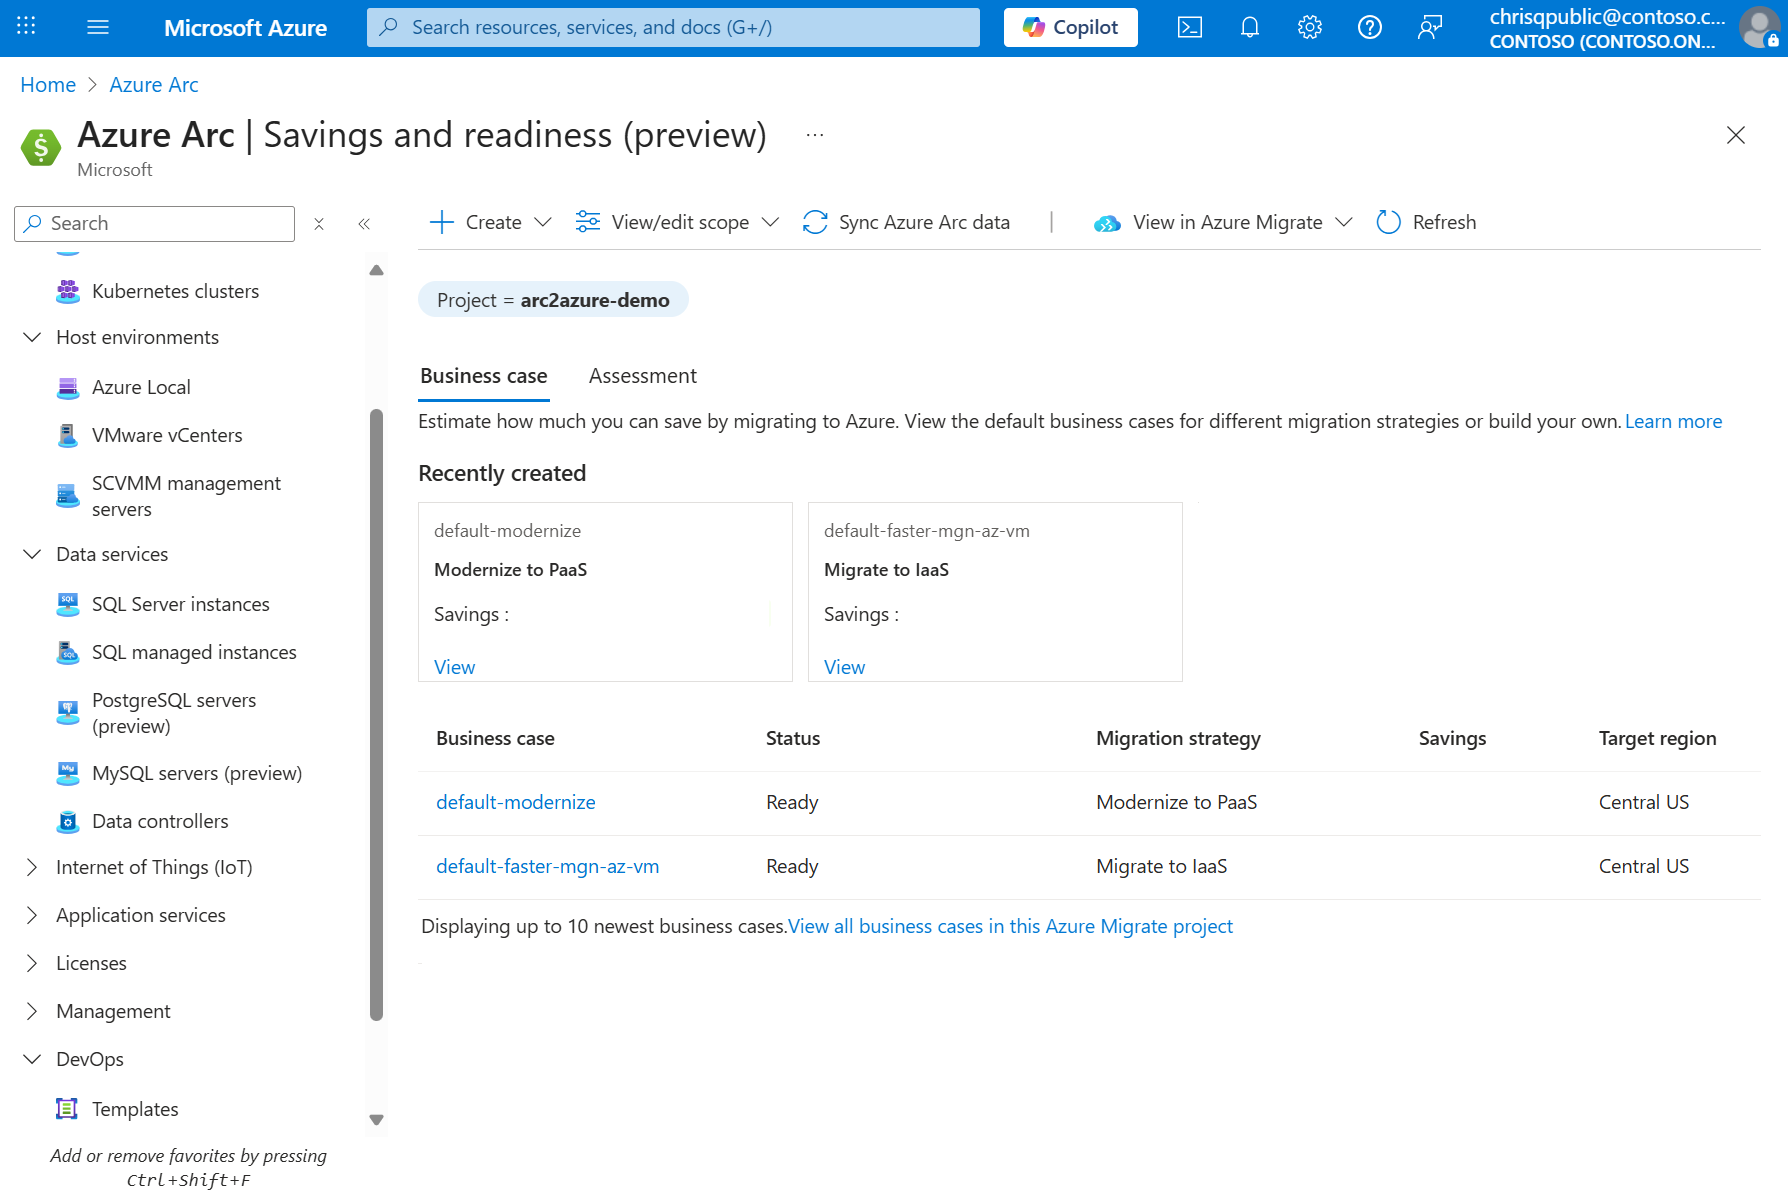
Select View on the card or the name of the business case in the list.
Review the report. To learn more about various reports, see View a business case.

View default assessment
Similarly, when you create an Azure Migrate project with Arc resources, a default assessment named default-all-workloads is created. This assessment evaluates all workloads (servers and SQL Server instances) in scope.
To view the default assessment:
Navigate to Savings and Readiness (Preview) pane in Azure Arc center as described in the Create a migrate project with your Arc resources section section. By default, you're taken to the Business case tab.
Switch to the Assessment tab.
View migration readiness percentage for your Arc-enabled resources at a glance on the cards in the Recently created section

Select View all strategies on the card or the name of the assessment in the list.
Review the report. For details about the information that an assessment provides, see Assessment report.

Create custom business cases or assessments
Along with default business cases and assessments, you can also create custom business cases and assessments. For example, you might want to generate a business case or assessment scoped to a specific application or use different settings.
To create a custom business case:
Navigate to Savings and Readiness (Preview) pane in Azure Arc center as described in the Create a migrate project with your Arc resources section section.
Select +Create
Select Business case
Follow the steps in Build a business case
To create a custom assessment:
Navigate to Savings and Readiness (Preview) pane in Azure Arc center as described in the Create a migrate project with your Arc resources section section.
Select +Create
Select Assessment
Follow the steps in Create an application assessment
Delete the project
If you no longer need the project, delete it by following these steps:
- In Azure portal, search for Azure Migrate
- Under Services, select Azure Migrate.
- In Azure Migrate, select All projects.
- In All projects, search and select the project you want to delete.
- Select Delete in the toolbar.
- In the Select associated resources tab, ensure all resources are selected and select Review
- In the Review tab, enter the name of the project to confirm deletion
- Select Delete