Note
Access to this page requires authorization. You can try signing in or changing directories.
Access to this page requires authorization. You can try changing directories.
Note
Apache Airflow job is powered by Apache Airflow.
In this tutorial, you run a hello-world DAG in Apache Airflow Job. This tutorial focuses on familiarizing users with the features and environment of the Apache Airflow Job.
Create an Apache Airflow Job
You can use an existing workspace or Create a new workspace.
Expand + New dropdown -> Select Browse all -> Under the Data Factory section -> Select Apache Airflow Job (preview)
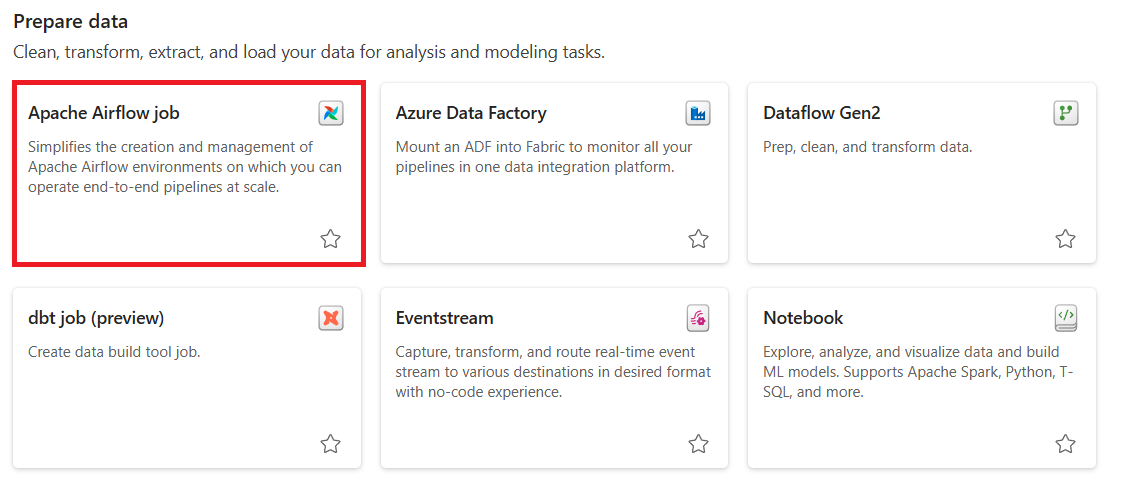
Give a suitable name to your project and select the Create button.
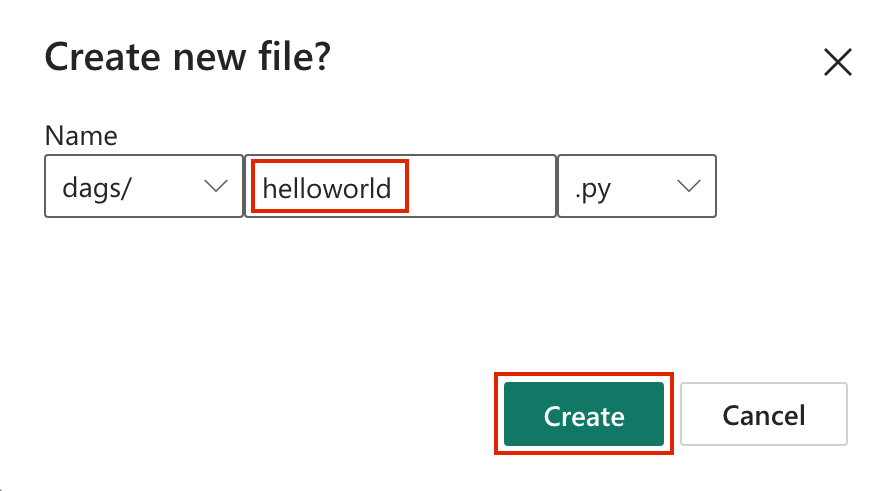
Create a DAG File
Select the New DAG file card -> Give the name to the file and select the Create button.
A boilerplate DAG code is presented to you. You can edit the file as per your requirements.

Select Save.


Monitor your Apache Airflow DAG in Apache Airflow UI
The saved dag files are loaded in the Apache Airflow UI. You can monitor them by clicking on the "Monitor in Apache Airflow" button.

