Nuta
Dostęp do tej strony wymaga autoryzacji. Możesz spróbować się zalogować lub zmienić katalog.
Dostęp do tej strony wymaga autoryzacji. Możesz spróbować zmienić katalogi.
Jest to druga część kompletnego przewodnika dotyczącego korzystania z usługi Windows Hello jako alternatywy dla tradycyjnych systemów uwierzytelniania nazw użytkowników i haseł w spakowanych aplikacjach systemu Windows. W tym artykule kontynuujemy od momentu, w którym zakończyła się część 1, aplikacja logowania Windows Hello, i rozszerzamy funkcjonalność, aby pokazać, jak można zintegrować funkcję Windows Hello z istniejącą aplikacją.
Aby skompilować ten projekt, potrzebujesz doświadczenia z językiem C# i XAML. Musisz również używać programu Visual Studio 2022 na komputerze z systemem Windows 10 lub Windows 11. Zobacz Rozpoczynanie tworzenia aplikacji systemu Windows , aby uzyskać pełne instrukcje dotyczące konfigurowania środowiska deweloperskiego.
Ćwiczenie 1. Logika po stronie serwera
W tym ćwiczeniu zaczniesz od aplikacji Windows Hello utworzonej w pierwszym laboratorium i utworzysz lokalny pozorowany serwer i bazę danych. To praktyczne laboratorium ma na celu nauczenie, jak można zintegrować usługę Windows Hello z istniejącym systemem. Korzystając z pozornego serwera i pozorowanej bazy danych, eliminuje się wiele niepowiązanych konfiguracji. We własnych aplikacjach należy zastąpić pozorne obiekty rzeczywistymi usługami i bazami danych.
Aby rozpocząć, otwórz rozwiązanie WindowsHelloLogin z pierwszego laboratorium Windows Hello Hands On Lab.
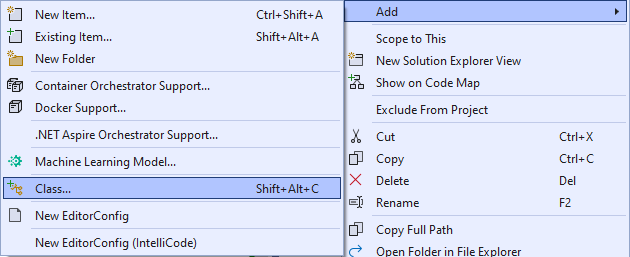
Rozpoczniesz od zaimplementowania makiety serwera i makiety bazy danych. Utwórz nowy folder o nazwie "AuthService". W Eksploratorze rozwiązań kliknij prawym przyciskiem myszy projekt WindowsHelloLogin i wybierz polecenie Dodaj>nowy folder.
Utwórz klasy UserAccount i WindowsHelloDevices , które będą działać jako modele dla danych do zapisania w makiety bazy danych. Konto użytkownika będzie podobne do modelu użytkownika zaimplementowanego na tradycyjnym serwerze uwierzytelniania. Kliknij prawym przyciskiem myszy folder AuthService i dodaj nową klasę o nazwie "UserAccount".
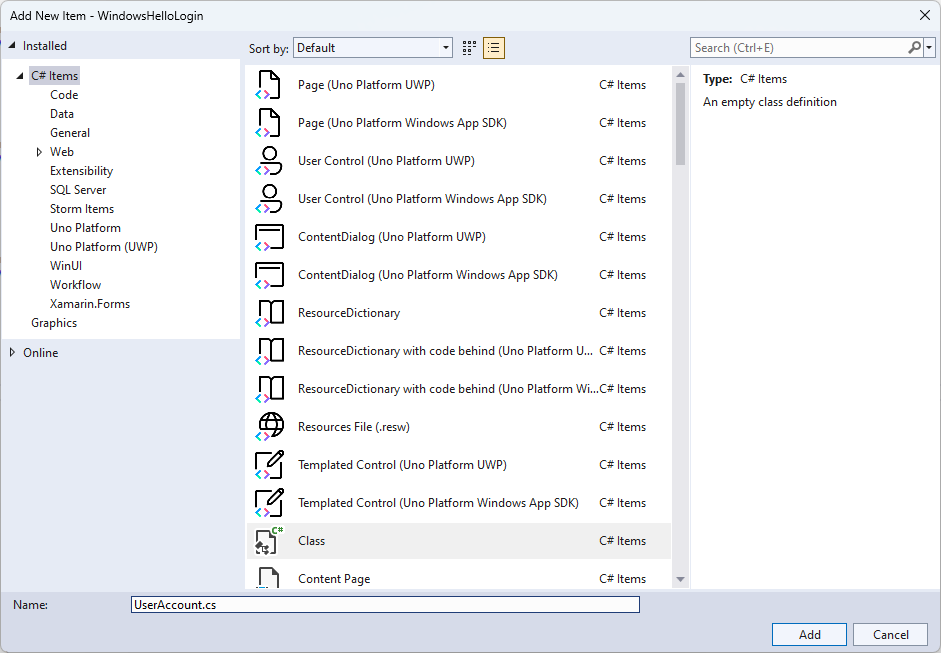
Zmień zakres klas na publiczny i dodaj następujące właściwości publiczne dla klasy UserAccount . Musisz dodać instrukcję using dla przestrzeni nazw
System.ComponentModel.DataAnnotations.using System; using System.ComponentModel.DataAnnotations; namespace WindowsHelloLogin.AuthService { public class UserAccount { [Key, Required] public Guid UserId { get; set; } [Required] public string Username { get; set; } public string Password { get; set; } // public List<WindowsHelloDevice> WindowsHelloDevices = new(); } }Być może zauważyłeś, że oznaczono jako komentarz listę WindowsHelloDevices. Jest to modyfikacja, którą należy wprowadzić do istniejącego modelu użytkownika w bieżącej implementacji. Lista WindowsHelloDevices będzie zawierać identyfikator urządzenia, klucz publiczny stworzony przez Windows Hello i KeyCredentialAttestationResult. W tym ćwiczeniu należy zaimplementować funkcję keyAttestationResult , ponieważ są one udostępniane tylko przez funkcję Windows Hello na urządzeniach z mikroukładem TPM (Trusted Platform Modules). KeyCredentialAttestationResult to połączenie wielu właściwości, które należy podzielić, aby móc je zapisać i załadować z bazy danych.
Utwórz nową klasę w folderze AuthService o nazwie "WindowsHelloDevice.cs". Jest to model dla urządzeń z usługą Windows Hello, jak opisano powyżej. Zmień zakres klas na publiczny i dodaj następujące właściwości.
using System;

namespace WindowsHelloLogin.AuthService
{
    public class WindowsHelloDevice
    {
        // These are the new variables that will need to be added to the existing UserAccount in the Database
        // The DeviceName is used to support multiple devices for the one user.
        // This way the correct public key is easier to find as a new public key is made for each device.
        // The KeyAttestationResult is only used if the User device has a TPM (Trusted Platform Module) chip,
        // in most cases it will not. So will be left out for this hands on lab.
        public Guid DeviceId { get; set; }
        public byte[] PublicKey { get; set; }
        // public KeyCredentialAttestationResult KeyAttestationResult { get; set; }
    }
}
Wróć do UserAccount.cs i odkomentuj listę urządzeń z usługą Windows Hello.
using System.Collections.Generic;

namespace WindowsHelloLogin.AuthService
{
    public class UserAccount
    {
        [Key, Required]
        public Guid UserId { get; set; }
        [Required]
        public string Username { get; set; }
        public string Password { get; set; }
        public List<WindowsHelloDevice> WindowsHelloDevices = new();
    }
}
Po utworzeniu modelu userAccount i windowsHelloDevice należy utworzyć inną nową klasę w folderze AuthService , który będzie działać jako pozorna baza danych, ponieważ jest to pozorna baza danych, z której będziesz zapisywać i ładować listę kont użytkowników lokalnie. W świecie rzeczywistym będzie to implementacja bazy danych. Utwórz nową klasę w folderze AuthService o nazwie "MockStore.cs". Zmień zakres klasy na publiczny.
Ponieważ magazyn makiety zapisze i załaduje listę kont użytkowników lokalnie, możesz zaimplementować logikę w celu zapisania i załadowania tej listy przy użyciu narzędzia XmlSerializer. Należy również zapamiętać nazwę pliku i lokalizację zapisywania. W MockStore.cs zaimplementuj następujące elementy:
using System.Collections.Generic;
using System;
using System.IO;
using System.Linq;
using System.Text;
using System.Threading.Tasks;
using System.Xml.Serialization;
using Windows.Storage;

namespace WindowsHelloLogin.AuthService
{
    public class MockStore
    {
        private const string USER_ACCOUNT_LIST_FILE_NAME = "userAccountsList.txt";
        // This cannot be a const because the LocalFolder is accessed at runtime
        private string _userAccountListPath = Path.Combine(
            ApplicationData.Current.LocalFolder.Path, USER_ACCOUNT_LIST_FILE_NAME);
        private List<UserAccount> _mockDatabaseUserAccountsList;

#region Save and Load Helpers
        /// <summary>
        /// Create and save a useraccount list file. (Replacing the old one)
        /// </summary>
        private async Task SaveAccountListAsync()
        {
            string accountsXml = SerializeAccountListToXml();

            if (File.Exists(_userAccountListPath))
            {
                StorageFile accountsFile = await StorageFile.GetFileFromPathAsync(_userAccountListPath);
                await FileIO.WriteTextAsync(accountsFile, accountsXml);
            }
            else
            {
                StorageFile accountsFile = await ApplicationData.Current.LocalFolder.CreateFileAsync(USER_ACCOUNT_LIST_FILE_NAME);
                await FileIO.WriteTextAsync(accountsFile, accountsXml);
            }
        }

        /// <summary>
        /// Gets the useraccount list file and deserializes it from XML to a list of useraccount objects.
        /// </summary>
        /// <returns>List of useraccount objects</returns>
        private async Task LoadAccountListAsync()
        {
            if (File.Exists(_userAccountListPath))
            {
                StorageFile accountsFile = await StorageFile.GetFileFromPathAsync(_userAccountListPath);

                string accountsXml = await FileIO.ReadTextAsync(accountsFile);
                DeserializeXmlToAccountList(accountsXml);
            }

            // If the UserAccountList does not contain the sampleUser Initialize the sample users
            // This is only needed as it in a Hand on Lab to demonstrate a user being migrated.
            // In the real world, user accounts would just be in a database.
            if (!_mockDatabaseUserAccountsList.Any(f => f.Username.Equals("sampleUsername")))
            {
                //If the list is empty, call InitializeSampleAccounts and return the list
                //await InitializeSampleUserAccountsAsync();
            }
        }

        /// <summary>
        /// Uses the local list of accounts and returns an XML formatted string representing the list
        /// </summary>
        /// <returns>XML formatted list of accounts</returns>
        private string SerializeAccountListToXml()
        {
            var xmlizer = new XmlSerializer(typeof(List<UserAccount>));
            var writer = new StringWriter();
            xmlizer.Serialize(writer, _mockDatabaseUserAccountsList);
            return writer.ToString();
        }

        /// <summary>
        /// Takes an XML formatted string representing a list of accounts and returns a list object of accounts
        /// </summary>
        /// <param name="listAsXml">XML formatted list of accounts</param>
        /// <returns>List object of accounts</returns>
        private List<UserAccount> DeserializeXmlToAccountList(string listAsXml)
        {
            var xmlizer = new XmlSerializer(typeof(List<UserAccount>));
            TextReader textreader = new StreamReader(new MemoryStream(Encoding.UTF8.GetBytes(listAsXml)));
            return _mockDatabaseUserAccountsList = (xmlizer.Deserialize(textreader)) as List<UserAccount>;
        }
#endregion
    }
}
W metodzie LoadAccountListAsync prawdopodobnie zauważyłeś, że metoda InitializeSampleUserAccountsAsync została zakomentowana. Tę metodę należy utworzyć w MockStore.cs. Ta metoda wypełni listę kont użytkowników, aby można było przeprowadzić logowanie. W świecie rzeczywistym baza danych użytkownika zostałaby już wypełniona. W tym kroku utworzysz również konstruktor, który zainicjuje listę użytkowników i wywoła metodę LoadAccountListAsync.
namespace WindowsHelloLogin.AuthService
{
    public class MockStore
    {
        private const string USER_ACCOUNT_LIST_FILE_NAME = "userAccountsList.txt";
        // This cannot be a const because the LocalFolder is accessed at runtime
        private string _userAccountListPath = Path.Combine(
            ApplicationData.Current.LocalFolder.Path, USER_ACCOUNT_LIST_FILE_NAME);
        private List<UserAccount> _mockDatabaseUserAccountsList;

        public MockStore()
        {
            _mockDatabaseUserAccountsList = new List<UserAccount>();
            _ = LoadAccountListAsync();
        }

        private async Task InitializeSampleUserAccountsAsync()
        {
            // Create a sample Traditional User Account that only has a Username and Password
            // This will be used initially to demonstrate how to migrate to use Windows Hello

            var sampleUserAccount = new UserAccount()
            {
                UserId = Guid.NewGuid(),
                Username = "sampleUsername",
                Password = "samplePassword",
            };

            // Add the sampleUserAccount to the _mockDatabase
            _mockDatabaseUserAccountsList.Add(sampleUserAccount);
            await SaveAccountListAsync();
        }
    }
}
Teraz, gdy metoda InitializeSampleUserAccountsAsync istnieje, odkomentuj wywołanie tej metody w metodzie LoadAccountListAsync.
private async Task LoadAccountListAsync()
{
    if (File.Exists(_userAccountListPath))
    {
        StorageFile accountsFile = await StorageFile.GetFileFromPathAsync(_userAccountListPath);

        string accountsXml = await FileIO.ReadTextAsync(accountsFile);
        DeserializeXmlToAccountList(accountsXml);
    }

    // If the UserAccountList does not contain the sampleUser Initialize the sample users
    // This is only needed as it in a Hand on Lab to demonstrate a user migrating
    // In the real world user accounts would just be in a database
    if (!_mockDatabaseUserAccountsList.Any(f = > f.Username.Equals("sampleUsername")))
            {
        //If the list is empty InitializeSampleUserAccountsAsync and return the list
        await InitializeSampleUserAccountsAsync();
    }
}
Lista kont użytkowników w sklepie testowym może być teraz zapisywana i ładowana. Inne części aplikacji będą musiały mieć dostęp do tej listy, więc konieczne będzie pobranie tych danych za pomocą niektórych metod. Poniżej metody InitializeSampleUserAccountsAsync dodaj następujące metody, aby pobrać dane. Umożliwią one uzyskanie identyfikatora użytkownika, pojedynczego użytkownika, listy użytkowników dla określonego urządzenia funkcji Windows Hello, a także uzyskanie klucza publicznego dla użytkownika na określonym urządzeniu.
public Guid GetUserId(string username)
{
    if (_mockDatabaseUserAccountsList.Any())
    {
        UserAccount account = _mockDatabaseUserAccountsList.FirstOrDefault(f => f.Username.Equals(username));
        if (account != null)
        {
            return account.UserId;
        }
    }
    return Guid.Empty;
}

public UserAccount GetUserAccount(Guid userId)
{
    return _mockDatabaseUserAccountsList.FirstOrDefault(f => f.UserId.Equals(userId));
}

public List<UserAccount> GetUserAccountsForDevice(Guid deviceId)
{
    var usersForDevice = new List<UserAccount>();

    foreach (UserAccount account in _mockDatabaseUserAccountsList)
    {
        if (account.WindowsHelloDevices.Any(f => f.DeviceId.Equals(deviceId)))
        {
            usersForDevice.Add(account);
        }
    }

    return usersForDevice;
}

public byte[] GetPublicKey(Guid userId, Guid deviceId)
{
    UserAccount account = _mockDatabaseUserAccountsList.FirstOrDefault(f => f.UserId.Equals(userId));
    if (account != null)
    {
        if (account.WindowsHelloDevices.Any())
        {
            return account.WindowsHelloDevices.FirstOrDefault(p => p.DeviceId.Equals(deviceId)).PublicKey;
        }
    }
    return null;
}
Następne metody implementacji będą obsługiwać proste operacje, aby dodać konto, usunąć konto, a także usunąć urządzenie. Usunięcie urządzenia jest wymagane, ponieważ funkcja Windows Hello jest specyficzna dla urządzenia. Dla każdego urządzenia, na którym się logujesz, nowa para kluczy publicznych i prywatnych zostanie utworzona przez usługę Windows Hello. To jest jak posiadanie innego hasła dla każdego urządzenia, na którym się logujesz; jedyną rzeczą jest to, że nie musisz pamiętać wszystkich tych haseł, ponieważ serwer je pamięta. Dodaj następujące metody do MockStore.cs.
public async Task<UserAccount> AddAccountAsync(string username)
{
    UserAccount newAccount = null;
    try
    {
        newAccount = new UserAccount()
        {
            UserId = Guid.NewGuid(),
            Username = username,
        };

        _mockDatabaseUserAccountsList.Add(newAccount);
        await SaveAccountListAsync();
    }
    catch (Exception)
    {
        throw;
    }
    return newAccount;
}

public async Task<bool> RemoveAccountAsync(Guid userId)
{
    UserAccount userAccount = GetUserAccount(userId);
    if (userAccount != null)
    {
        _mockDatabaseUserAccountsList.Remove(userAccount);
        await SaveAccountListAsync();
        return true;
    }
    return false;
}

public async Task<bool> RemoveDeviceAsync(Guid userId, Guid deviceId)
{
    UserAccount userAccount = GetUserAccount(userId);
    WindowsHelloDevice deviceToRemove = null;
    if (userAccount != null)
    {
        foreach (WindowsHelloDevice device in userAccount.WindowsHelloDevices)
        {
            if (device.DeviceId.Equals(deviceId))
            {
                deviceToRemove = device;
                break;
            }
        }
    }

    if (deviceToRemove != null)
    {
        //Remove the WindowsHelloDevice
        userAccount.WindowsHelloDevices.Remove(deviceToRemove);
        await SaveAccountListAsync();
    }

    return true;
}
W klasie MockStore dodaj metodę, która spowoduje dodanie informacji pokrewnych funkcji Windows Hello do istniejącego konta użytkownika. Ta metoda będzie nazywana "WindowsHelloUpdateDetailsAsync" i będzie pobierać parametry w celu zidentyfikowania użytkownika oraz szczegółów funkcji Windows Hello. KeyAttestationResult został zakomentowany podczas tworzenia WindowsHelloDevice. W rzeczywistej aplikacji będzie to wymagane.
using System.Threading.Tasks;
using Windows.Security.Credentials;

public async Task WindowsHelloUpdateDetailsAsync(Guid userId, Guid deviceId, byte[] publicKey,
    KeyCredentialAttestationResult keyAttestationResult)
{
    UserAccount existingUserAccount = GetUserAccount(userId);
    if (existingUserAccount != null)
    {
        if (!existingUserAccount.WindowsHelloDevices.Any(f => f.DeviceId.Equals(deviceId)))
        {
            existingUserAccount.WindowsHelloDevices.Add(new WindowsHelloDevice()
            {
                DeviceId = deviceId,
                PublicKey = publicKey,
                // KeyAttestationResult = keyAttestationResult
            });
        }
    }
    await SaveAccountListAsync();
}
Klasa MockStore jest teraz kompletna, ponieważ reprezentuje ona bazę danych, która powinna być uważana za prywatną. Aby uzyskać dostęp do magazynu MockStore, do manipulowania danymi bazy danych jest potrzebna klasa AuthService . W folderze AuthService utwórz nową klasę o nazwie "AuthService.cs". Zmień zakres klas na publiczny i dodaj wzorzec pojedynczego wystąpienia, aby upewnić się, że tylko jedno wystąpienie jest kiedykolwiek tworzone.
namespace WindowsHelloLogin.AuthService
{
    public class AuthService
    {
        // Singleton instance of the AuthService
        // The AuthService is a mock of what a real world server and service implementation would be
        private static AuthService _instance;
        public static AuthService Instance
        {
            get
            {
                if (null == _instance)
                {
                    _instance = new AuthService();
                }
                return _instance;
            }
        }

        private AuthService()
        { }
    }
}
Klasa AuthService musi utworzyć wystąpienie klasy MockStore i zapewnić dostęp do właściwości obiektu MockStore .
namespace WindowsHelloLogin.AuthService
{
    public class AuthService
    {
        //Singleton instance of the AuthService
        //The AuthService is a mock of what a real world server and database implementation would be
        private static AuthService _instance;
        public static AuthService Instance
        {
            get
            {
                if (null == _instance)
                {
                    _instance = new AuthService();
                }
                return _instance;
            }
        }

        private AuthService()
        { }

        private MockStore _mockStore = new();

        public Guid GetUserId(string username)
        {
            return _mockStore.GetUserId(username);
        }

        public UserAccount GetUserAccount(Guid userId)
        {
            return _mockStore.GetUserAccount(userId);
        }

        public List<UserAccount> GetUserAccountsForDevice(Guid deviceId)
        {
            return _mockStore.GetUserAccountsForDevice(deviceId);
        }
    }
}
Metody są potrzebne w klasie AuthService , aby uzyskać dostęp do metod dodawania, usuwania i aktualizowania szczegółów funkcji Windows Hello w obiekcie MockStore . Na końcu definicji klasy AuthService dodaj następujące metody.
using System.Threading.Tasks;
using Windows.Security.Credentials;

public async Task RegisterAsync(string username)
{
    await _mockStore.AddAccountAsync(username);
}

public async Task<bool> WindowsHelloRemoveUserAsync(Guid userId)
{
    return await _mockStore.RemoveAccountAsync(userId);
}

public async Task<bool> WindowsHelloRemoveDeviceAsync(Guid userId, Guid deviceId)
{
    return await _mockStore.RemoveDeviceAsync(userId, deviceId);
}

public async Task WindowsHelloUpdateDetailsAsync(Guid userId, Guid deviceId, byte[] publicKey,
    KeyCredentialAttestationResult keyAttestationResult)
{
    await _mockStore.WindowsHelloUpdateDetailsAsync(userId, deviceId, publicKey, keyAttestationResult);
}
Klasa AuthService musi podać metodę sprawdzania poprawności poświadczeń. Ta metoda będzie przyjmować nazwę użytkownika i hasło i upewnić się, że konto istnieje, a hasło jest prawidłowe. Istniejący system miałby równoważną metodę, która sprawdza, czy użytkownik jest autoryzowany. Dodaj następującą metodę ValidateCredentials do pliku AuthService.cs.
public bool ValidateCredentials(string username, string password)
{
    if (!string.IsNullOrEmpty(username) && !string.IsNullOrEmpty(password))
    {
        // This would be used for existing accounts migrating to use Windows Hello
        Guid userId = GetUserId(username);
        if (userId != Guid.Empty)
        {
            UserAccount account = GetUserAccount(userId);
            if (account != null)
            {
                if (string.Equals(password, account.Password))
                {
                    return true;
                }
            }
        }
    }
    return false;
}
Klasa AuthService wymaga metody wyzwania dla żądań, która zwraca wyzwanie klientowi, aby zweryfikować, czy użytkownik jest osobą, za którą się podaje. Następnie w klasie AuthService potrzebna jest inna metoda, aby odebrać podpisane wyzwanie z powrotem od klienta. W przypadku tego laboratorium praktycznego, pozostawiono niekompletną metodę określania, czy podpisane zadanie zostało ukończone. Każda implementacja funkcji Windows Hello w istniejącym systemie uwierzytelniania będzie nieco inna. Klucz publiczny przechowywany na serwerze musi być zgodny z wynikiem, który klient zwrócił do serwera. Dodaj te dwie metody do AuthService.cs.
using Windows.Security.Cryptography;
using Windows.Storage.Streams;

public IBuffer WindowsHelloRequestChallenge()
{
    return CryptographicBuffer.ConvertStringToBinary("ServerChallenge", BinaryStringEncoding.Utf8);
}

public bool SendServerSignedChallenge(Guid userId, Guid deviceId, byte[] signedChallenge)
{
    // Depending on your company polices and procedures this step will be different
    // It is at this point you will need to validate the signedChallenge that is sent back from the client.
    // Validation is used to ensure the correct user is trying to access this account.
    // The validation process will use the signedChallenge and the stored PublicKey
    // for the username and the specific device signin is called from.
    // Based on the validation result you will return a bool value to allow access to continue or to block the account.

    // For this sample validation will not happen as a best practice solution does not apply and will need to
       // be configured for each company.
    // Simply just return true.

    // You could get the User's Public Key with something similar to the following:
    byte[] userPublicKey = _mockStore.GetPublicKey(userId, deviceId);
    return true;
}
Ćwiczenie 2. Logika po stronie klienta
W tym ćwiczeniu będziesz zmieniać widoki po stronie klienta oraz klasy pomocnicze z pierwszego ćwiczenia laboratoryjnego, aby użyć klasy AuthService. W świecie rzeczywistym usługa AuthService będzie serwerem uwierzytelniania i należy użyć interfejsu API sieci Web do wysyłania i odbierania danych z serwera. W przypadku tego warsztatu praktycznego klient i serwer są tutaj lokalne, aby zachować prostotę. Celem jest nauczenie się, jak używać interfejsów API usługi Windows Hello.
W MainPage.xaml.cs można usunąć wywołanie metody AccountHelper.LoadAccountListAsync w załadowanej metodzie, ponieważ klasa AuthService tworzy wystąpienie magazynu MockStore w celu załadowania listy kont. Metoda
Loadedpowinna teraz wyglądać podobnie do poniższego fragmentu kodu. Pamiętaj, że definicja metody asynchronicznej zostaje usunięta, ponieważ nic nie jest oczekiwane.private void MainPage_Loaded(object sender, RoutedEventArgs e) { Frame.Navigate(typeof(UserSelection)); }Zaktualizuj interfejs strony logowania , aby wymagać wprowadzenia hasła. W tym laboratorium pokazano, w jaki sposób można zmigrować istniejący system do korzystania z usługi Windows Hello, a istniejące konta będą miały nazwę użytkownika i hasło. Zaktualizuj również wyjaśnienie w dolnej części kodu XAML, aby uwzględnić hasło domyślne. Zaktualizuj następujący kod XAML w pliku Login.xaml.
<Grid>
  <StackPanel>
    <TextBlock Text="Login" FontSize="36" Margin="4" TextAlignment="Center"/>

    <TextBlock x:Name="ErrorMessage" Text="" FontSize="20" Margin="4" Foreground="Red" TextAlignment="Center"/>

    <TextBlock Text="Enter your credentials below" Margin="0,0,0,20"
               TextWrapping="Wrap" Width="300"
               TextAlignment="Center" VerticalAlignment="Center" FontSize="16"/>

    <StackPanel Orientation="Horizontal" HorizontalAlignment="Center">
      <!-- Username Input -->
      <TextBlock x:Name="UserNameTextBlock" Text="Username: "
                 FontSize="20" Margin="4" Width="100"/>
      <TextBox x:Name="UsernameTextBox" PlaceholderText="sampleUsername" Width="200" Margin="4"/>
    </StackPanel>

    <StackPanel Orientation="Horizontal" HorizontalAlignment="Center">
      <!-- Password Input -->
      <TextBlock x:Name="PasswordTextBlock" Text="Password: "
                 FontSize="20" Margin="4" Width="100"/>
      <PasswordBox x:Name="PasswordBox" PlaceholderText="samplePassword" Width="200" Margin="4"/>
    </StackPanel>

    <Button x:Name="LoginButton" Content="Login" Background="DodgerBlue" Foreground="White"
            Click="LoginButton_Click" Width="80" HorizontalAlignment="Center" Margin="0,20"/>

    <TextBlock Text="Don't have an account?"
               TextAlignment="Center" VerticalAlignment="Center" FontSize="16"/>
    <TextBlock x:Name="RegisterButtonTextBlock" Text="Register now"
               PointerPressed="RegisterButtonTextBlock_OnPointerPressed"
               Foreground="DodgerBlue"
               TextAlignment="Center" VerticalAlignment="Center" FontSize="16"/>

    <Border x:Name="WindowsHelloStatus" Background="#22B14C"
            Margin="0,20" Height="100">
      <TextBlock x:Name="WindowsHelloStatusText" Text="Windows Hello is ready to use!"
                 Margin="4" TextAlignment="Center" VerticalAlignment="Center" FontSize="20"/>
    </Border>

    <TextBlock x:Name="LoginExplanation" FontSize="24" TextAlignment="Center" TextWrapping="Wrap"
               Text="Please Note: To demonstrate a login, validation will only occur using the default username 'sampleUsername' and default password 'samplePassword'"/>
  </StackPanel>
</Grid>
W pliku kodu dla klasy Login należy zmienić prywatną zmienną na górze klasy na zmienną
Account. Zmień zdarzenieOnNavigateTo, aby rzutować typ naUserAccount. Będziesz również potrzebować następującej instrukcji using.using WindowsHelloLogin.AuthService; namespace WindowsHelloLogin.Views { public sealed partial class Login : Page { private UserAccount _account; private bool _isExistingAccount; public Login() { this.InitializeComponent(); } protected override async void OnNavigatedTo(NavigationEventArgs e) { //Check Windows Hello is setup and available on this machine if (await WindowsHelloHelper.WindowsHelloAvailableCheckAsync()) { if (e.Parameter != null) { _isExistingAccount = true; //Set the account to the existing account being passed in _account = (UserAccount)e.Parameter; UsernameTextBox.Text = _account.Username; await SignInWindowsHelloAsync(); } } } private async void LoginButton_Click(object sender, RoutedEventArgs e) { ErrorMessage.Text = ""; await SignInWindowsHelloAsync(); } } }Ponieważ strona Logowania używa
UserAccountobiektu zamiast poprzedniegoAccountobiektu, WindowsHelloHelper.cs należy zaktualizować w celu użyciaUserAccountparametru jako typu parametru dla niektórych metod. Należy zmienić następujące parametry dla metod CreateWindowsHelloKeyAsync, RemoveWindowsHelloAccountAsync i GetWindowsHelloAuthenticationMessageAsync .UserAccountPonieważ klasa maGuidzwiązany z identyfikatorem UserId, zaczniesz wykorzystywać identyfikator w większej liczbie miejsc, aby zwiększyć precyzję.public static async Task<bool> CreateWindowsHelloKeyAsync(Guid userId, string username) { KeyCredentialRetrievalResult keyCreationResult = await KeyCredentialManager.RequestCreateAsync(username, KeyCredentialCreationOption.ReplaceExisting); return true; } public static async Task RemoveWindowsHelloAccountAsync(UserAccount account) { } public static async Task<bool> GetWindowsHelloAuthenticationMessageAsync(UserAccount account) { KeyCredentialRetrievalResult openKeyResult = await KeyCredentialManager.OpenAsync(account.Username); //Calling OpenAsync will allow the user access to what is available in the app and will not require user credentials again. //If you wanted to force the user to sign in again you can use the following: //var consentResult = await Windows.Security.Credentials.UI.UserConsentVerifier.RequestVerificationAsync(account.Username); //This will ask for the either the password of the currently signed in Microsoft Account or the PIN used for Windows Hello. if (openKeyResult.Status == KeyCredentialStatus.Success) { //If OpenAsync has succeeded, the next thing to think about is whether the client application requires access to backend services. //If it does here you would Request a challenge from the Server. The client would sign this challenge and the server //would check the signed challenge. If it is correct it would allow the user access to the backend. //You would likely make a new method called RequestSignAsync to handle all this //for example, RequestSignAsync(openKeyResult); //Refer to the second Windows Hello sample for information on how to do this. //For this sample there is not concept of a server implemented so just return true. return true; } else if (openKeyResult.Status == KeyCredentialStatus.NotFound) { //If the _account is not found at this stage. It could be one of two errors. //1. Windows Hello has been disabled //2. Windows Hello has been disabled and re-enabled cause the Windows Hello Key to change. //Calling CreateWindowsHelloKeyAsync and passing through the account will attempt to replace the existing Windows Hello Key for that account. //If the error really is that Windows Hello is disabled then the CreateWindowsHelloKeyAsync method will output that error. if (await CreateWindowsHelloKeyAsync(account.UserId, account.Username)) { //If the Windows Hello Key was again successfully created, Windows Hello has just been reset. //Now that the Windows Hello Key has been reset for the account retry sign in. return await GetWindowsHelloAuthenticationMessageAsync(account); } } // Can't use Windows Hello right now, try again later return false; }Metoda SignInWindowsHelloAsync w pliku Login.xaml.cs musi zostać zaktualizowana, aby używać AuthService zamiast accountHelper. Walidacja poświadczeń zostanie wykonana za pośrednictwem usługi AuthService. W przypadku tego laboratorium jedynym skonfigurowanym kontem jest "sampleUsername". To konto jest tworzone w metodzie InitializeSampleUserAccountsAsync w MockStore.cs. Zaktualizuj metodę SignInWindowsHelloAsync w Login.xaml.cs teraz, aby odzwierciedlić poniższy fragment kodu.
private async Task SignInWindowsHelloAsync()
{
    if (_isExistingAccount)
    {
        if (await WindowsHelloHelper.GetWindowsHelloAuthenticationMessageAsync(_account))
        {
            Frame.Navigate(typeof(Welcome), _account);
        }
    }
    else if (AuthService.AuthService.Instance.ValidateCredentials(UsernameTextBox.Text, PasswordBox.Password))
    {
        Guid userId = AuthService.AuthService.Instance.GetUserId(UsernameTextBox.Text);

        if (userId != Guid.Empty)
        {
            //Now that the account exists on server try and create the necessary details and add them to the account
            if (await WindowsHelloHelper.CreateWindowsHelloKeyAsync(userId, UsernameTextBox.Text))
            {
                Debug.WriteLine("Successfully signed in with Windows Hello!");
                //Navigate to the Welcome Screen.
                _account = AuthService.AuthService.Instance.GetUserAccount(userId);
                Frame.Navigate(typeof(Welcome), _account);
            }
            else
            {
                //The Windows Hello account creation failed.
                //Remove the account from the server as the details were not configured
                await AuthService.AuthService.Instance.WindowsHelloRemoveUserAsync(userId);

                ErrorMessage.Text = "Account Creation Failed";
            }
        }
    }
    else
    {
        ErrorMessage.Text = "Invalid Credentials";
    }
}
Ponieważ funkcja Windows Hello utworzy inną parę kluczy publicznych i prywatnych dla każdego konta na każdym urządzeniu, strona powitalna będzie musiała wyświetlić listę zarejestrowanych urządzeń dla zalogowanego konta i umożliwić zapomnianie każdego z nich. W pliku Welcome.xaml dodaj poniżej
ForgetButtonnastępujący kod XAML. Wprowadzi przycisk zapomnienia urządzenia, obszar tekstowy do wyświetlania błędów i listę do wyświetlania wszystkich urządzeń.<Grid> <StackPanel> <TextBlock x:Name="Title" Text="Welcome" FontSize="40" TextAlignment="Center"/> <TextBlock x:Name="UserNameText" FontSize="28" TextAlignment="Center"/> <Button x:Name="BackToUserListButton" Content="Back to User List" Click="Button_Restart_Click" HorizontalAlignment="Center" Margin="0,20" Foreground="White" Background="DodgerBlue"/> <Button x:Name="ForgetButton" Content="Forget Me" Click="Button_Forget_User_Click" Foreground="White" Background="Gray" HorizontalAlignment="Center"/> <Button x:Name="ForgetDeviceButton" Content="Forget Device" Click="Button_Forget_Device_Click" Foreground="White" Background="Gray" Margin="0,40,0,20" HorizontalAlignment="Center"/> <TextBlock x:Name="ForgetDeviceErrorTextBlock" Text="Select a device first" TextWrapping="Wrap" Width="300" Foreground="Red" TextAlignment="Center" VerticalAlignment="Center" FontSize="16" Visibility="Collapsed"/> <ListView x:Name="UserListView" MaxHeight="500" MinWidth="350" Width="350" HorizontalAlignment="Center"> <ListView.ItemTemplate> <DataTemplate> <Grid Background="Gray" Height="50" Width="350" HorizontalAlignment="Center" VerticalAlignment="Stretch" > <TextBlock Text="{Binding DeviceId}" HorizontalAlignment="Center" TextAlignment="Center" VerticalAlignment="Center" Foreground="White"/> </Grid> </DataTemplate> </ListView.ItemTemplate> </ListView> </StackPanel> </Grid>W pliku Welcome.xaml.cs należy zmienić zmienną prywatną
Accountw górnej części klasy na zmienną prywatnąUserAccount. Następnie zaktualizuj metodęOnNavigatedTo, aby użyć usługi AuthService i pobrać informacje dla bieżącego konta. Gdy masz informacje o koncie, możesz skonfigurowaćItemsSourcelistę do wyświetlania urządzeń. Należy dodać odwołanie do przestrzeni nazw AuthService.using WindowsHelloLogin.AuthService; namespace WindowsHelloLogin.Views { public sealed partial class Welcome : Page { private UserAccount _activeAccount; public Welcome() { InitializeComponent(); } protected override void OnNavigatedTo(NavigationEventArgs e) { _activeAccount = (UserAccount)e.Parameter; if (_activeAccount != null) { UserAccount account = AuthService.AuthService.Instance.GetUserAccount(_activeAccount.UserId); if (account != null) { UserListView.ItemsSource = account.WindowsHelloDevices; UserNameText.Text = account.Username; } } } } }Ponieważ będziesz używać usługi AuthService podczas usuwania konta, odwołanie do elementu AccountHelper w metodzie
Button_Forget_User_Clickmożna usunąć. Metoda powinna teraz wyglądać tak, jak poniżej.private async void Button_Forget_User_Click(object sender, RoutedEventArgs e) { //Remove it from Windows Hello await WindowsHelloHelper.RemoveWindowsHelloAccountAsync(_activeAccount); Debug.WriteLine($"User {_activeAccount.Username} deleted."); //Navigate back to UserSelection page. Frame.Navigate(typeof(UserSelection)); }Metoda WindowsHelloHelper nie używa usługi AuthService do usunięcia konta. Musisz wykonać wywołanie funkcji AuthService i przekazać userId.
public static async Task RemoveWindowsHelloAccountAsync(UserAccount account)
{
    //Open the account with Windows Hello
    KeyCredentialRetrievalResult keyOpenResult = await KeyCredentialManager.OpenAsync(account.Username);

    if (keyOpenResult.Status == KeyCredentialStatus.Success)
    {
        // In the real world you would send key information to server to unregister
        await AuthService.AuthService.Instance.WindowsHelloRemoveUserAsync(account.UserId);
    }

    //Then delete the account from the machines list of Windows Hello Accounts
    await KeyCredentialManager.DeleteAsync(account.Username);
}
Przed zakończeniem implementowania strony powitalnej należy utworzyć metodę w WindowsHelloHelper.cs, która umożliwi usunięcie urządzenia. Utwórz nową metodę, która wywoła metodę WindowsHelloRemoveDeviceAsync w usłudze AuthService.
public static async Task RemoveWindowsHelloDeviceAsync(UserAccount account, Guid deviceId)
{
    await AuthService.AuthService.Instance.WindowsHelloRemoveDeviceAsync(account.UserId, deviceId);
}
W Welcome.xaml.cs zaimplementuj program obsługi zdarzeń Button_Forget_Device_Click . Spowoduje to użycie wybranego urządzenia z listy urządzeń i użycie pomocnika funkcji Windows Hello do wywołania usuwania urządzenia. Pamiętaj, aby program obsługi zdarzeń był asynchroniczny.
private async void Button_Forget_Device_Click(object sender, RoutedEventArgs e)
{
    WindowsHelloDevice selectedDevice = UserListView.SelectedItem as WindowsHelloDevice;
    if (selectedDevice != null)
    {
        //Remove it from Windows Hello
        await WindowsHelloHelper.RemoveWindowsHelloDeviceAsync(_activeAccount, selectedDevice.DeviceId);

        Debug.WriteLine($"User {_activeAccount.Username} deleted.");

        if (!UserListView.Items.Any())
        {
            //Navigate back to UserSelection page.
            Frame.Navigate(typeof(UserSelection));
        }
    }
    else
    {
        ForgetDeviceErrorTextBlock.Visibility = Visibility.Visible;
    }
}
Następną stroną, którą zaktualizujesz, jest strona UserSelection . Strona UserSelection będzie musiała użyć usługi AuthService , aby pobrać wszystkie konta użytkowników dla bieżącego urządzenia. Obecnie nie ma możliwości, aby uzyskać identyfikator urządzenia do przekazania do usługi AuthService, aby mogła zwrócić konta użytkowników dla tego urządzenia. W folderze Utils utwórz nową klasę o nazwie "Helpers.cs". Zmień zakres klas na publiczny statyczny, a następnie dodaj następującą metodę, która umożliwi pobranie bieżącego identyfikatora urządzenia.
using System;
using Windows.Security.ExchangeActiveSyncProvisioning;

namespace WindowsHelloLogin.Utils
{
    public static class Helpers
    {
        public static Guid GetDeviceId()
        {
            //Get the Device ID to pass to the server
            var deviceInformation = new EasClientDeviceInformation();
            return deviceInformation.Id;
        }
    }
}
W klasie strony UserSelection należy zmienić tylko kod, a nie interfejs użytkownika. W UserSelection.xaml.cs zaktualizuj metodę UserSelection_Loaded i metodę UserSelectionChanged , aby użyć
UserAccountklasy zamiastAccountklasy . Musisz również pobrać wszystkich użytkowników dla tego urządzenia za pośrednictwem usługi AuthService.using System.Linq; using WindowsHelloLogin.AuthService; namespace WindowsHelloLogin.Views { public sealed partial class UserSelection : Page { public UserSelection() { InitializeComponent(); Loaded += UserSelection_Loaded; } private void UserSelection_Loaded(object sender, RoutedEventArgs e) { List<UserAccount> accounts = AuthService.AuthService.Instance.GetUserAccountsForDevice(Helpers.GetDeviceId()); if (accounts.Any()) { UserListView.ItemsSource = accounts; UserListView.SelectionChanged += UserSelectionChanged; } else { //If there are no accounts navigate to the Login page Frame.Navigate(typeof(Login)); } } /// <summary> /// Function called when an account is selected in the list of accounts /// Navigates to the Login page and passes the chosen account /// </summary> private void UserSelectionChanged(object sender, RoutedEventArgs e) { if (((ListView)sender).SelectedValue != null) { UserAccount account = (UserAccount)((ListView)sender).SelectedValue; if (account != null) { Debug.WriteLine($"Account {account.Username} selected!"); } Frame.Navigate(typeof(Login), account); } } } }Strona WindowsHelloRegister musi mieć zaktualizowany plik związany z kodem. Interfejs użytkownika nie wymaga żadnych zmian. W WindowsHelloRegister.xaml.cs usuń zmienną prywatną
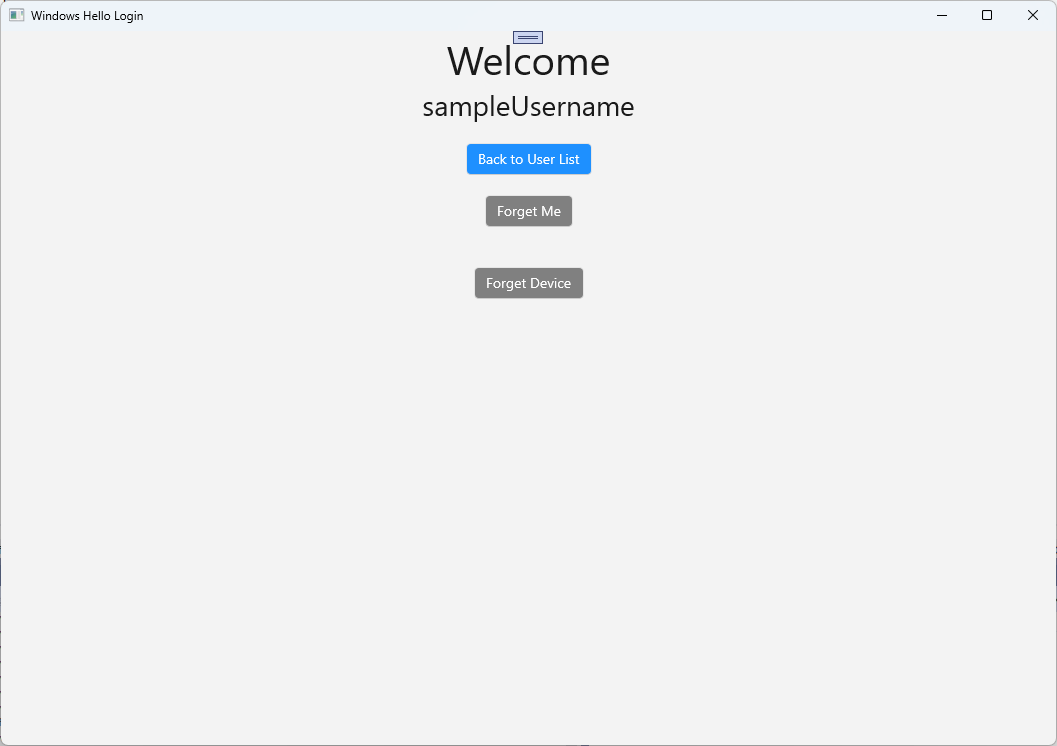
Accountu góry klasy, ponieważ nie jest już potrzebna. Zaktualizuj program obsługi zdarzeń RegisterButton_Click_Async , aby użyć usługi AuthService. Ta metoda utworzy nowy UserAccount, a następnie spróbuje zaktualizować szczegóły tego konta. Jeśli usługa Windows Hello nie utworzy klucza, konto zostanie usunięte, ponieważ proces rejestracji zakończy się niepowodzeniem.private async void RegisterButton_Click_Async(object sender, RoutedEventArgs e) { ErrorMessage.Text = ""; //Validate entered credentials are acceptable if (!string.IsNullOrEmpty(UsernameTextBox.Text)) { //Register an Account on the AuthService so that we can get back a userId await AuthService.AuthService.Instance.RegisterAsync(UsernameTextBox.Text); Guid userId = AuthService.AuthService.Instance.GetUserId(UsernameTextBox.Text); if (userId != Guid.Empty) { //Now that the account exists on server try and create the necessary details and add them to the account if (await WindowsHelloHelper.CreateWindowsHelloKeyAsync(userId, UsernameTextBox.Text)) { //Navigate to the Welcome Screen. Frame.Navigate(typeof(Welcome), AuthService.AuthService.Instance.GetUserAccount(userId)); } else { //The Windows Hello account creation failed. //Remove the account from the server as the details were not configured await AuthService.AuthService.Instance.WindowsHelloRemoveUserAsync(userId); ErrorMessage.Text = "Account Creation Failed"; } } } else { ErrorMessage.Text = "Please enter a username"; } }Skompiluj i uruchom aplikację. Zaloguj się do przykładowego konta użytkownika przy użyciu poświadczeń "sampleUsername" i "samplePassword". Na ekranie powitalnym może zostać wyświetlony przycisk Zapomnij urządzenia, ale nie ma żadnych urządzeń. Podczas tworzenia lub migrowania użytkownika do pracy z usługą Windows Hello informacje o koncie nie są wypychane do usługi AuthService.

Aby uzyskać informacje o koncie usługi Windows Hello w usłudze AuthService, należy zaktualizować WindowsHelloHelper.cs. W metodzie CreateWindowsHelloKeyAsync, zamiast zwracać
truetylko w przypadku powodzenia, należy wywołać nową metodę, która spróbuje pobrać KeyAttestation. Chociaż to laboratorium nie rejestruje tych informacji w usłudze AuthService, dowiesz się, jak uzyskać te informacje po stronie klienta. Zaktualizuj metodę CreateWindowsHelloKeyAsync w następujący sposób:public static async Task<bool> CreateWindowsHelloKeyAsync(Guid userId, string username) { KeyCredentialRetrievalResult keyCreationResult = await KeyCredentialManager.RequestCreateAsync(username, KeyCredentialCreationOption.ReplaceExisting); switch (keyCreationResult.Status) { case KeyCredentialStatus.Success: Debug.WriteLine("Successfully made key"); await GetKeyAttestationAsync(userId, keyCreationResult); return true; case KeyCredentialStatus.UserCanceled: Debug.WriteLine("User cancelled sign-in process."); break; case KeyCredentialStatus.NotFound: // User needs to setup Windows Hello Debug.WriteLine($"Windows Hello is not set up!{Environment.NewLine}Please go to Windows Settings and set up a PIN to use it."); break; default: break; } return false; }Utwórz metodę GetKeyAttestationAsync w WindowsHelloHelper.cs. Ta metoda pokaże, jak uzyskać wszystkie niezbędne informacje, które mogą być udostępniane przez usługę Windows Hello dla każdego konta na określonym urządzeniu.
using Windows.Storage.Streams;

private static async Task GetKeyAttestationAsync(Guid userId, KeyCredentialRetrievalResult keyCreationResult)
{
    KeyCredential userKey = keyCreationResult.Credential;
    IBuffer publicKey = userKey.RetrievePublicKey();
    KeyCredentialAttestationResult keyAttestationResult = await userKey.GetAttestationAsync();
    IBuffer keyAttestation = null;
    IBuffer certificateChain = null;
    bool keyAttestationIncluded = false;
    bool keyAttestationCanBeRetrievedLater = false;
    KeyCredentialAttestationStatus keyAttestationRetryType = 0;

    if (keyAttestationResult.Status == KeyCredentialAttestationStatus.Success)
    {
        keyAttestationIncluded = true;
        keyAttestation = keyAttestationResult.AttestationBuffer;
        certificateChain = keyAttestationResult.CertificateChainBuffer;
        Debug.WriteLine("Successfully made key and attestation");
    }
    else if (keyAttestationResult.Status == KeyCredentialAttestationStatus.TemporaryFailure)
    {
        keyAttestationRetryType = KeyCredentialAttestationStatus.TemporaryFailure;
        keyAttestationCanBeRetrievedLater = true;
        Debug.WriteLine("Successfully made key but not attestation");
    }
    else if (keyAttestationResult.Status == KeyCredentialAttestationStatus.NotSupported)
    {
        keyAttestationRetryType = KeyCredentialAttestationStatus.NotSupported;
        keyAttestationCanBeRetrievedLater = false;
        Debug.WriteLine("Key created, but key attestation not supported");
    }

    Guid deviceId = Helpers.GetDeviceId();

    //Update the Windows Hello details with the information we have just fetched above.
    //await UpdateWindowsHelloDetailsAsync(userId, deviceId, publicKey.ToArray(), keyAttestationResult);
}
Być może mogłeś zauważyć, że w metodzie GetKeyAttestationAsync ostatni wiersz, który właśnie został dodany, jest oznaczony jako komentarz. Ten ostatni wiersz będzie nową metodą, którą utworzysz, aby wysłać wszystkie informacje funkcji Windows Hello do AuthService. W świecie rzeczywistym należy wysłać go do rzeczywistego serwera za pośrednictwem internetowego interfejsu API.
using System.Runtime.InteropServices.WindowsRuntime;
using System.Threading.Tasks;

public static async Task<bool> UpdateWindowsHelloDetailsAsync(Guid userId, Guid deviceId, byte[] publicKey, KeyCredentialAttestationResult keyAttestationResult)
{
    //In the real world, you would use an API to add Windows Hello signing info to server for the signed in account.
    //For this tutorial, we do not implement a Web API for our server and simply mock the server locally.
    //The CreateWindowsHelloKey method handles adding the Windows Hello account locally to the device using the KeyCredential Manager

    //Using the userId the existing account should be found and updated.
    await AuthService.AuthService.Instance.WindowsHelloUpdateDetailsAsync(userId, deviceId, publicKey, keyAttestationResult);
    return true;
}
Usuń komentarz z ostatniego wiersza w metodzie GetKeyAttestationAsync, aby informacje związane z Windows Hello były wysyłane do AuthService.
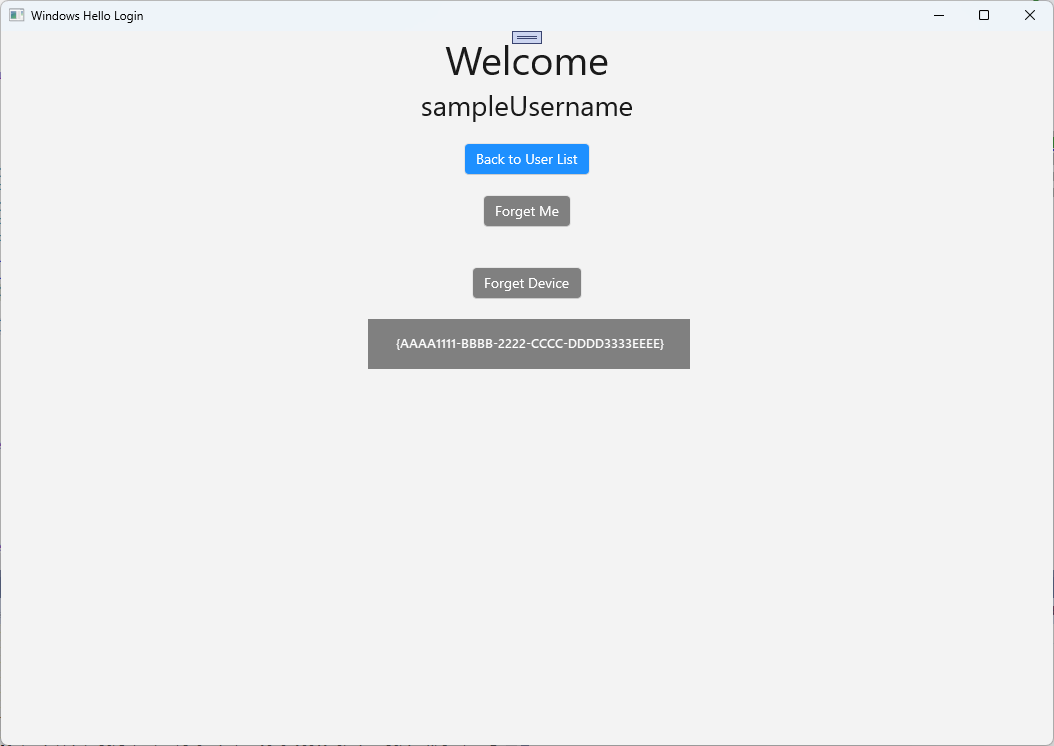
Skompiluj i uruchom aplikację i zaloguj się przy użyciu poświadczeń domyślnych, jak poprzednio. Na stronie Powitanie zobaczysz teraz, że zostanie wyświetlony identyfikator urządzenia. Jeśli zalogowałbyś się na innym urządzeniu, byłoby ono również wyświetlane tutaj (gdybyś miał usługę uwierzytelniania hostowaną w chmurze). Podczas tego praktycznego laboratorium wyświetlany jest identyfikator urządzenia. W rzeczywistej implementacji warto wyświetlić przyjazną nazwę, którą osoba może zrozumieć i użyć do identyfikacji każdego urządzenia.
Aby ukończyć to laboratorium praktyczne, potrzebujesz żądania i wyzwania dla użytkownika po wybraniu z poziomu strony wyboru użytkownika i ponownym zalogowaniu się. Usługa AuthService ma dwie metody, które zostały utworzone w celu zażądania wyzwania, czyli jednej, która używa podpisanego wyzwania. W WindowsHelloHelper.cs utwórz nową metodę o nazwie RequestSignAsync. Spowoduje to żądanie wyzwania od usługi AuthService, lokalne podpisanie tego wyzwania przy użyciu interfejsu API Windows Hello i wysłanie podpisanego wyzwania do usługi AuthService. W tych warsztatach praktycznych usługa AuthService otrzyma podpisane wyzwanie i zwróci
true. W rzeczywistej implementacji należy zaimplementować mechanizm weryfikacji, aby określić, czy wyzwanie zostało podpisane przez odpowiedniego użytkownika na odpowiednim urządzeniu. Dodaj poniższą metodę do WindowsHelloHelper.csprivate static async Task<bool> RequestSignAsync(Guid userId, KeyCredentialRetrievalResult openKeyResult) { // Calling userKey.RequestSignAsync() prompts the uses to enter the PIN or use Biometrics (Windows Hello). // The app would use the private key from the user account to sign the sign-in request (challenge) // The client would then send it back to the server and await the servers response. IBuffer challengeMessage = AuthService.AuthService.Instance.WindowsHelloRequestChallenge(); KeyCredential userKey = openKeyResult.Credential; KeyCredentialOperationResult signResult = await userKey.RequestSignAsync(challengeMessage); if (signResult.Status == KeyCredentialStatus.Success) { // If the challenge from the server is signed successfully // send the signed challenge back to the server and await the servers response return AuthService.AuthService.Instance.SendServerSignedChallenge( userId, Helpers.GetDeviceId(), signResult.Result.ToArray()); } else if (signResult.Status == KeyCredentialStatus.UserCanceled) { // User cancelled the Windows Hello PIN entry. } else if (signResult.Status == KeyCredentialStatus.NotFound) { // Must recreate Windows Hello key } else if (signResult.Status == KeyCredentialStatus.SecurityDeviceLocked) { // Can't use Windows Hello right now, remember that hardware failed and suggest restart } else if (signResult.Status == KeyCredentialStatus.UnknownError) { // Can't use Windows Hello right now, try again later } return false; }W klasie WindowsHelloHelper wywołaj metodę RequestSignAsync z metody GetWindowsHelloAuthenticationMessageAsync .
public static async Task<bool> GetWindowsHelloAuthenticationMessageAsync(UserAccount account)
{
    KeyCredentialRetrievalResult openKeyResult = await KeyCredentialManager.OpenAsync(account.Username);
    // Calling OpenAsync will allow the user access to what is available in the app and will not require user credentials again.
    // If you wanted to force the user to sign in again you can use the following:
    // var consentResult = await Windows.Security.Credentials.UI.UserConsentVerifier.RequestVerificationAsync(account.Username);
    // This will ask for the either the password of the currently signed in Microsoft Account or the PIN used for Windows Hello.

    if (openKeyResult.Status == KeyCredentialStatus.Success)
    {
        //If OpenAsync has succeeded, the next thing to think about is whether the client application requires access to backend services.
        //If it does here you would Request a challenge from the Server. The client would sign this challenge and the server
        //would check the signed challenge. If it is correct it would allow the user access to the backend.
        //You would likely make a new method called RequestSignAsync to handle all this
        //for example, RequestSignAsync(openKeyResult);
        //Refer to the second Windows Hello sample for information on how to do this.

        return await RequestSignAsync(account.UserId, openKeyResult);
    }
    else if (openKeyResult.Status == KeyCredentialStatus.NotFound)
    {
        //If the _account is not found at this stage. It could be one of two errors.
        //1. Windows Hello has been disabled
        //2. Windows Hello has been disabled and re-enabled cause the Windows Hello Key to change.
        //Calling CreateWindowsHelloKeyAsync and passing through the account will attempt to replace the existing Windows Hello Key for that account.
        //If the error really is that Windows Hello is disabled then the CreateWindowsHelloKeyAsync method will output that error.
        if (await CreateWindowsHelloKeyAsync(account.UserId, account.Username))
        {
            //If the Windows Hello Key was again successfully created, Windows Hello has just been reset.
            //Now that the Windows Hello Key has been reset for the _account retry sign in.
            return await GetWindowsHelloAuthenticationMessageAsync(account);
        }
    }

    // Can't use Windows Hello right now, try again later
    return false;
}
W tym ćwiczeniu zaktualizowano aplikację po stronie klienta, aby korzystała z usługi AuthService. Dzięki temu można wyeliminować potrzebę klasy Account i klasy AccountHelper . Usuń klasę Account, folder Models i klasę AccountHelper w folderze Utils. Przed pomyślną kompilacją rozwiązania należy usunąć wszystkie odwołania do
WindowsHelloLogin.Modelsprzestrzeni nazw w całej aplikacji.Skompiluj i uruchom aplikację i korzystaj z funkcji Windows Hello za pomocą pozorowej usługi i bazy danych.
Podczas tego praktycznego laboratorium nauczyłeś się, jak używać interfejsów API Windows Hello, aby zastąpić konieczność używania haseł podczas uwierzytelniania na komputerze z systemem Windows. Jeśli rozważysz, ile energii ludzie poświęcają na utrzymanie haseł i obsługę zagubionych haseł w istniejących systemach, powinieneś zauważyć korzyści płynące z przejścia na ten nowy system uwierzytelniania Windows Hello.
Pozostawiliśmy jako ćwiczenie dla ciebie szczegóły dotyczące tego, jak wdrożysz uwierzytelnianie po stronie usługi i serwera. Oczekuje się, że większość deweloperów będzie mieć istniejące systemy, które będą musiały zostać zmigrowane, aby rozpocząć pracę z usługą Windows Hello. Szczegóły każdego z tych systemów będą się różnić.
Tematy pokrewne
Współpracuj z nami na GitHub
Źródło tej treści można znaleźć na GitHubie, gdzie można także tworzyć i przeglądać problemy oraz pull requesty. Więcej informacji znajdziesz w naszym przewodniku dla współautorów.

Windows developer