Nota
O acesso a esta página requer autorização. Podes tentar iniciar sessão ou mudar de diretório.
O acesso a esta página requer autorização. Podes tentar mudar de diretório.
Applies to:✅ SQL analytics endpoint and Warehouse in Microsoft Fabric
Neste tutorial, saiba como analisar dados com blocos de anotações em um Warehouse.
Observação
This tutorial forms part of an end-to-end scenario. Para concluir este tutorial, você deve primeiro concluir estes tutoriais:
Criar um bloco de anotações T-SQL
Nesta tarefa, saiba como criar um bloco de anotações T-SQL.
Verifique se o espaço de trabalho criado no primeiro tutorial está aberto.
On the Home ribbon, open the New SQL query dropdown, and then select New SQL query in notebook.

In the Explorer pane, select Warehouses to reveal the objects of the
Wide World Importerswarehouse.To generate a SQL template to explore data, to the right of the
dimension_citytable, select the ellipsis (…), and then select SELECT TOP 100.
Para executar o código T-SQL nesta célula, selecione o botão Executar célula para a célula de código.
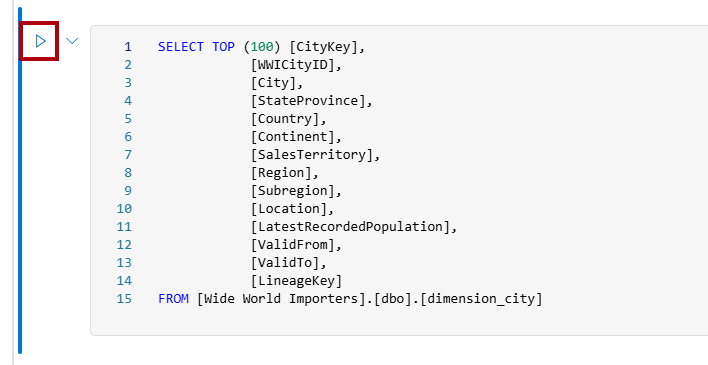
Revise o resultado da consulta no painel de resultados.


Create a lakehouse shortcut and analyze data with a notebook
Nesta tarefa, aprenda a criar um atalho para o lakehouse e a analisar dados com um notebook.
Abra a página inicial do espaço de trabalho
Data Warehouse Tutorial.Selecione + Novo Item para exibir a lista completa de tipos de itens disponíveis.
From the list, in the Store data section, select the Lakehouse item type.
In the New lakehouse window, enter the name
Shortcut_Exercise.
Select Create.
When the new lakehouse opens, in the landing page, select the New shortcut option.

In the New shortcut window, select the Microsoft OneLake option.

In the Select a data source type window, select the
Wide World Importerswarehouse that you created in the Create a Warehouse tutorial, and then select Next.In the OneLake object browser, expand Tables, expand the
dboschema, and then select the checkbox for thedimension_customertable.
Select Next.
Select Create.
No painel do
Explorer, selecione a tabela para visualizar os dados e, em seguida, revise os dados recuperados da tabela no depósito. To create a notebook to query the
dimension_customertable, on the Home ribbon, in the Open notebook dropdown, select New notebook.
In the Explorer pane, select Lakehouses.
Drag the
dimension_customertable to the open notebook cell.
Notice the PySpark query that was added to the notebook cell. Esta consulta recupera as primeiras 1.000 linhas do atalho
Shortcut_Exercise.dimension_customer. This notebook experience is similar to Visual Studio Code Jupyter notebook experience. You can also open the notebook in VS Code.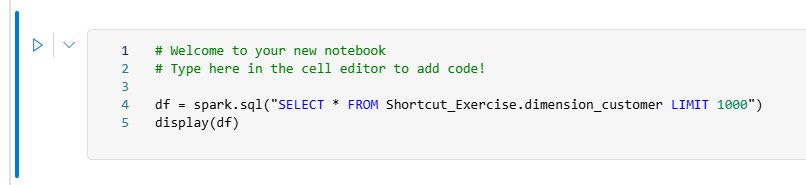
On the Home ribbon, select the Run all button.

Revise o resultado da consulta no painel de resultados.

