Note
Access to this page requires authorization. You can try signing in or changing directories.
Access to this page requires authorization. You can try changing directories.
Learn how to build a front-end application with React, Apollo Client, and TypeScript that integrates with a GraphQL API hosted in Microsoft Fabric. This tutorial covers setting up local development tools including autocompletion, code generation, and IntelliSense for an optimal developer experience.
Who should use VS Code development tools
Local development with VS Code is designed for:
- React developers building web applications that consume Fabric lakehouse and warehouse data via GraphQL
- TypeScript developers who need type-safe client code generation for Fabric GraphQL APIs
- Full-stack developers building custom analytics applications on top of the Fabric platform with local IDE support
- Development teams who want modern tooling with IntelliSense and debugging for Fabric data access applications
Use this approach when you're building React applications that need rich IDE support, code generation, and local debugging capabilities with TypeScript and Apollo Client.
Prerequisites
Before you begin, ensure you have:
- Microsoft Fabric workspace access: Be a member of the Fabric workspace with at least Contributor role (or higher: Admin, Member) to create and modify GraphQL API items
- Data source permissions: Read/write permissions on the data sources you plan to expose through the GraphQL API
- Node.js installed on your development machine (includes npm)
- Visual Studio Code installed on your development machine
- Basic knowledge of React, TypeScript, and GraphQL concepts
Step 1: Create a GraphQL API in Microsoft Fabric
Note
This guide demonstrates creating a GraphQL API from a SQL database context. You create the SQL database first, then create the GraphQL API directly from within that database. If you already have an existing GraphQL API and want to connect to it, follow the Get started guide where you create the API first and then connect to a SQL database or other data source.
Create a SQL database
To create a SQL database that contains sample data for your GraphQL API:
- In your Fabric workspace, select New Item.
- Select SQL database (preview).
- Provide a name for your database.
- Select Sample data to automatically create tables and populate them with sample data. This creates the AdventureWorksLT sample database with the SalesLT schema, including tables like SalesLT.Customer, SalesLT.Product, and SalesLT.SalesOrderHeader.
Tip
If you already have a SQL database with sample data from a previous tutorial or GraphQL API creation, you can reuse that same database. A single database can support multiple GraphQL APIs, so there's no need to create a new database if you already have one with the SalesLT schema.
Create the GraphQL API
Now that you have a SQL database with sample data, create the GraphQL API:
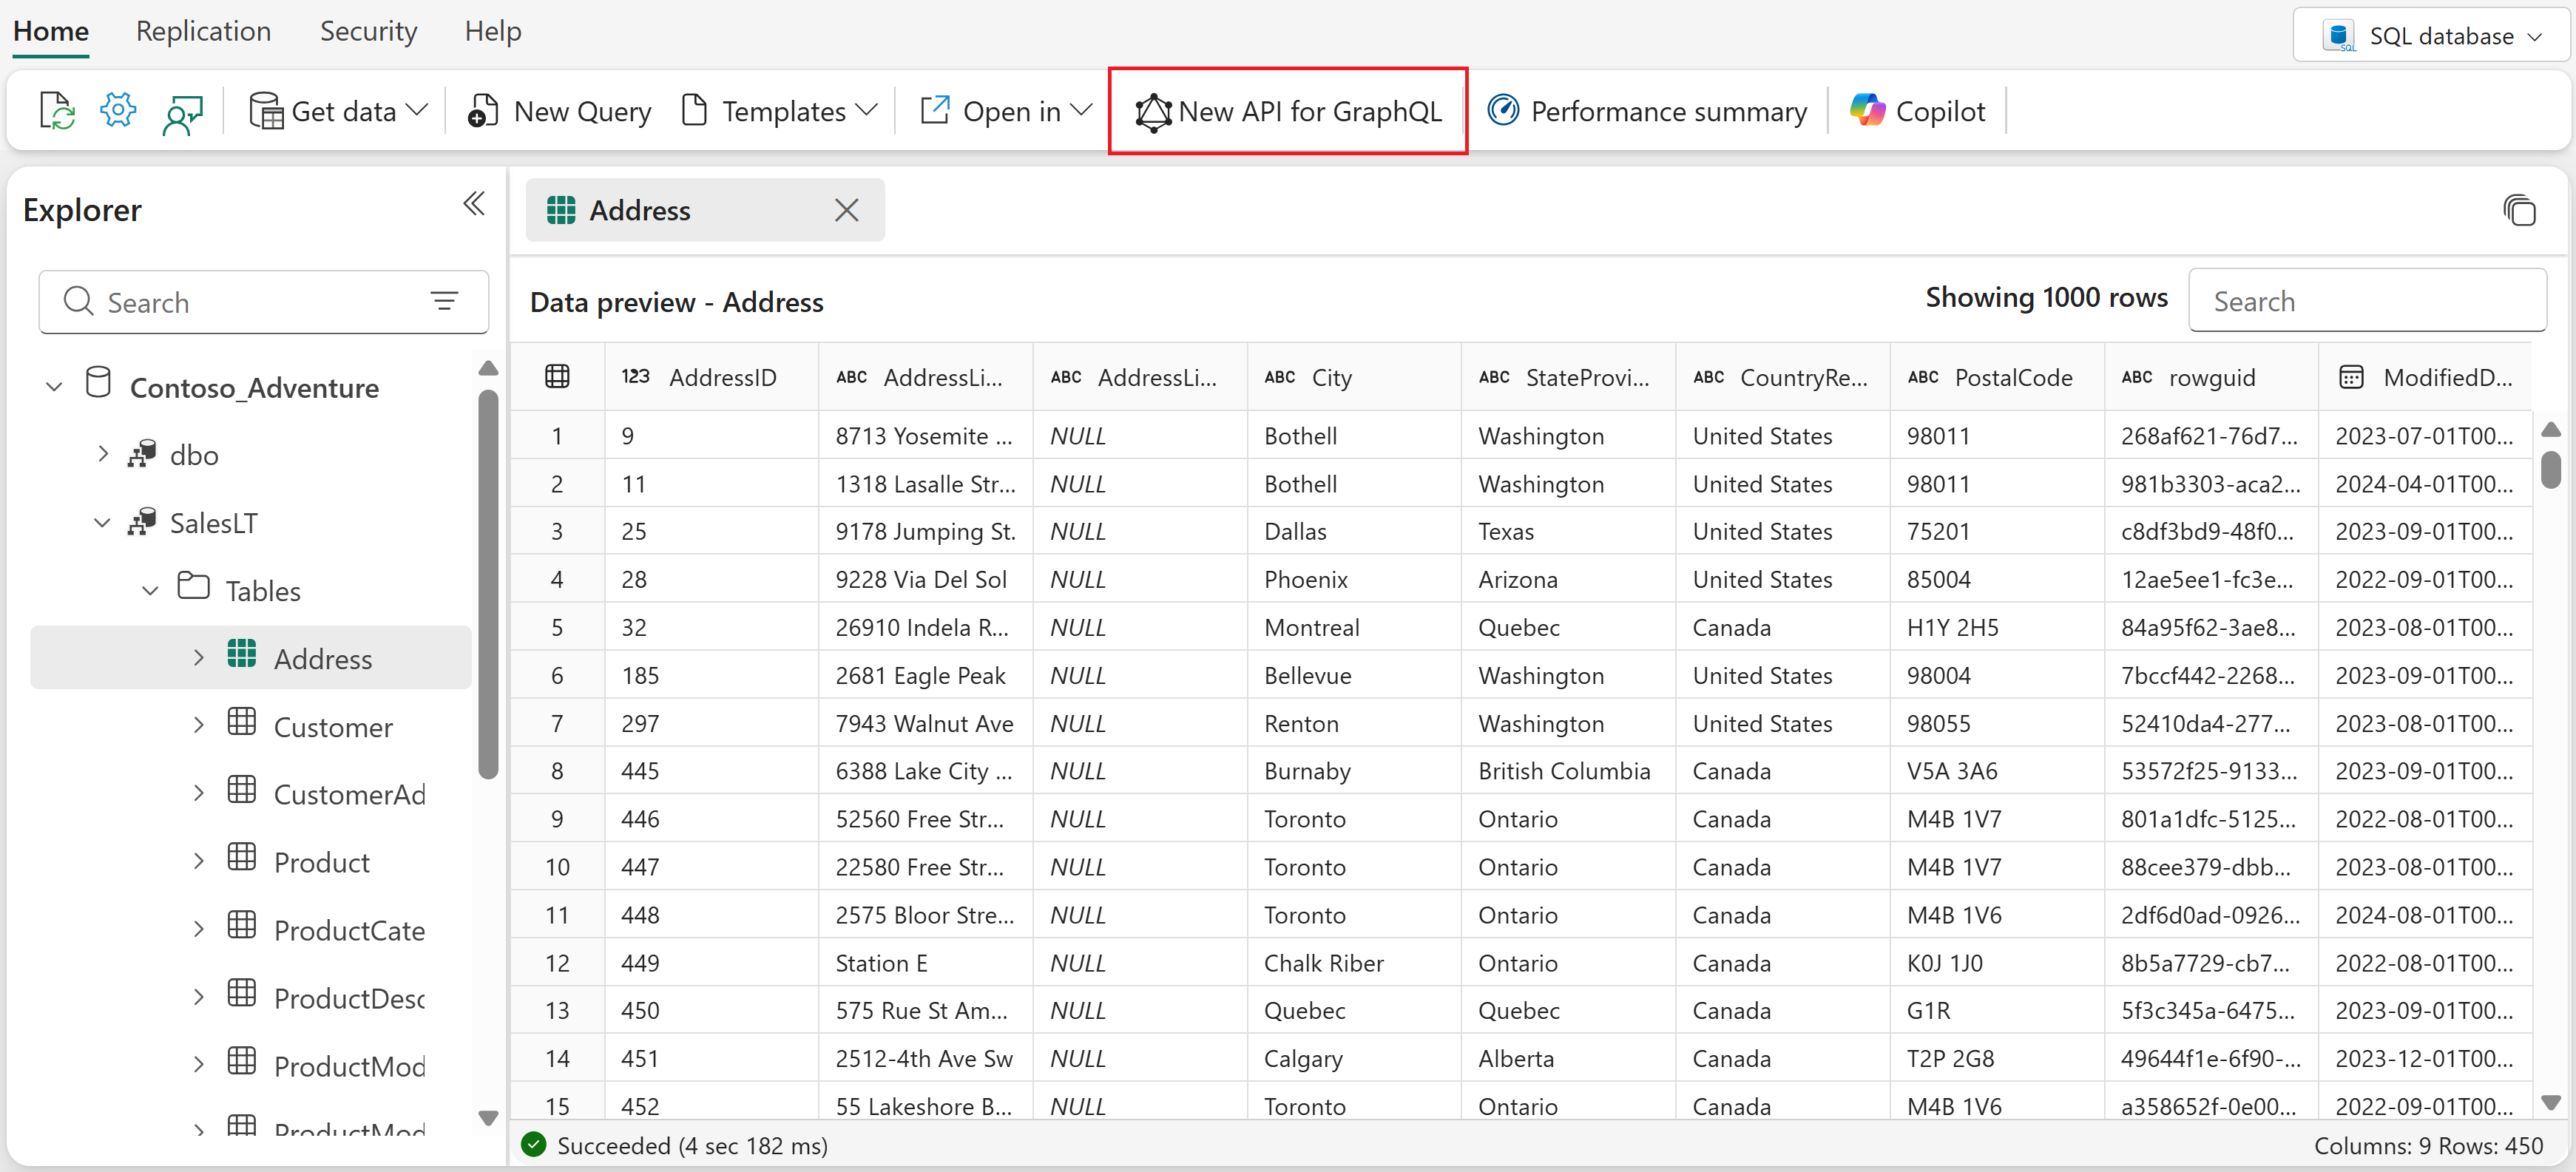
In your SQL database, select New API for GraphQL from the ribbon.
Provide a name for your API.
Select all the SalesLT tables from your database.
Select Load to generate the API.

Your GraphQL API is now ready and available in your Fabric workspace.
Step 2: Set up your development environment
To follow along with this tutorial, complete these steps to set up the React starter application, install the necessary dependencies, and configure Visual Studio Code with GraphQL support.
Clone the starter application - Get the React starter application from the Microsoft Fabric samples repository:
git clone https://github.com/microsoft/fabric-samples.git
cd fabric-samples/docs-samples/data-engineering/GraphQL/React-Apollo-TS
Install dependencies - Install the required packages for GraphQL development, autocompletion, and code generation:
npm installInstall the required Visual Studio Code extension - Install the GraphQL: Language Feature Support extension in Visual Studio Code to enable syntax highlighting, validation, and IntelliSense for GraphQL operations.
Step 3: Configure your GraphQL schema
A GraphQL schema defines the structure of your API - what data is available, what operations you can perform, and what the relationships between different data types are. Your development tools use this schema to provide IntelliSense, code completion, and type generation, making it much easier to write correct GraphQL queries and mutations.
You can obtain your GraphQL schema in two ways:
Option 1: Export schema as static file
- In your Fabric GraphQL API, select Export Schema from the ribbon.
- The downloaded file name includes your GraphQL API's ID (for example,
GraphQL_your-api-id_schema.graphql). Save it to your project root directory and rename it toschema.graphql- this is the filename you use in the configuration steps that follow.
Option 2: Use remote endpoint
- Access the GraphQL API you created in the Fabric Portal.
- Obtain an authorization token using PowerShell with Get-PowerBIAccessToken
Note
While the remote endpoint option always provides the most up-to-date schema, the retrieved token is temporary and expires hourly. They should be used for testing and development purposes only, whenever possible use a static file to avoid issues with token expiration.
Step 4: Configure IntelliSense and autocompletion
Now you'll set up IntelliSense using the schema from Step 3. The schema file (whether static or from remote endpoint) enables VS Code to provide real-time code suggestions, error detection, and field validation as you write GraphQL queries.
Create a configuration file at your project root:
Using static schema file
Use the following configuration if you exported the schema as a static file:
Create .graphqlrc.yml:
schema: './schema.graphql'
documents: 'src/**/*.{ts,tsx,graphql,gql}'
Using remote endpoint
Use the following configuration if you prefer to fetch the schema directly from your GraphQL API endpoint:
Create graphql.config.yml:
schema:
  - https://your-graphql-endpoint.com/graphql:
      headers:
        Authorization: Bearer YOUR_ACCESS_TOKEN
documents: src/**/*.{ts,tsx,graphql,gql}
Configuration options
- schema: Specifies the location of your GraphQL schema
- documents: Defines which files should have IntelliSense support
After creating the configuration file, restart Visual Studio Code to ensure changes take effect.
Step 5: Set up code generation
GraphQL code generation automatically creates strongly typed TypeScript interfaces and React hooks from your schema and operations, reducing errors and improving development efficiency. Its primary purpose is to enhance type safety and streamline development in GraphQL projects, particularly when working with strongly typed languages like TypeScript.
Create codegen configuration
Static file option
If you exported the schema as a static file, create codegen.yml at your project root:
schema: './schema.graphql'
documents: './src/**/*.graphql'
generates:
  src/generated/graphql.tsx:
    plugins:
      - typescript
      - typescript-operations
      - typescript-react-apollo
    config:
      withHooks: true
Remote endpoint option
If you're using the remote endpoint approach, create codegen.yml at your project root:
schema:
  - https://your-graphql-endpoint.com/graphql:
      headers:
        Authorization: Bearer YOUR_ACCESS_TOKEN
documents: 'src/**/*.{ts,tsx,graphql,gql}'
generates:
  src/generated/graphql.tsx:
    plugins:
      - typescript
      - typescript-operations
      - typescript-react-apollo
    config:
      withHooks: true
Configuration breakdown
- schema: Path to your schema file or remote endpoint
- documents: Glob pattern for locating GraphQL operation files
- generates: Specifies the output file for generated code
- plugins: Determines what code to generate (TypeScript types and React Apollo hooks)
Add codegen script
Add the code generation script to the package.json file in your project directory (this file was included when you cloned the repository in Step 2):
{
  "scripts": {
    "codegen": "graphql-codegen --config codegen.yml"
  }
}
Step 6: Write GraphQL operations
Create .graphql files in your src/operations directory to define your queries and mutations. IntelliSense provides autocompletion and validation.
Example queries
Create src/operations/queries.graphql and enter the following queries:
Here's a sample query to retrieve customer data:
query GET_CUSTOMERS(
  $after: String
  $first: Int
  $filter: CustomerFilterInput
  $orderBy: CustomerOrderByInput
) {
  customers(after: $after, first: $first, filter: $filter, orderBy: $orderBy) {
    items {
      CustomerID
      FirstName
      LastName
    }
  }
}
Here's an example mutation:
mutation ADD_CUSTOMER($input: CreateCustomerInput!) {
  createCustomer(item: $input) {
    CustomerID
    FirstName
    LastName
    Title
    Phone
    PasswordHash
    PasswordSalt
    rowguid
    ModifiedDate
    NameStyle
  }
}
Step 7: Generate types and hooks
Run the code generation command to create TypeScript types and React hooks:
npm run codegen
Upon successful completion, you have the generated code in src/generated/graphql.tsx containing:
- TypeScript interfaces for all GraphQL types
- Strongly typed React hooks for each operation
- Input and output type definitions
Step 8: Use generated code in your React components
Import and use the generated hooks in your React components, for example:
import React from 'react';
import { useGetCustomersQuery, useAddCustomerMutation } from '../generated/graphql';

const CustomersComponent: React.FC = () => {
  const { data, loading, error } = useGetCustomersQuery({
    variables: { first: 10 }
  });

  const [addCustomer] = useAddCustomerMutation();

  if (loading) return <div>Loading...</div>;
  if (error) return <div>Error: {error.message}</div>;

  return (
    <div>
      {data?.customers?.items?.map(customer => (
        <div key={customer.CustomerID}>
          {customer.FirstName} {customer.LastName}
        </div>
      ))}
    </div>
  );
};

export default CustomersComponent;
Step 9: Configure authentication
Configure Microsoft Entra ID authentication for your application:
Create a Microsoft Entra app following the Create a Microsoft Entra app section in Connect applications to Fabric API for GraphQL.
Update the
authConfig.tsfile in your project with the required parameters:
export const AUTH_CONFIG = {
    clientId: "<Enter_the_Application_Id_Here>",
    tenantId: "<Enter_the_Tenant_Id_Here>",
    clientSecret: "<Enter_the_Client_Secret_Here>", //optional
}
export const GRAPHQL_ENDPOINT = '<Enter_the_GraphQL_Endpoint_Here>';

// The scope required for Fabric GraphQL API access
export const DEFAULT_SCOPE = "https://analysis.windows.net/powerbi/api/.default";
For the complete configuration file, refer to the authConfig.ts sample in the repository.
Step 10: Run your application
Start your development server:
npm run dev
Your application launches in the browser at http://localhost:3000. You're prompted to sign in with your Microsoft credentials to access the GraphQL API data. After successful authentication, you'll see the customer data from your Fabric SQL database's SalesLT.Customer table displayed in the React application.